According to all I’ve heard, the enemy of vehicle dwelling is moisture. Sleeping = breath = condensation = dripping on your face from the ceiling as a wake up call, rust, mildew, mold, blegh. The general consensus from those in the know seems to be the only long-term remedy is a good fan for circulation and ventilation. Also very helpful for hot days, and bonus of being like white noise at night. Win!
The most effective fan mentioned everywhere online is the Maxxair Deluxe fan, which can switch between intake to circulate air from outside or act like a ceiling fan, and exhaust when cooking, stinky, etc. It has 10 speeds, cranks open manually because I don’t need the version with a remote, and has a thermostat so you can set it to maintain a temperature of 70-something (I think it’s preset and haven’t actually tried this feature- will update one day). Also has a rain cover so can be used in all weather. Sounds great!
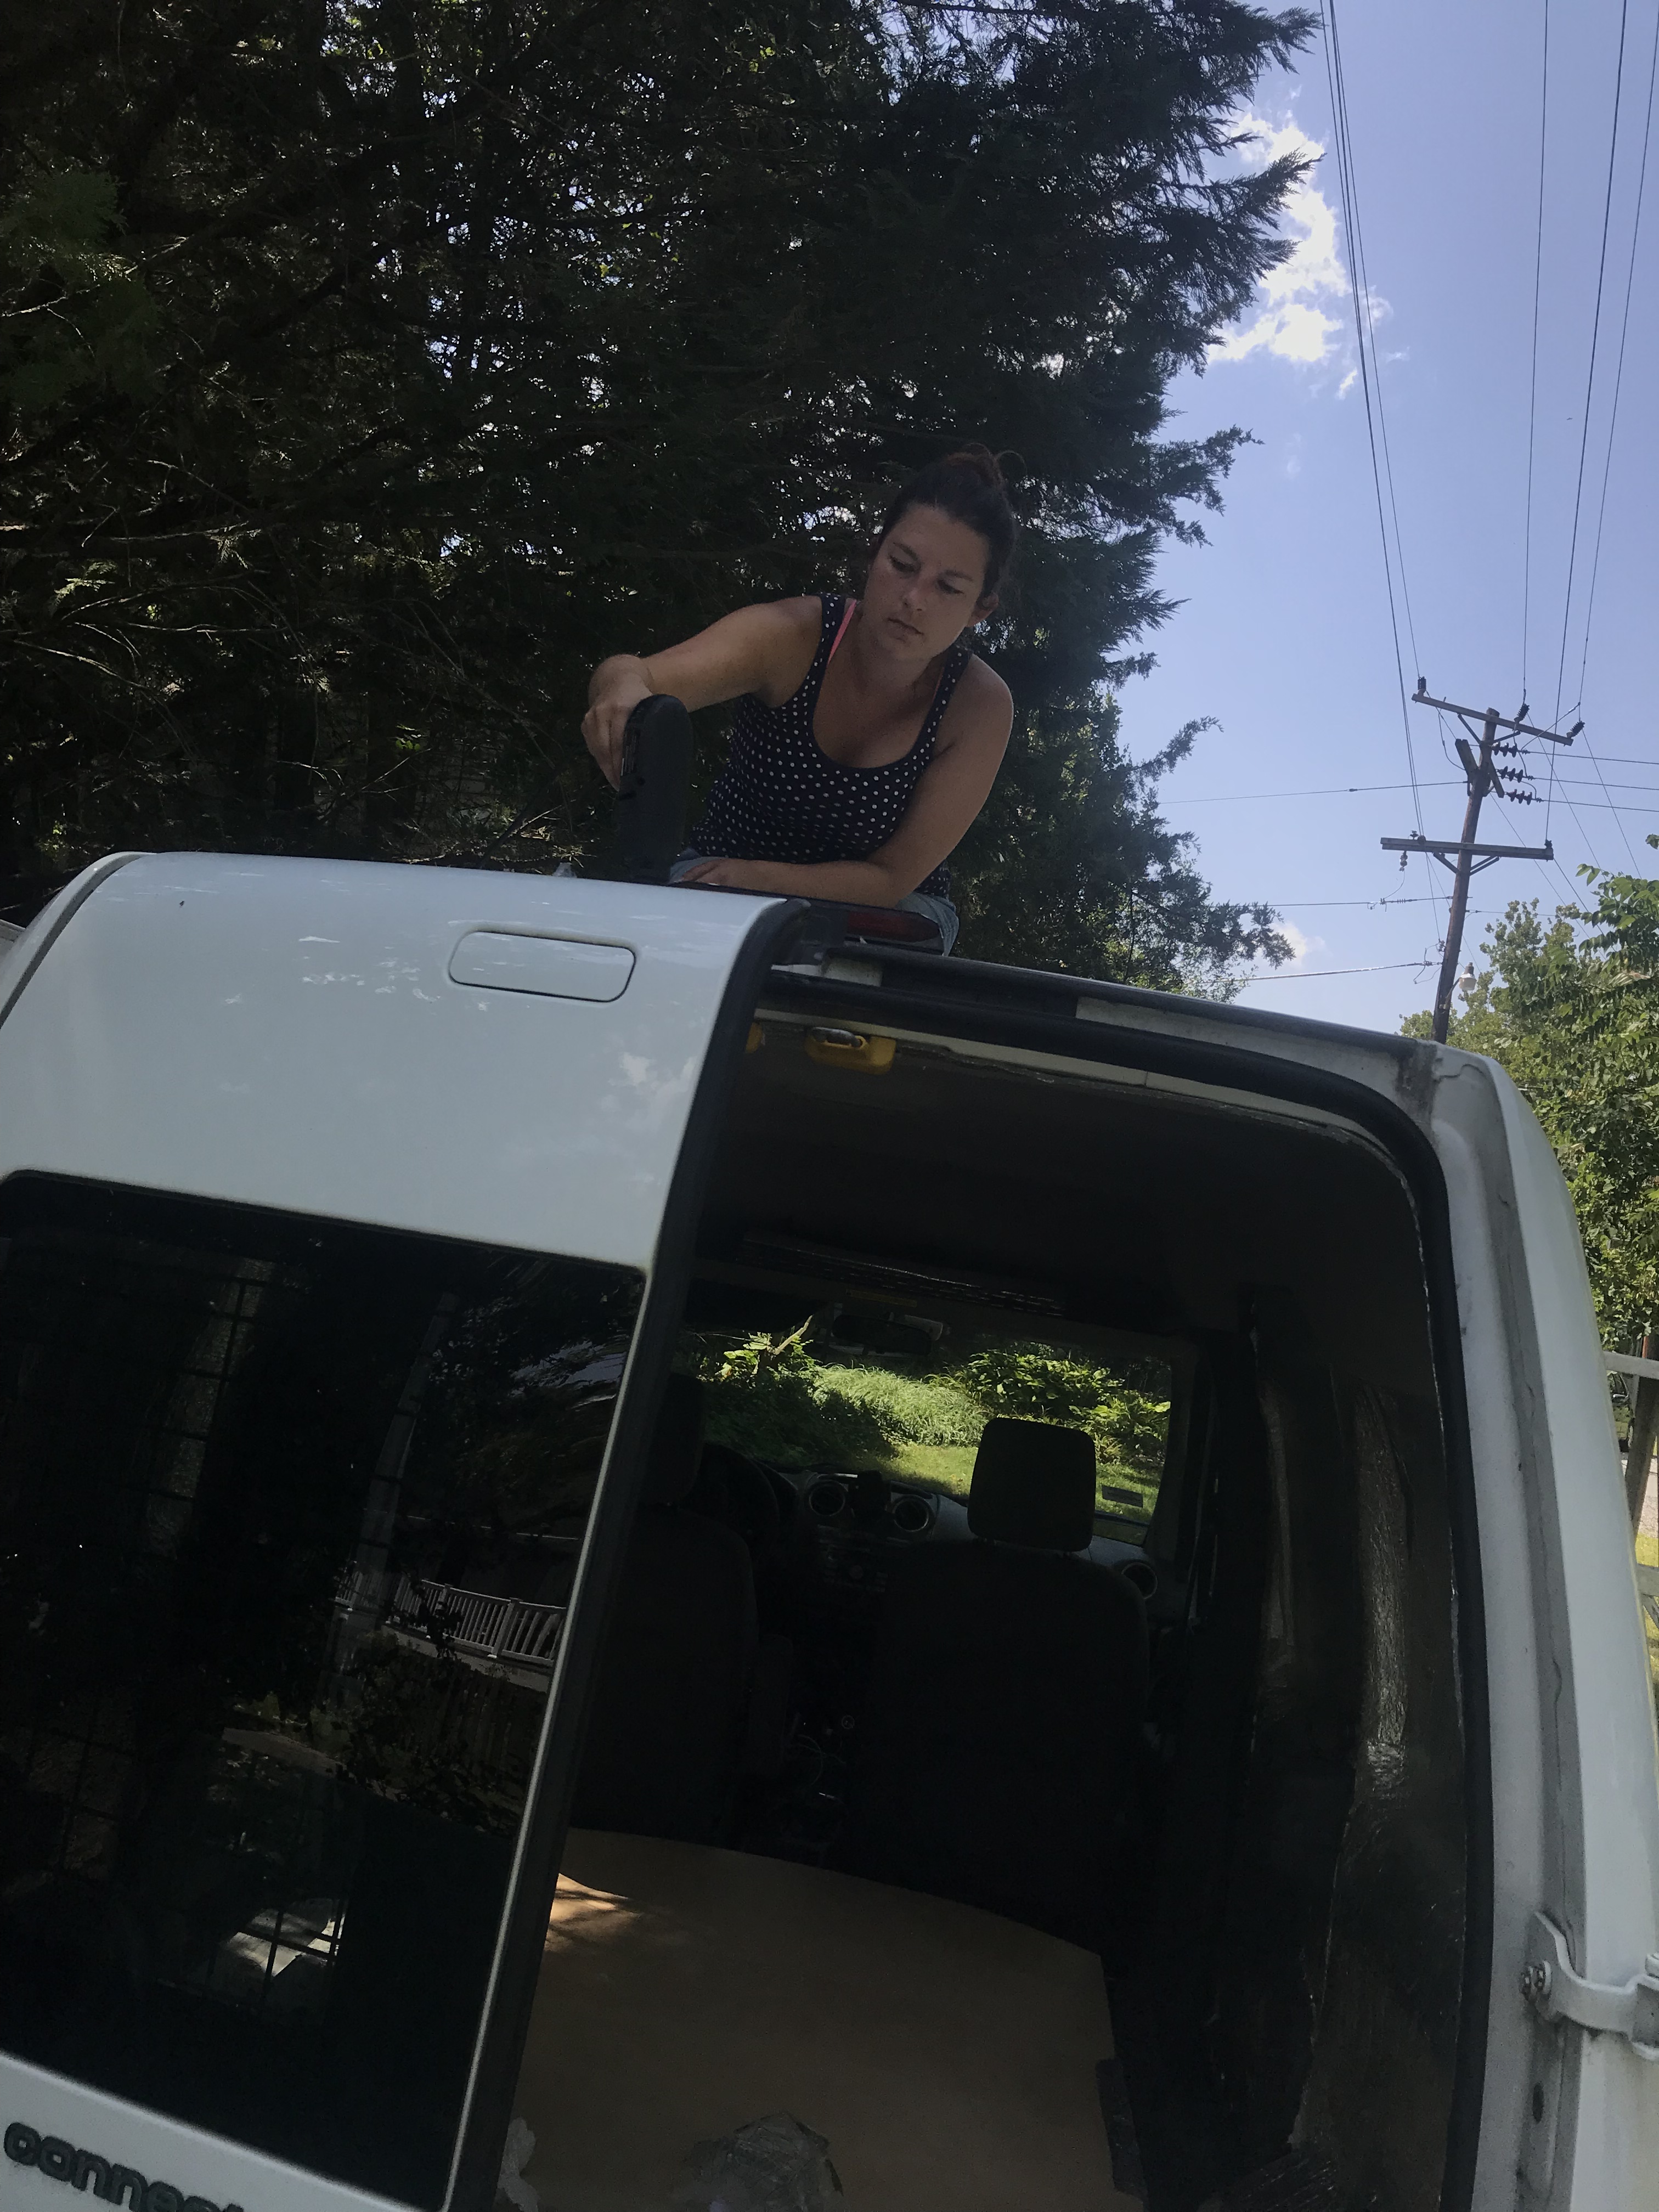
The first step to install the fan after ordering all the things needed is to take a giant plunge and chop a hole in the roof of the van. Yes, you read that right, cut a 14″ square in the roof of my future home. So there’s that. This requires a good saw that I don’t have but a few friends and connections do, so I was able to get a neighbor to help me out with this part.
Cutting the Roof Hole: The beginning of my comedy of errors
Now when cutting a big old hole in the roof of one’s vehicle, you might correctly assume the most important thing to do first would be to check the weather and wait for a day with 0% chance of rain. This is what smart people do. I, on the other hand, decided to take advantage of the offer for help from a family friend/neighbor who was going out of town in the next day or so, My window of opportunity was shrinking, the forecast that morning called for thunderstorms starting between 6-8pm. It was around noon. Plenty of time, I thought, I can either get the fan in and sealed or the van to a garage in plenty of time.
This, my friends, was a mistake. Classic beginner’s hubris. Trusting the weather report dumb. Assuming things would go smoothly stupid. Sigh.
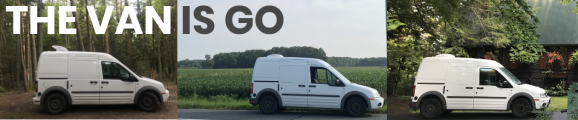
I measured out the spot in the rear of the van where I wanted it to go. My little van has limited space I could choose from- basically it could go right behind the seats in the center of the van, or toward the back because of the lights installed in the interior ceiling are dead center. I really wanted to go with the rear placement so if I crack the front windows it would create a good air flow covering the whole space, versus leaving the back of the van pretty much untouched if I went with the front placement. Plus, with the exhaust feature I wanted it close-ish to where I’d be potentially cooking in crappy weather toward the back of the space. There’s a top rear brake light on my Transit Connect that is a little close for comfort, but I decided to risk it.
So, Osamu climbed up to the roof, we traced out the outline of the template, drilled corner holes to get the blade in, and he went to town with the Sawzall (or something in that family). I think it was harder than expected to stick to the lines exactly but overall it seemed to go pretty quickly after a flurry of me and my godmother fetching the tape measures, trash bags, ladders, extension cords, drills, etc. that we had’t had time to gather before he came over so promptly. Once this job was done Osamu promptly hopped off the roof to go home and watch tennis, glad to be done with us underprepared ladies and their crazy plans.
When the hole was cut, I climbed up and filed the jagged edges, sanded some, and tried to fit the base on. Nope. After much shoving, leaning, and wiggling I kind of got it in on 3 sides and was filing down the last one. By now it was probably around 1:30 or 2pm since all the gathering, measuring and drawing took (surprise) longer than expected. I was up there trying to fit the plastic frame into a somewhat too small square when Osamu returned to check on us- his tennis match was in a rain delay. One small stroke of luck! He hopped back up and used some metal shears to trim off a little more on the edges of several sides, and while he was up there drilled the screw holes (this I actually was going to do but hey, I take all the help I can get).
Now that the frame actually fit the hole, I went back to work sanding, filing, then sprayed the edges with Rustoleum to paint and prevent rust. It was now around 3pm.
It was about this time that the first raindrops started to come down.
A look at the radar showed that the predicted rain and thunderstorms were approaching much faster than the news had predicted. Like, 2-3 hours early. Like, right now.
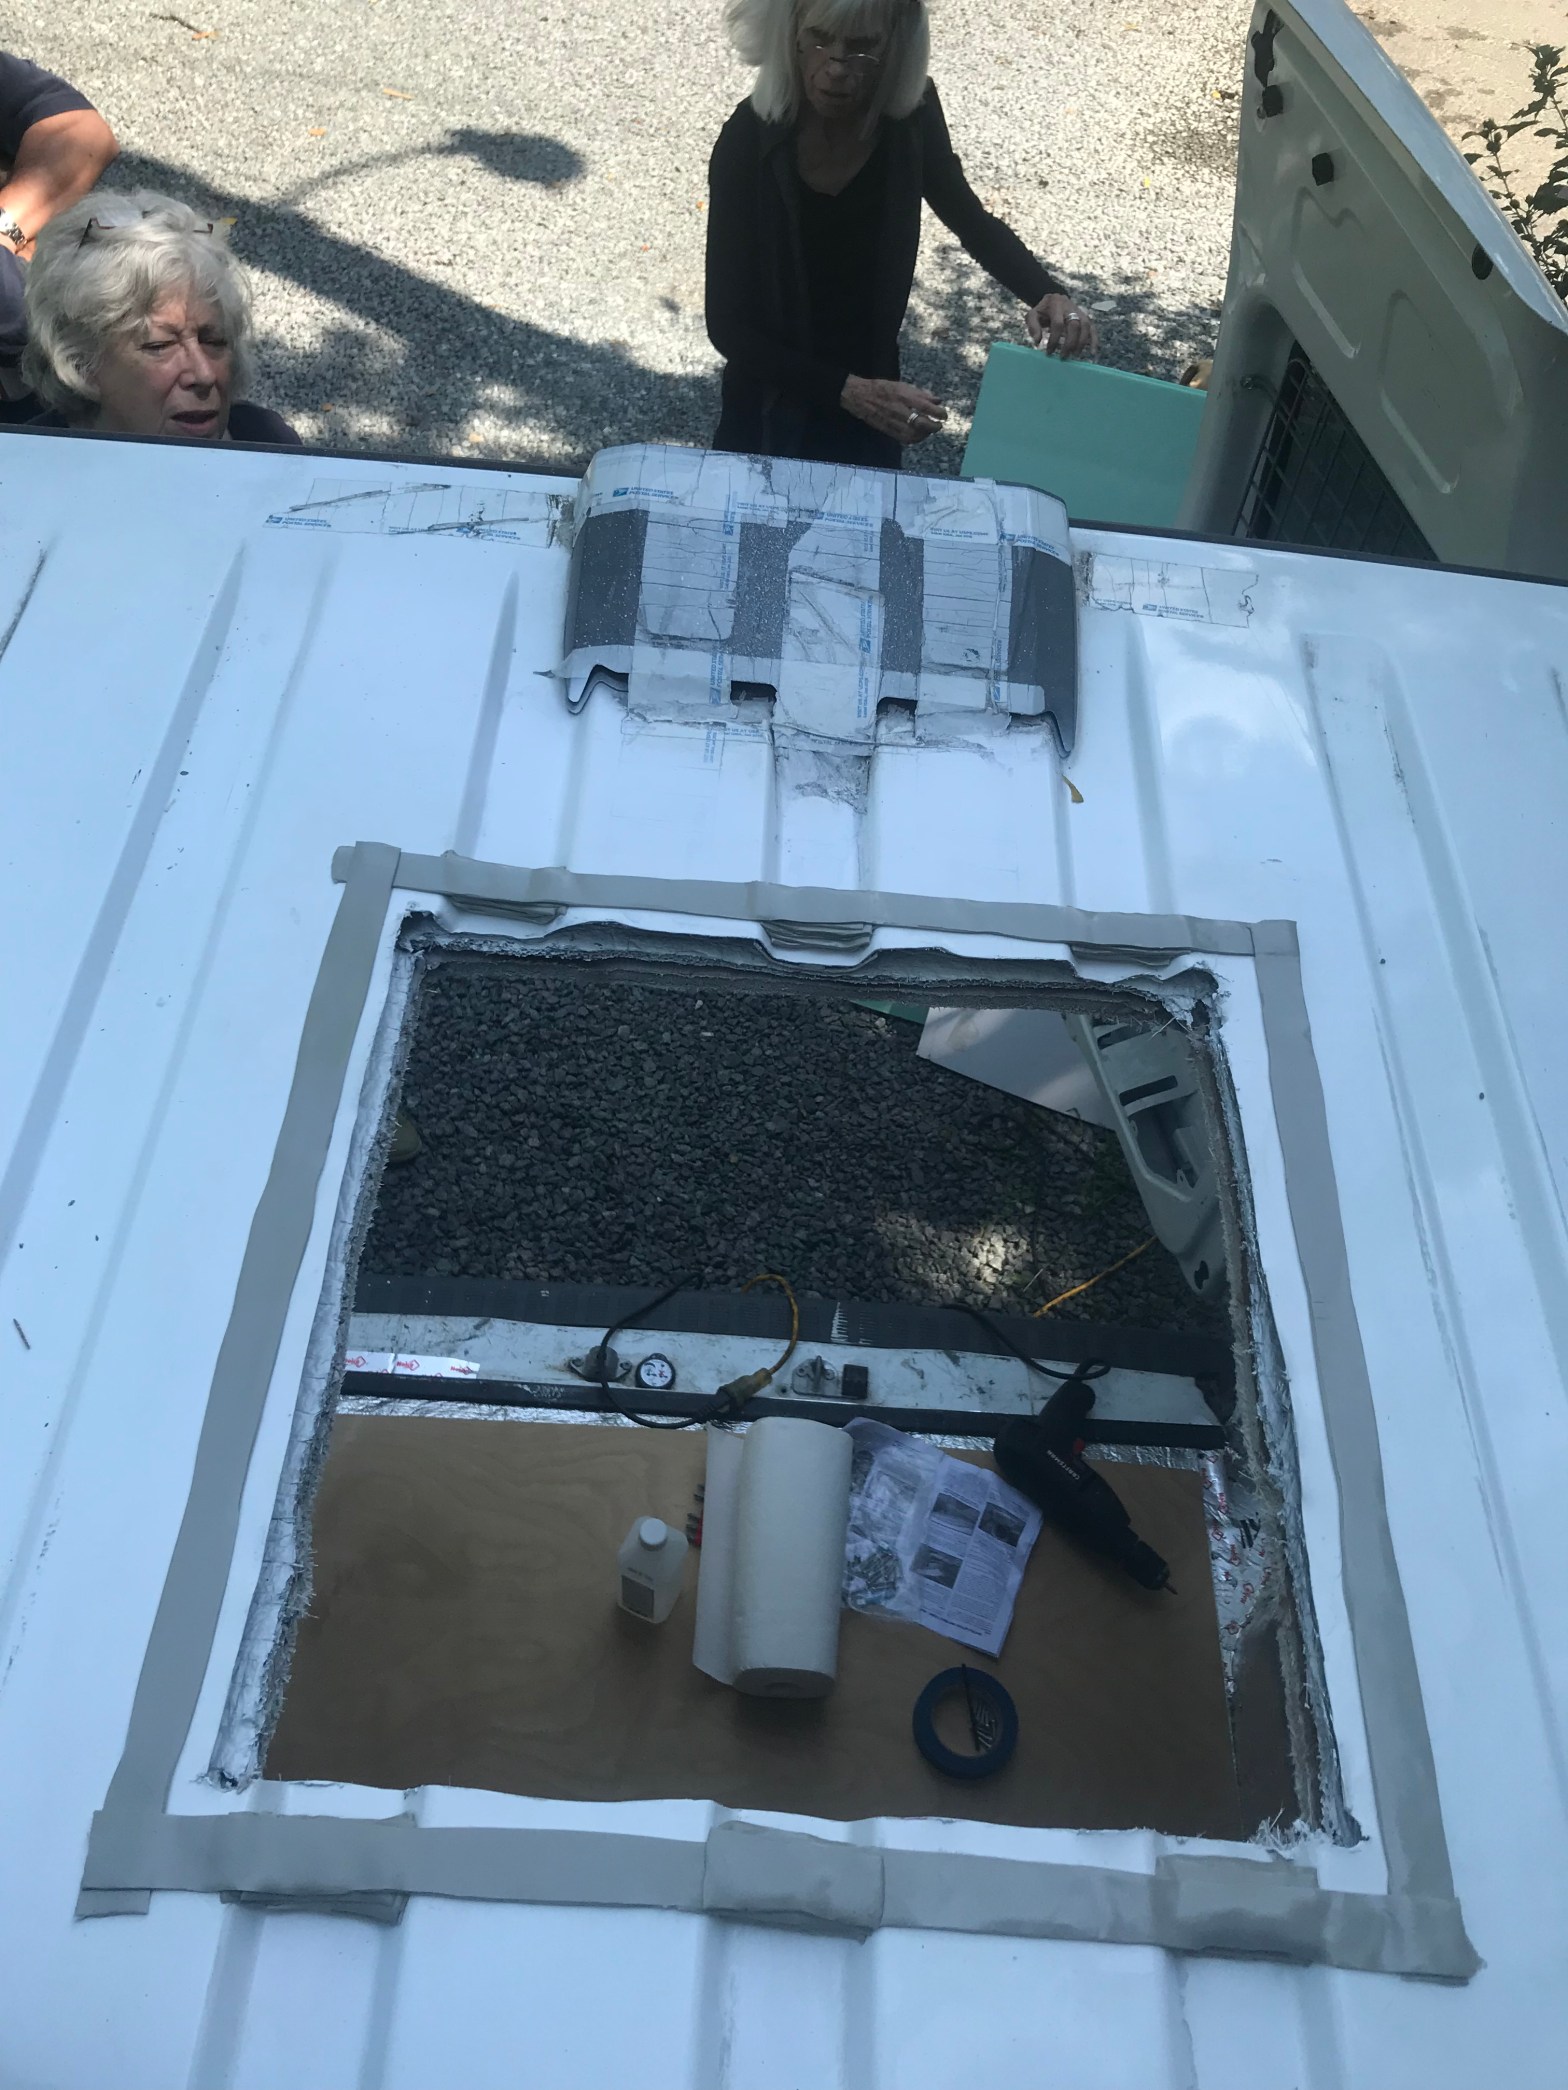
We grabbed some trash bags, painters tape (which didn’t work at all), duct tape (which was old and down to the end of the roll so it was sticky on both sides), and styrofoam. As the rain started to come down and the thunder rumbled, Jane rushed around gathering items as I was trapped on the roof of the van, unwilling to come down the ladder on unstable gravel without her there, plus I’d just have to get back up again. When she returned with the items, I attempted to tape down the trash bags over the styrofoam, which was intended to avoid the bags collecting water and collapsing into the hole. Once the roof got wet, however, it was very tough to get the tape to stick to the slick metal, and don’t get me started on the ridges on the roof. I finally got it stuck as I was going to get it, and climbed down to tackle the inside. We taped the styrofoam to the roof as much as possible to keep it from flying up, but with the sticky duct tape clinging more to my fingers than the roof, it was kind of a frustrating mess.

I may have flipped out a little and hit my fist repeatedly on the door trying to get the stupid tape off my hand. I may have threatened to burn the whole thing to the ground because it was ruined. I may have been a little melodramatic. But rain was starting to seep in, darkening the ceiling as a stream of water growing steadier by the moment trickled in through one corner, then another. We fetched Jane’s soup pot to catch the waterfall, and some towels destined never to be the same color again. My pants had tiny shards of metal from the cutting, trimming and filing embedded all over. It was not my best day.
I jumped in the van and Jane in her new and non-leaking Bug and took off in the height of a thunderstorm downpour to the closest garage without need to feed a meter. We made it there, me glancing back at the dribble at water dinging in the pot and continually waiting for the moment the poorly secured tape would give out and the whole foam and plastic getup would fly off into traffic and cause a pile up. Luckily we made it with all secure, thought as I entered the garage I realized I didn’t actually know the clearance of my new to me van; later searching says it’s 6′ 6″ and the garage clearance is 6′ 8″ – Jane was driving behind me and says my antenna made it under the entrance arm just barely. We parked under cover, and my defeated, drenched self got into her car and left the disaster there overnight.
Of course, as we left the garage the rain let up and by the time we returned home 10 minutes later the sky was clear once again and it remained precipitation-free for the rest of the evening. Of course.
Day 2: Where I learn to stay positive
The next morning, we went back bright and early (the garage doesn’t charge between 10pm-7am and we escaped before the exit arm went back down, so at least it was free!) to retrieve the van and see what damage had been done.
I pulled off the trash bags, dumped the inch or so of water in the pot, wrung out the towels, and wiped down the damp floor and puddles in the floor cavities. We removed most of the fasteners holding the roof cover up, and stuck a few skewers in between the roof insulation and ceiling to air it out. Osamu dropped by, curious to see how we’d weathered the storm, and let a box fan to help dry out. It worked great after we’d covered the hold in the ceiling material with the styrofoam to direct the air around to circulate. I also sprayed down the whole ceiling material (update- I have since learned this is called the headliner. obviously i am now a car expert) with the mold-preventative spray I had left from the floor install, so it would dry at the same time. We left that to dry while working on some other things like the floor, and it was good to go later in the day, so we popped it back up and replaced the fasteners.

Installing the Fan
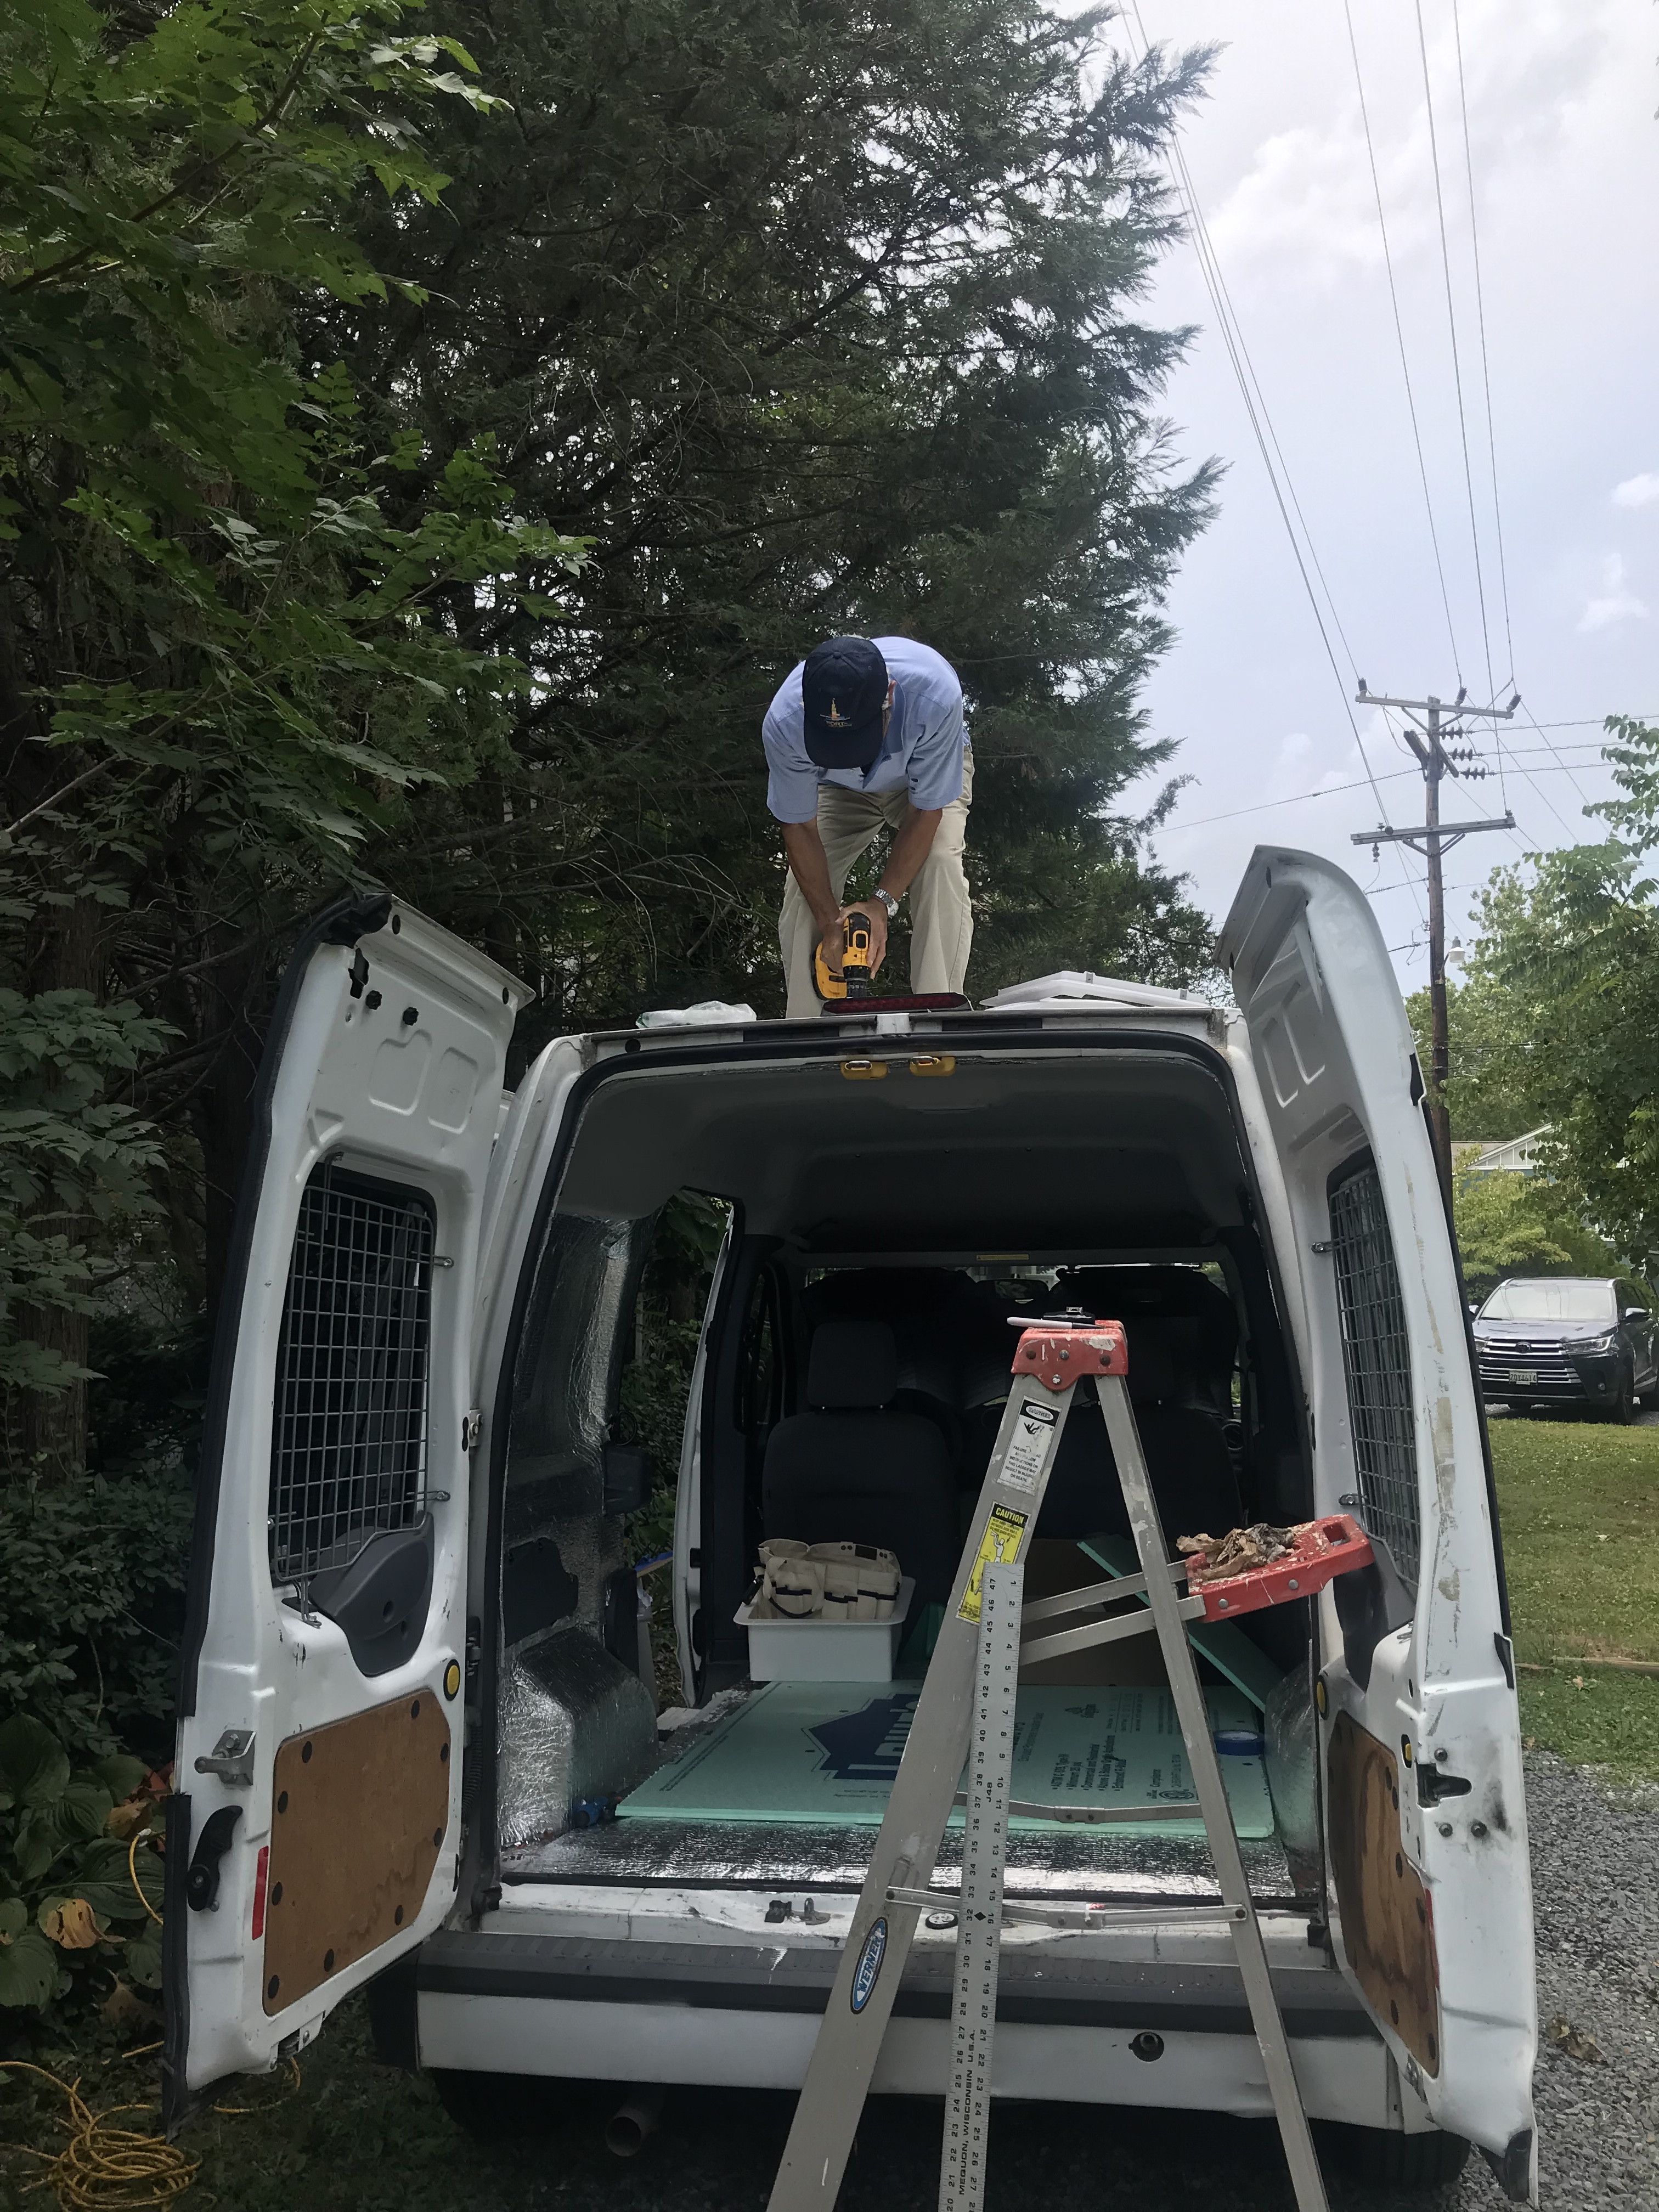
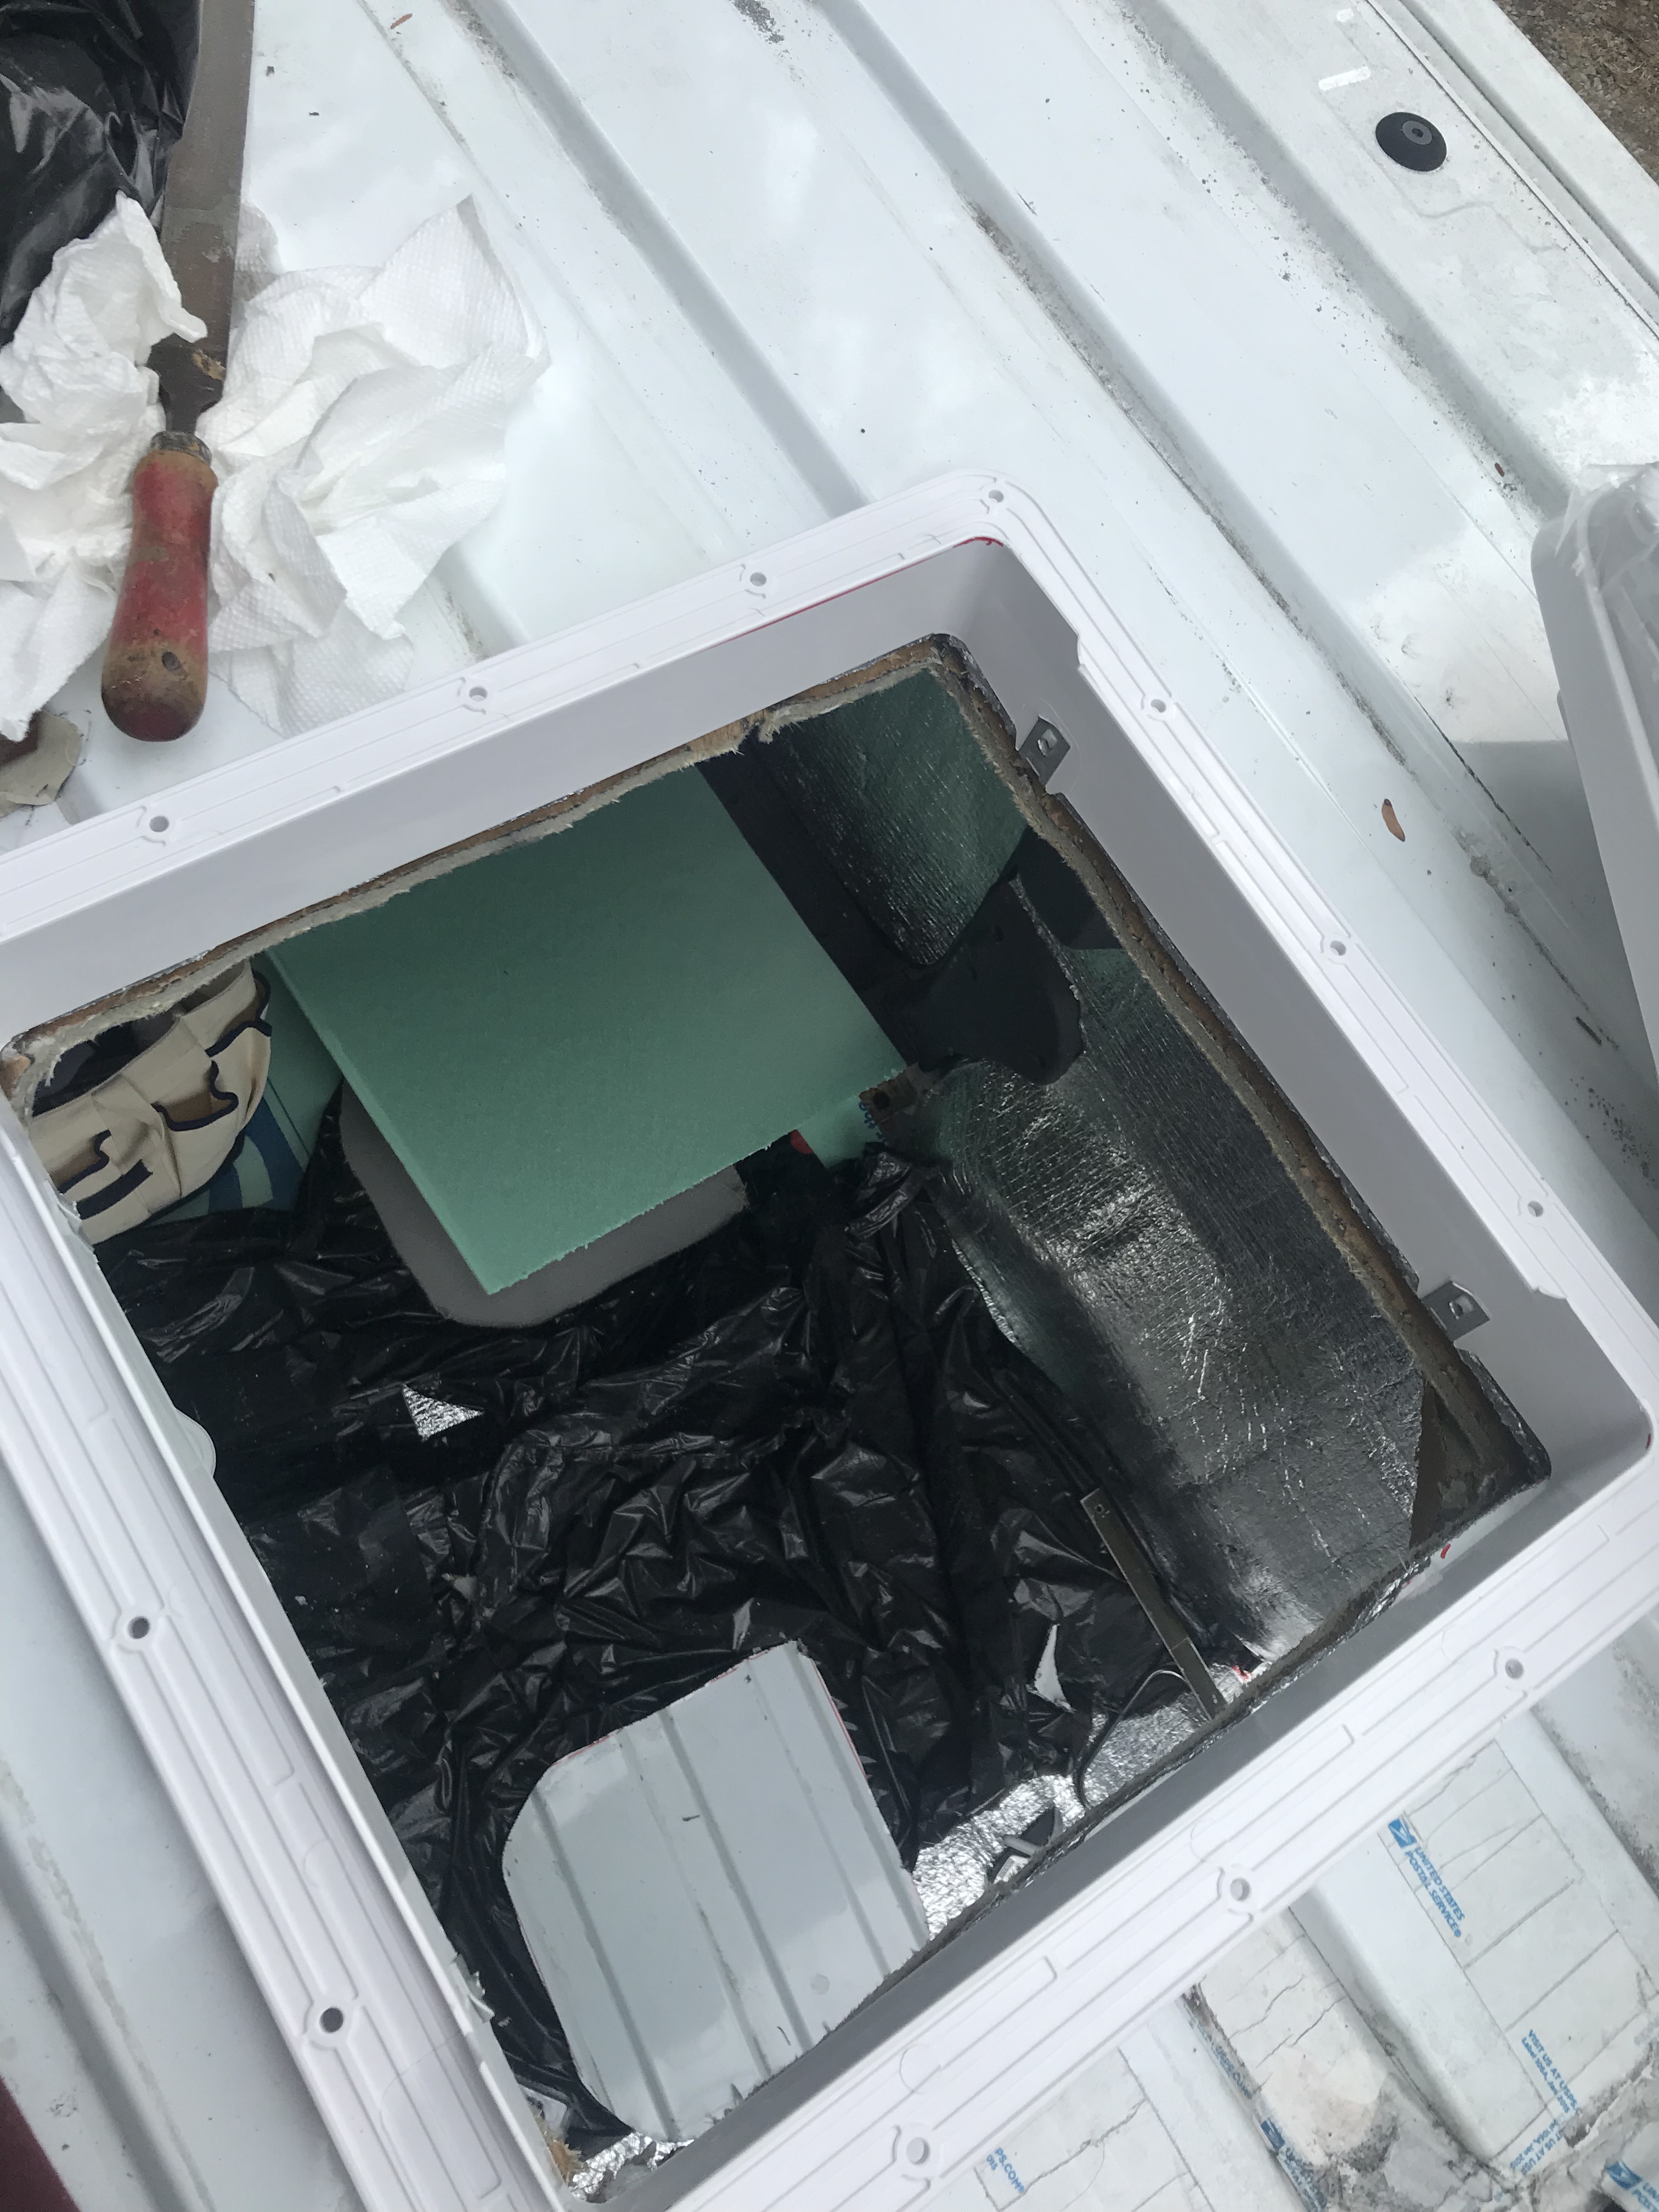
I got back up on the roof, cleaned the surface with rubbing alcohol, and started to prepare for the installation. As I mentioned, the van roof has ridges maybe half an inch deep along the length. In order to fit the flat frame on without allowing any water to come in, I had to fill the ridges with sealant before attaching the frame. I used many layers of butyl tape on top on one another to build a wall, then lay a layer all around where the frame would meet the roof around the hole to seal off any moisture.

Then cleaned the frame as directed with acetone (well, nail polish remover) and stuck the frame down firmly in the hole, and had my next troubleshooting moment. The screws didn’t seem to have anything to attach to inside the van roof, perhaps we drilled the holed too large. We improvised by sticking wood pieces, similar to paint stirrers, between the insulation and the roof metal creating a frame around the hole, which I was able to screw into.
Next I applied a thick layer of sealant, like caulk, over the screws and all around the hole. We had borrowed a caulking gun from Osamu, but neither Jane nor I, nor my neighbor who had stopped by to chat, had ever actually used one before. It took us a while to figure out that you have to pierce the tube with this metal wire but then it was easy going. Another day after it had all dried I touched up and added more in a few places, but so far (knock on wood) no leaks!
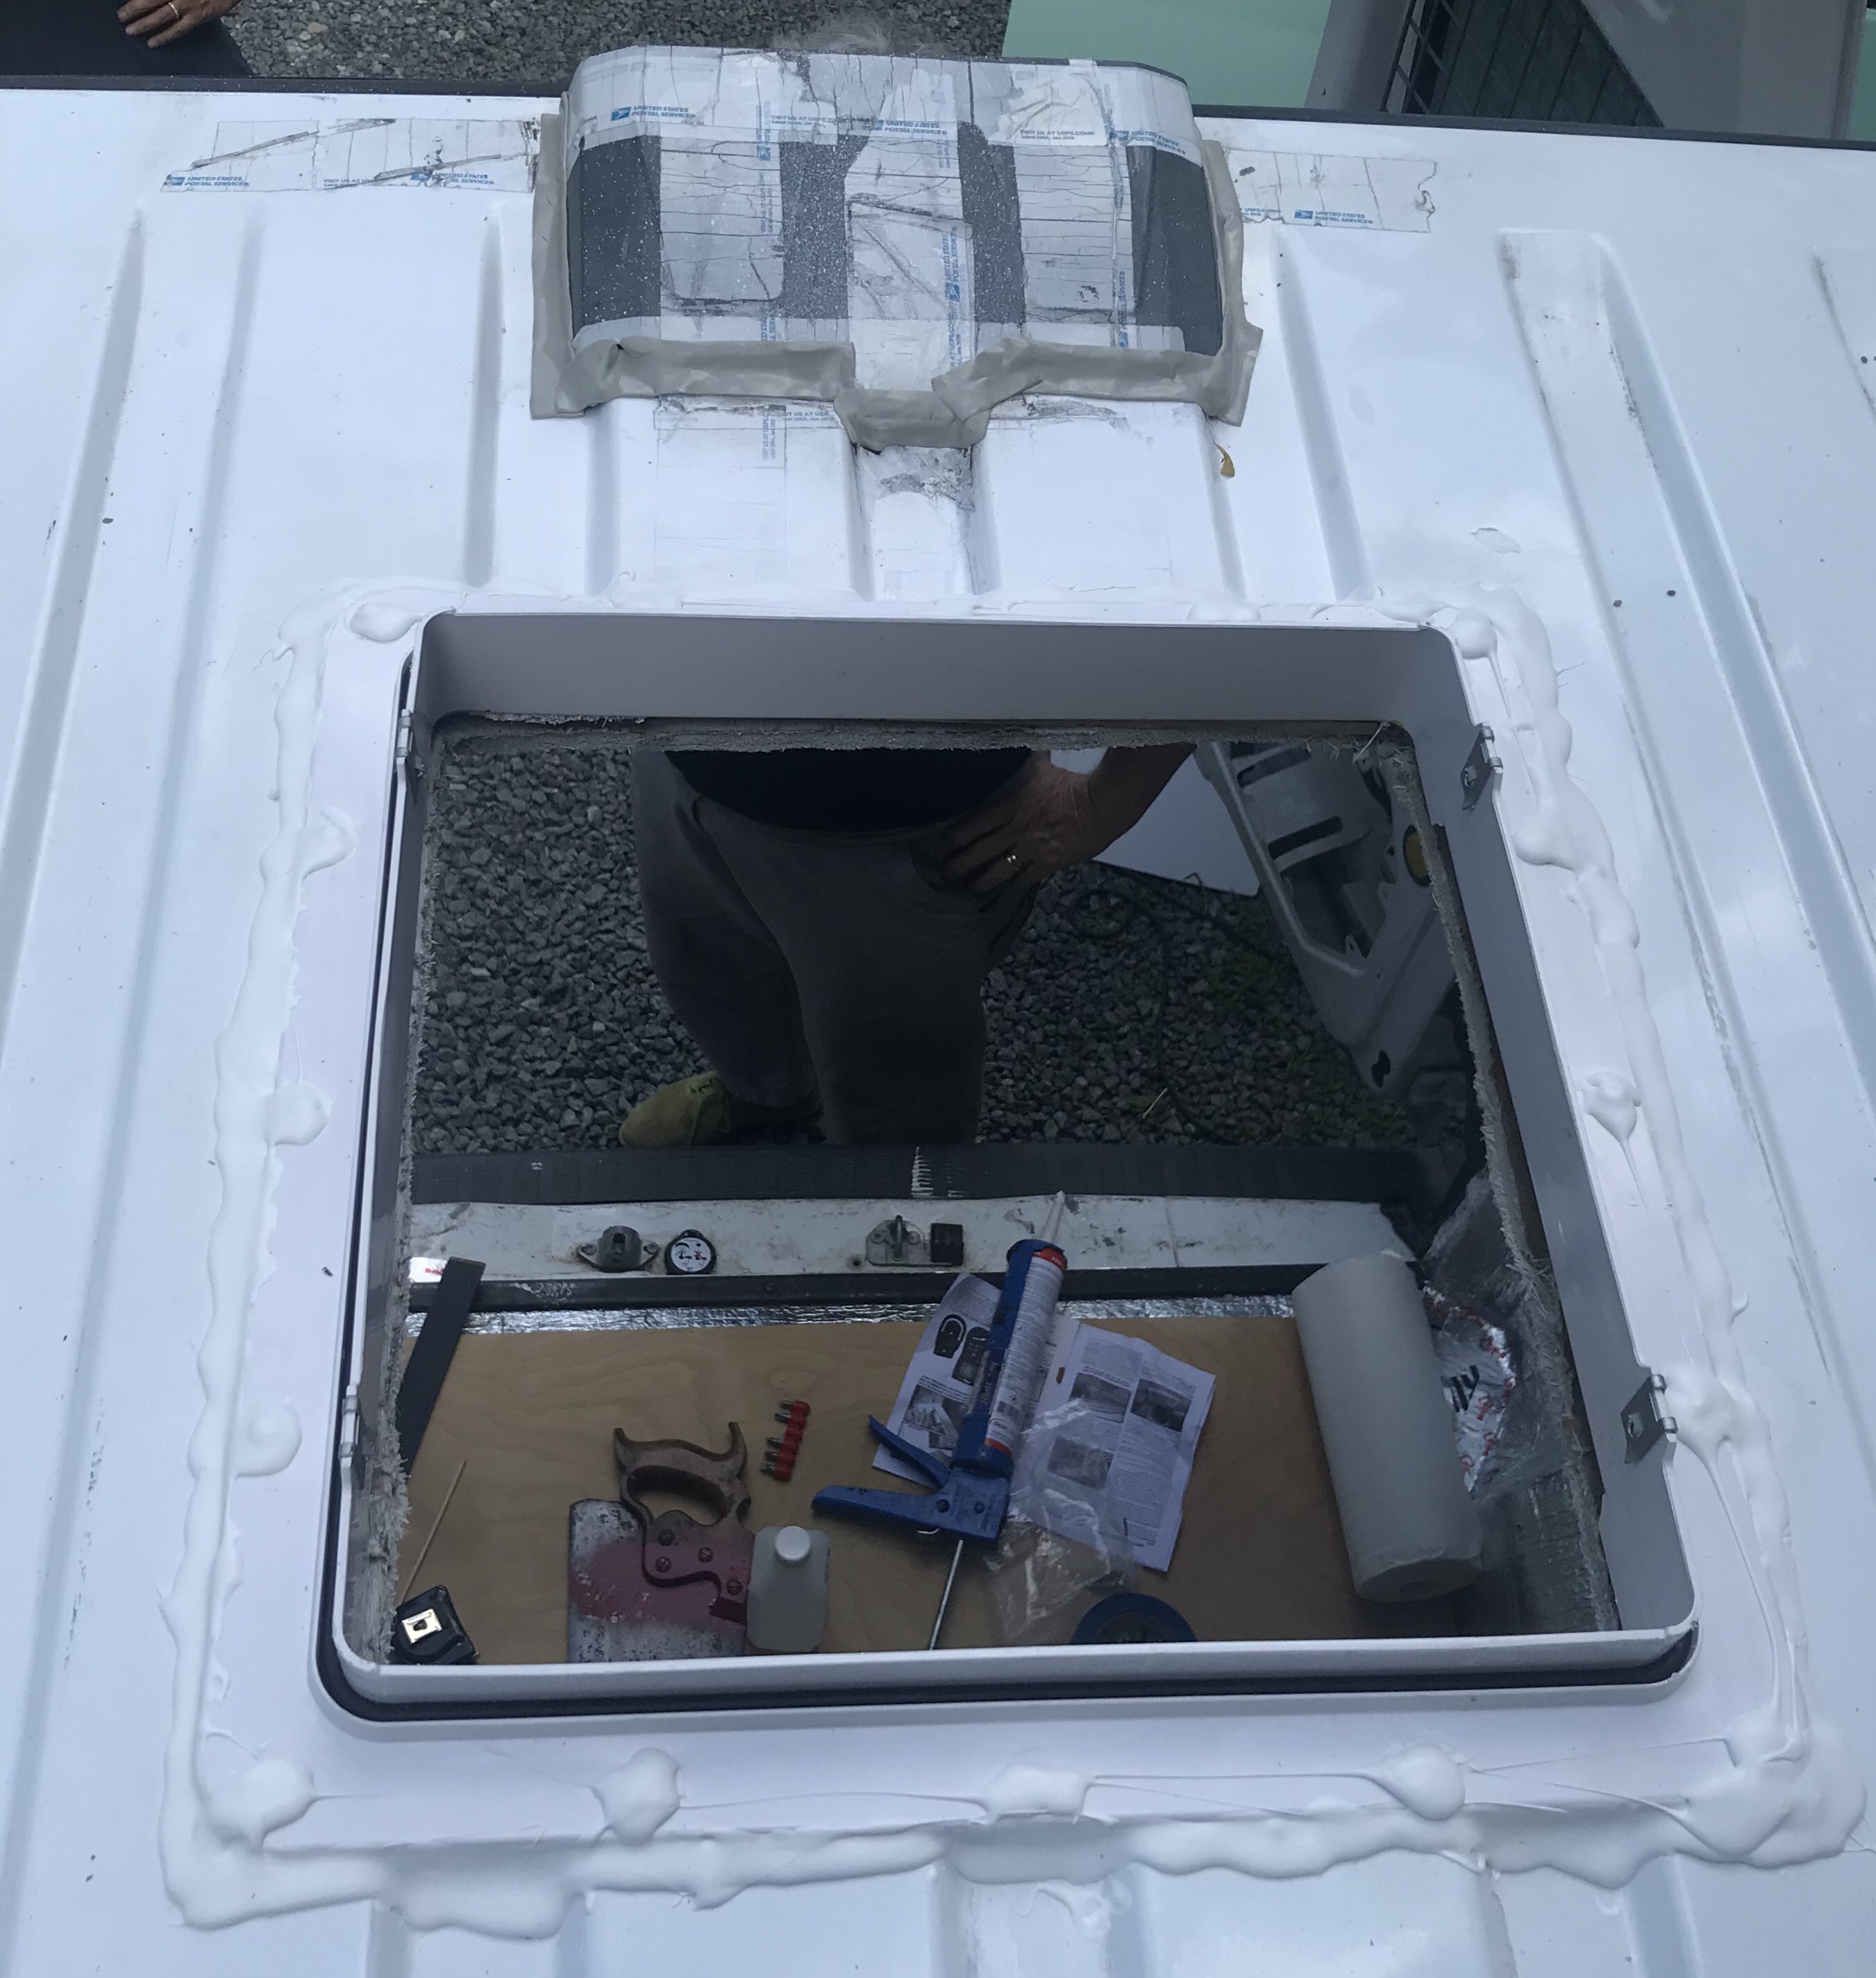
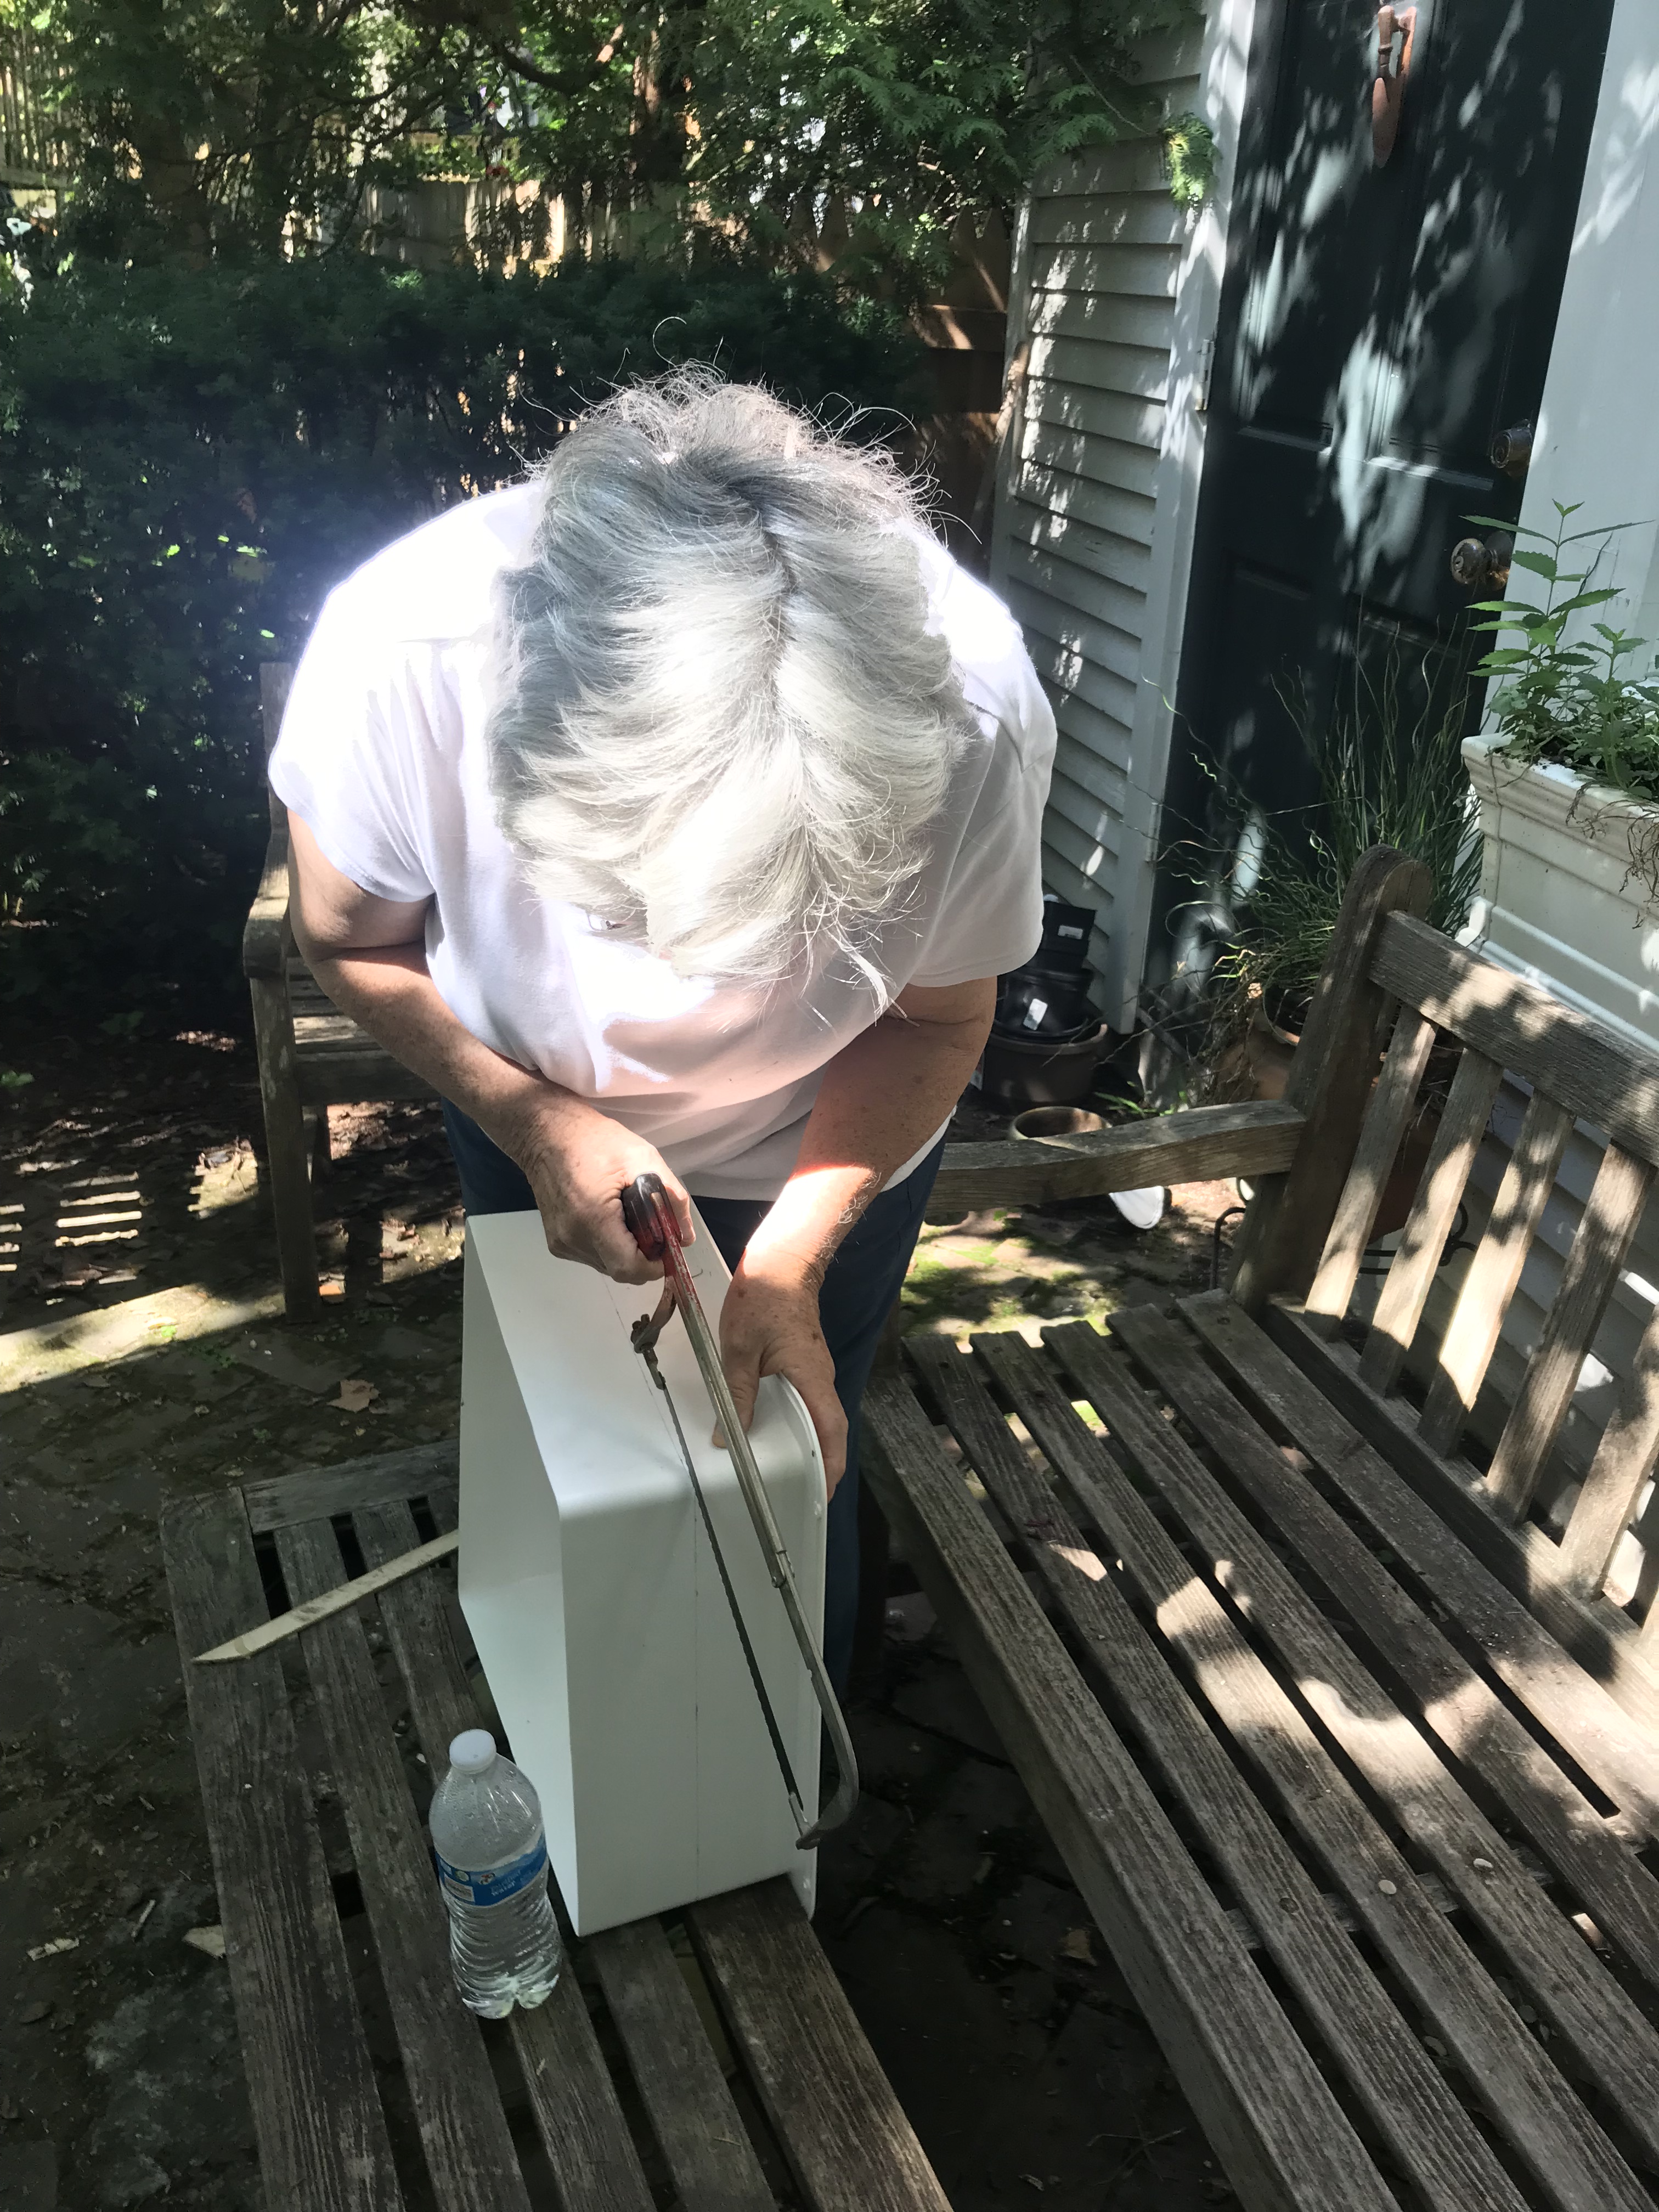
Another day we measured how tall the interior frame should be, Jane sawed it off at the right height, and we screwed that into the wood frame, as well. Fan in!
Wiring the Fan
All that was really left to do was test out the fan, but I was waiting on a part ordered from Amazon to wire it up. Most people, I imagine, wire the fan to the existing car lighting wires or engine (obviously I know little and can barely imagine what this would look like), but I wanted to wire mine separately in order to plug it into my battery pack and not drain the car battery if I use the fan overnight. So I got this 12v lighter attachment to connect to the fan wires, which I could then plug in as needed. It arrived to my parents’ house where I was visiting several days later, and my dad helped me strip off the wires and connect them to the fan wiring.
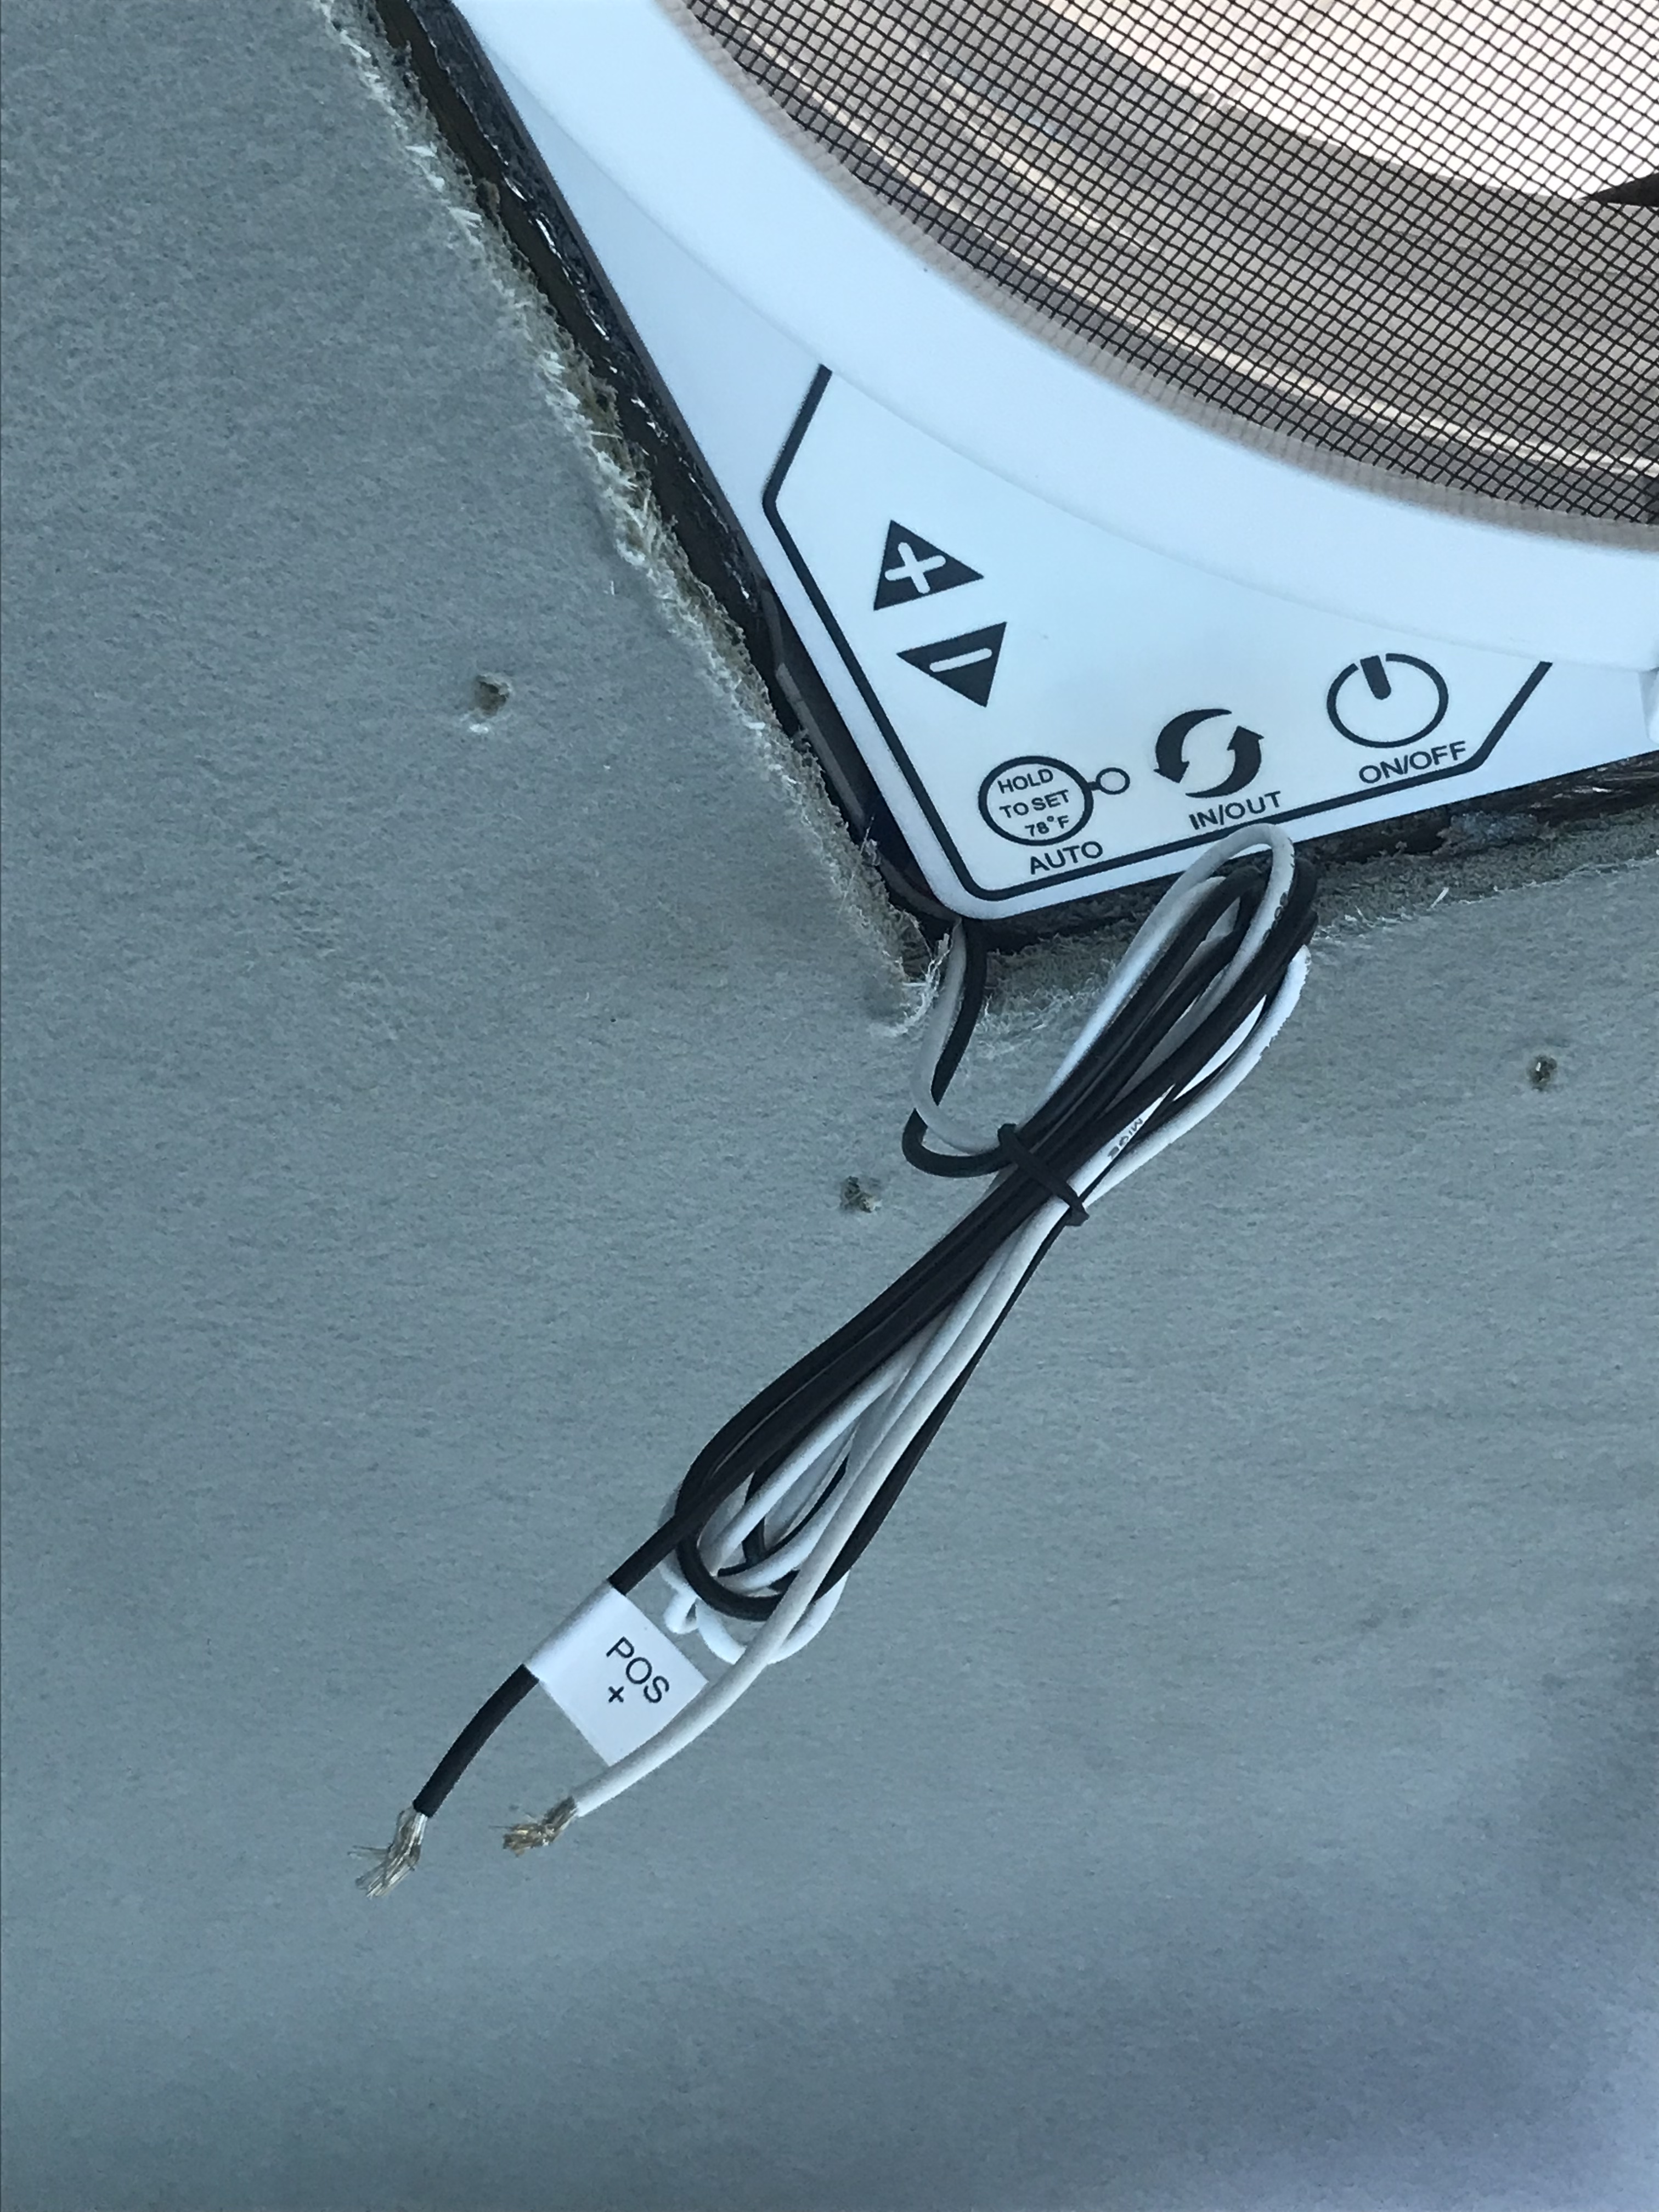
We went to test it out and…. nothing. We hooked black to black and red to white, we re-attached the connections, still nothing. My parents’ friend and neighbor, Nick, tried it, too, and still nothing, until he noticed that the black wire was labeled positive (the plug end was just straight unlabeled and with no directions, which is what I get for choosing a cheap online item) so we swapped wires and ta-da! Power. Why the two would use black for opposite wires I don’t know but glad he spotted it. It worked fine and all was well for now!
Time will tell how it really went. My choice to cut corners and place the fan really too close to the rear light may come back to bite me if I have any really cold weather and don’t get a good closure seal and heat escapes. Updates to come 🤗
