

Sleep was not always my favorite. My mother tells me that as a baby I tried my hardest not to sleep, not to nap, not to close my eyes because I didn’t want to miss anything. In retrospect the earliest sign of my major FOMO in alleged adulthood. But now sleep is THE BEST! Reading in bed, rainy day naps, collapsing exhausted after herding 3 year olds and realizing it is only 8pm but you can skip dinner and go to bed early because you’re a grown up and how sad is it that this made me so happy…. Anyway, figuring out a bed situation was a high priority.
Designing the Bed
As you can tell, I am a major social media stalker of other people’s awesome van and travel ideas. I must have looked at thousands of configurations and setups, some picture perfect and some reflecting reality, but not many in my actual van model. I stole the best ideas from the ones I saw that I could fit in my space constraints and fathom actually finding a way to recreate without professional help. Lucky for me, I actually have semi-professional help in that my godmother who is my project angel was once a woodworker, but still with me assisting it couldn’t be tooooo crazy.
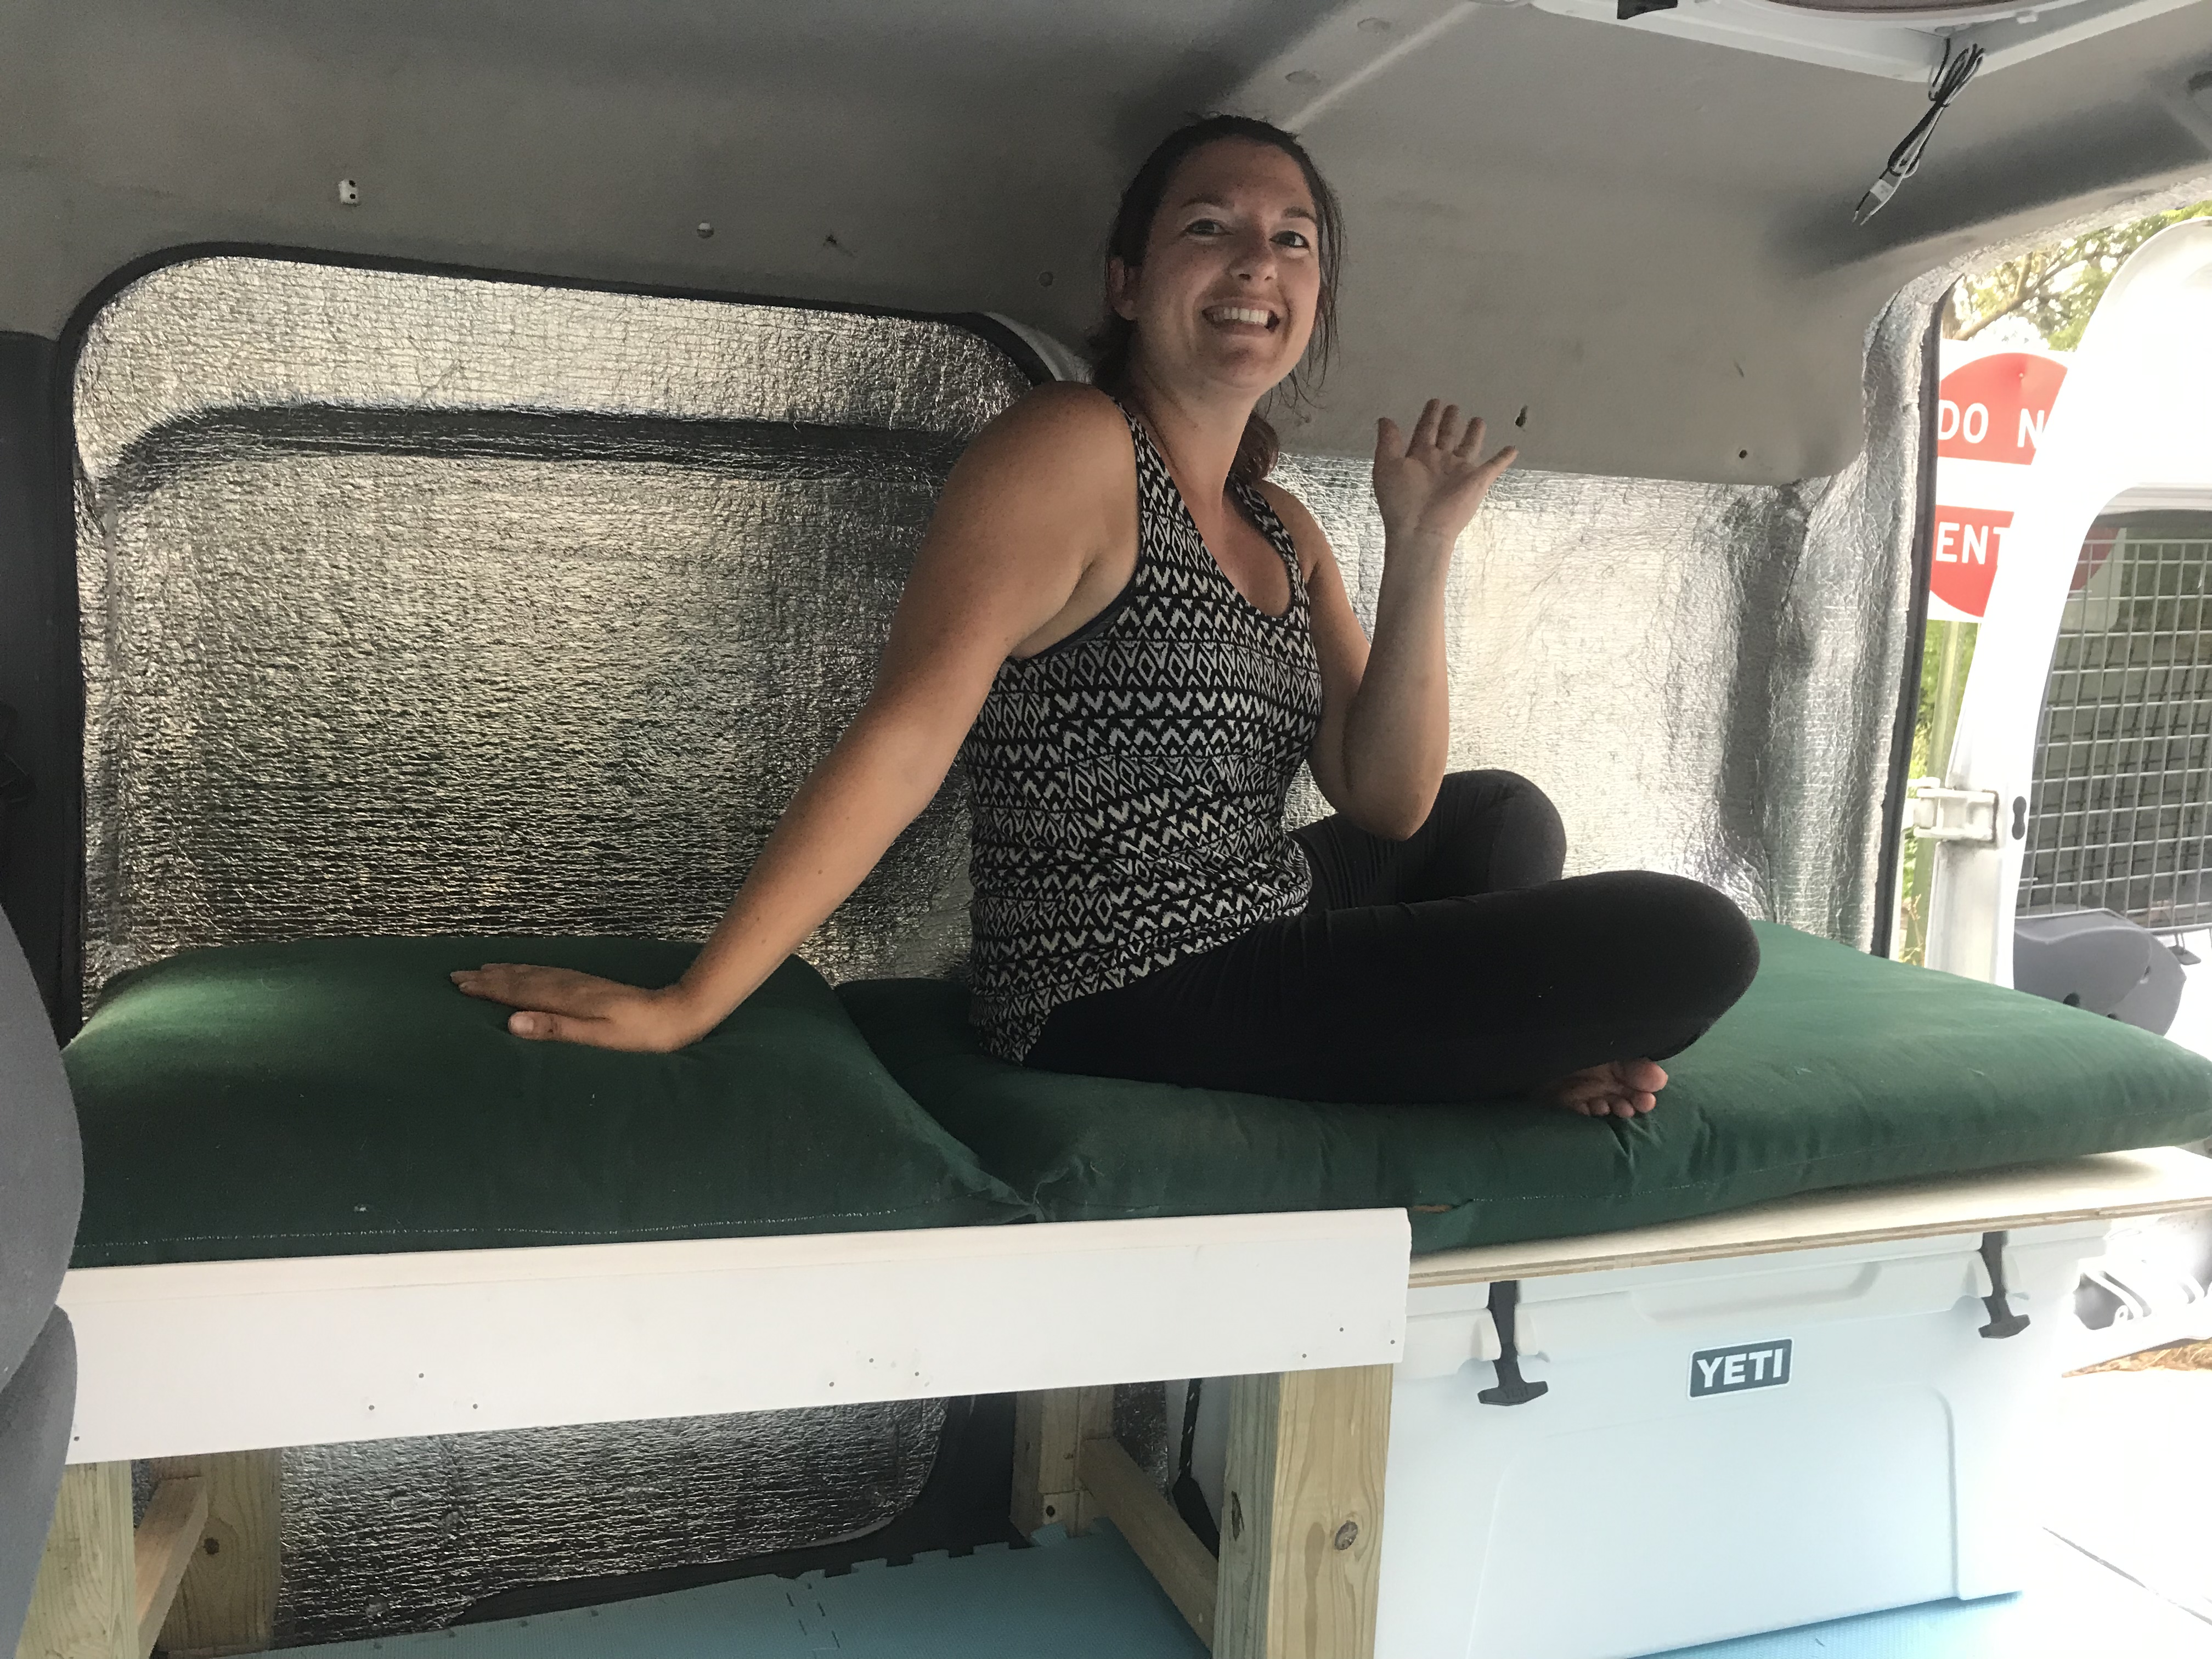
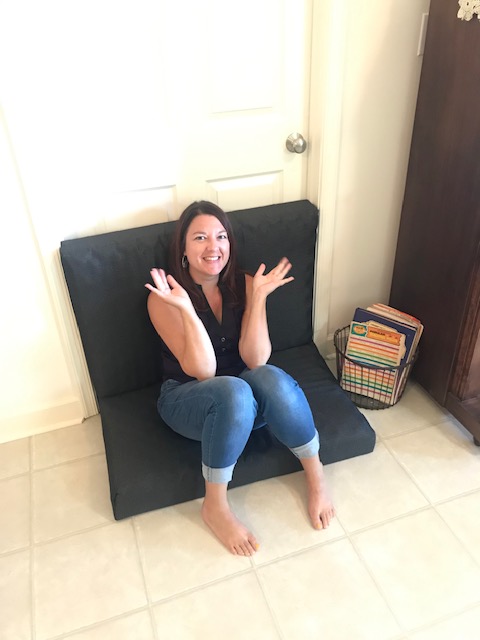
Based on some hardcore graph paper modeling, we decided upon a design which converts the bed into a seat by day, and uses my massive cooler in the support structure by night. This way in the day time, I have two cushions making a little sofa seat and can access my cooler and have more prep space, then in the evenings just pull a sheet of plywood out from under the seat, place it over the cooler on the bed frame outline, and put the back cushion down to make a bed. What magic!
Building the Frame
The couple who sold me the van had already made custom bed frame pieces, but covering the whole interior which wouldn’t be super practical for me and my setup. I passed on the old mattress, took out the cross beams, but used the edge pieces of the frame in our new design. We cut down a few support beams, and used this to make a half-length bed frame with the back edge extending behind the cooler to the end of the van.

We had to cut an indent in the frame to allow the cooler to open, and left the other end of the frame open around the cooler so I can get into it more easily and access the tab locks. We also left the back edge open so I can pull the cooler out to add ice or drain more easily.
For the base we just got a sheet of 1/2″ plywood and cut it in half to the correct dimensions, and sanded the hell out of it so the two pieces would slide rather than grate when moving, and to avoid splinters. On the permanent half we also added an edging of molding to keep the cushion and wood from sliding and shifting.

repurposing pieces of the old bed 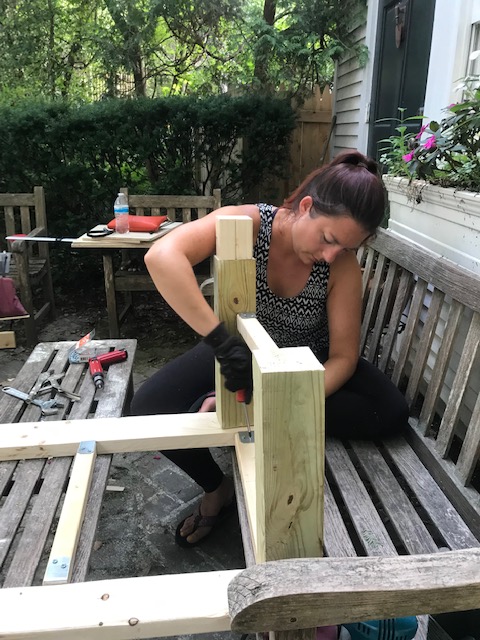
The frame supports fit pretty snugly into the sliding door step. All together he bed is 66″x24″, with space under the bed for storage. Long enough to lie down straight when the passenger seat is pushed up some.
Cushion Time
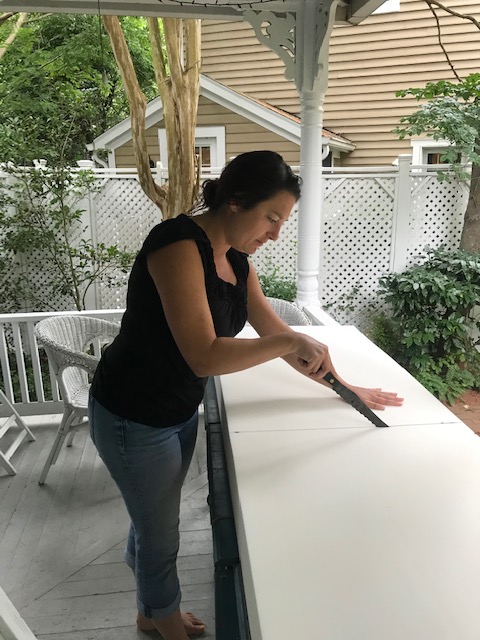
I ordered a roll of upholstery foam online, opting for 5″ because many reviews and info stated that the foam compresses with weight, so I figured I should go bigger in case. I also got a roll of memory foam mattress topper to make it extra comfy. They arrived, I let them expand from packing compression, and aired out a little of that chemical smell, then chopped the foam in half to match the size of the plywood sheets. I did the same to the memory foam, cutting it to size and using spray adhesive to attach the layers. Fun fact: a bread knife is killer on foam.
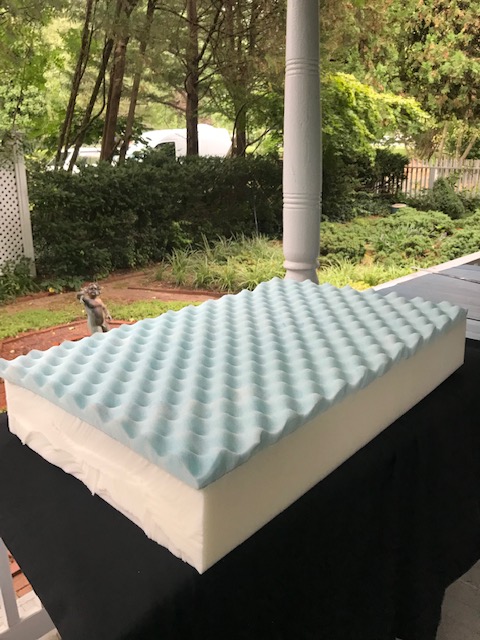
Now me being me, I of course overlooked an important detail. Once I placed the foam in the van, it was too tall to sit on without my head tilting against the ceiling. That nice, cushy 6.5″ of padding was a little too padded. Aside from the (important to me) issue of not being able to sit up, I also couldn’t fit the 2nd cushion on top as a chair back due to the height and the sloped roof of the van. Oops. I didn’t test it for a super long time but man if that foam did not compress one bit under my not so tiny weight. Well done foam, and nice trick review liars.
So, rather than do what I probably should have and just ordered smaller foam, I went the stingy route and decided to try cutting it down. I mean, I paid for it, and can’t return it since I’d already cut it in half, so why not try. Fun fact 2: a bread knife is way too short to get an even cut horizontally on this foam, but a saw worked okay. Yep, I sawed that craziness down 1.5″ by having Jane hold it still while I cut (one direction only- no clue why that worked better) across trying to keep straight to the line we drew around the whole thing. I *wish* we took a picture of this circus but we both had our hands full. The saw made a cool wave pattern, but that’s not really here nor there.
Fast forward ahead- better fitting cushions! Upside is of course that I can sit without my head smushing the ceiling. Downside is that in cutting it must have changed the structural integrity of the foam because now that damn thing does compress down as described. Also now that it’s shorter the molding edge kind of hits my legs while sitting.
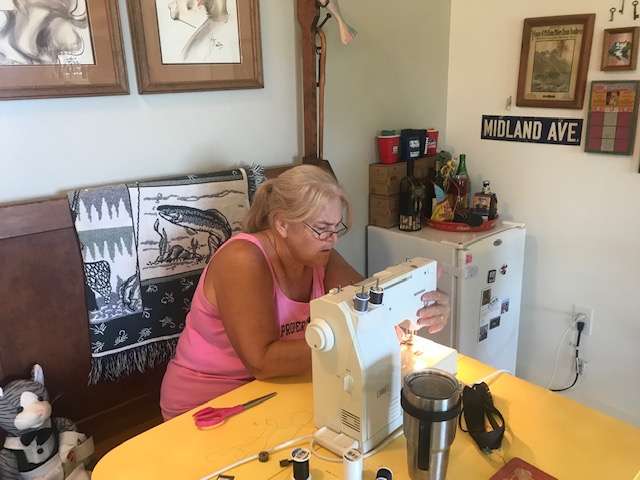
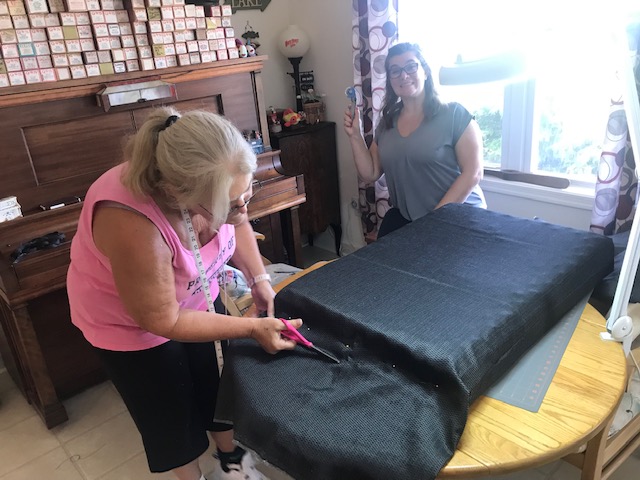
My friend’s mother graciously agreed to help me sew cushion covers, and by help I mean she supplied the fabric and basically did it while I watched in awe and then extremely inexpertly sewed a few inches of a seam. It’s 100% obvious which parts she did versus my ‘looks like a 12 year old’s home ec project’ part. Luckily it’s 95% her and looks great. Comfy! Thanks Julie & Pam!

Okay, ready for nap time.
