After Massachusetts I was on my way north to visit a wonderful friend in Maine. Lee was once upon a time my supervisor at work in college, and she took me in as sort of an adopted daughter for dinners and tv watching nights with her family. While visiting Lee told stories of people she’s met who sounded in dire straights and she wanted to invite home, I thought, yep, sounds familiar! I was not in dire straights by any means but didn’t have much of a social life with not being a big party person back then, working a lot to pay my tuition, and taking too many classes and student teaching.
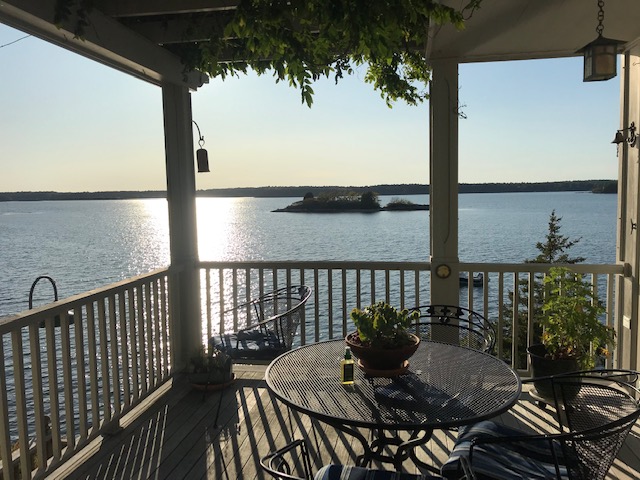
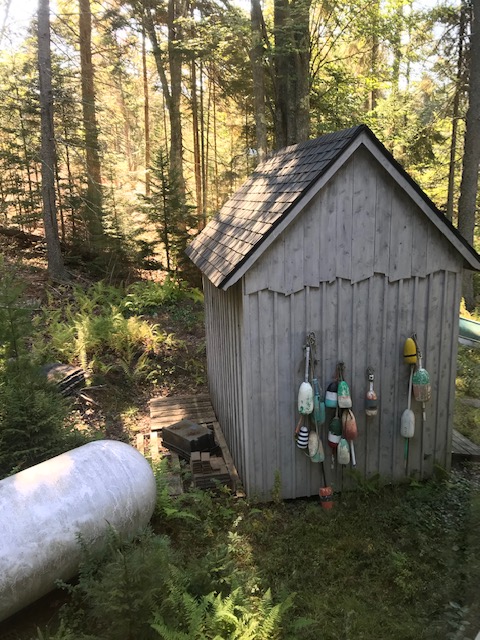
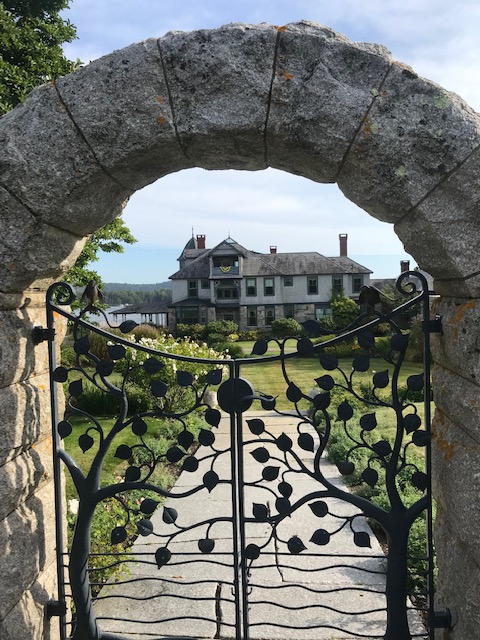
She and her husband found this fabulous spot on a peninsula north of Portland and renovated and build a small compound of cottages on the water. As was the case with their other home, this place is a design dream. Open, modern, and beautiful. I can’t say enough what a paradise they’ve created with just a little help from the gorgeous view. They even have a little lobster boat. They graciously let me stay for a few days and as usual, she fed me and made me feel like part of the family despite not seeing one another in years. A huge draw of this trip is to reconnect with people and my last 2 stops were a great start to this.
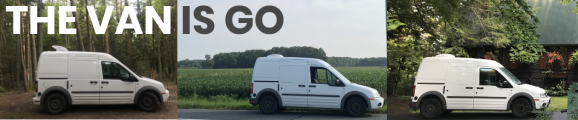
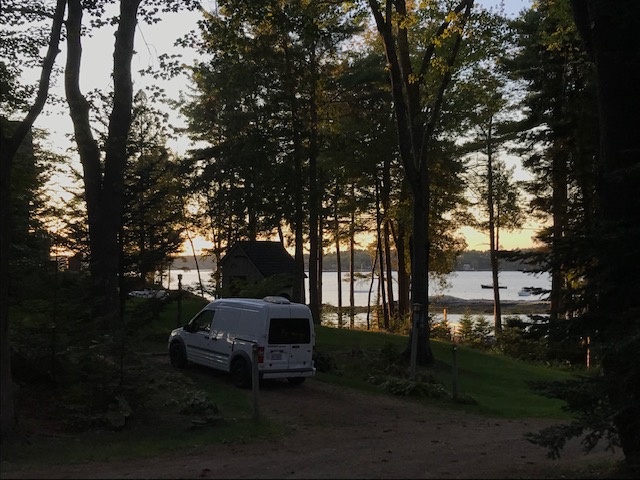
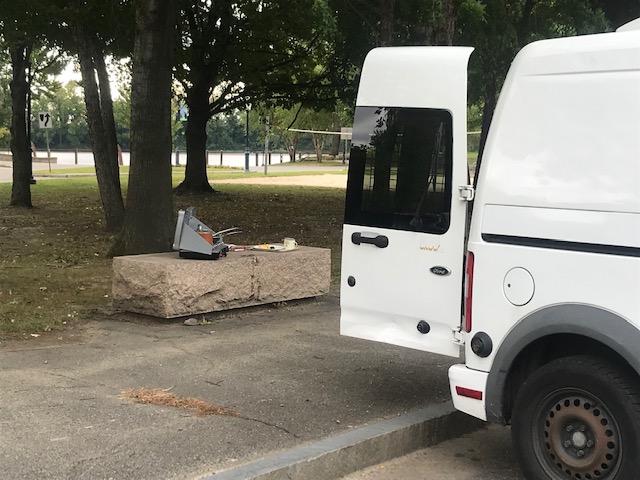
I spy a van down by the river
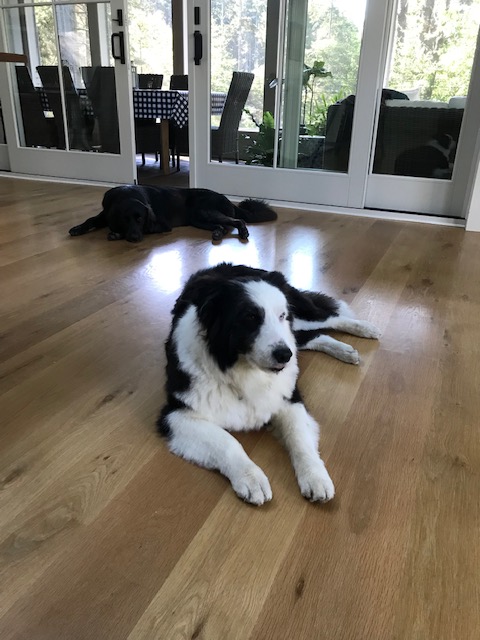
sweet doggos!
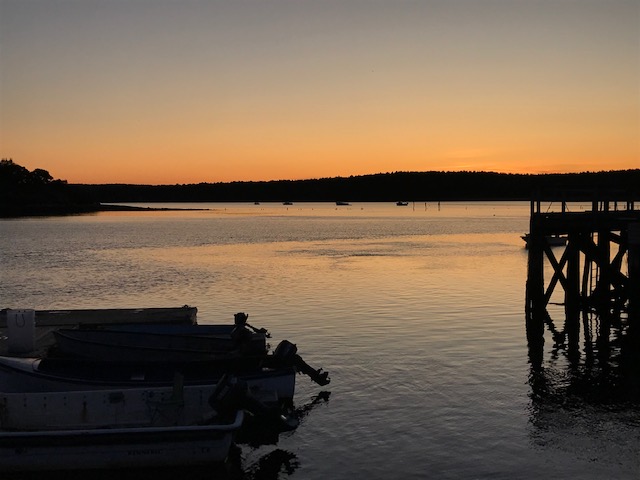
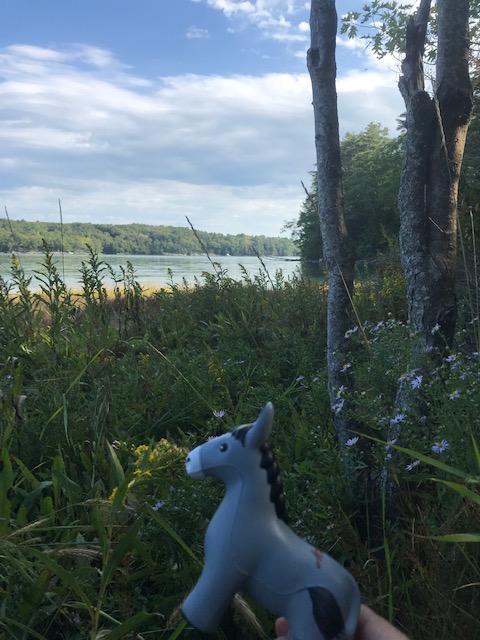
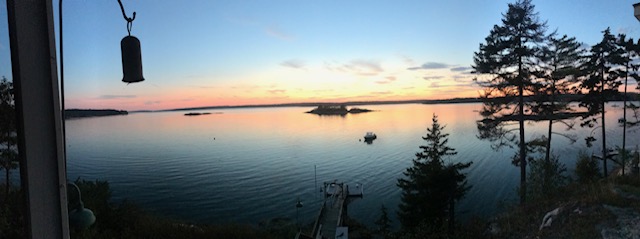
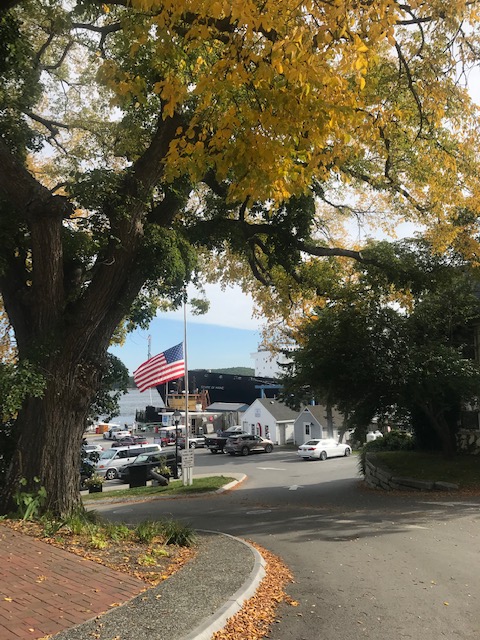
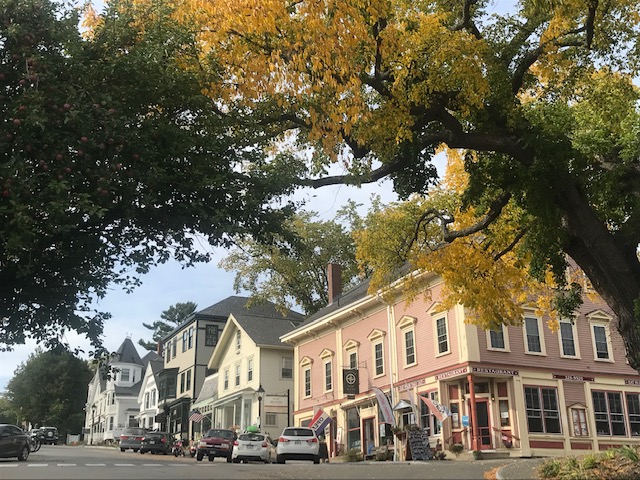
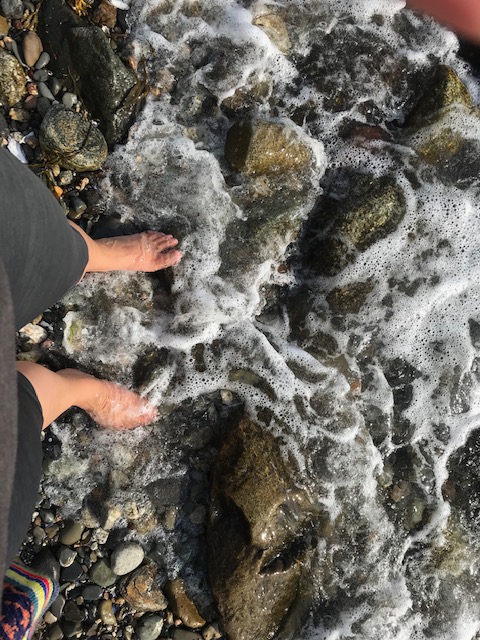
Anyway, Lee gave me the tour of the towns around which included some lovely views of old forts, expanses of pines, and magical sunsets over the water. The next day I wandered through the cute town of Boothbay Harbor (after my hours spent a tad waylaid) and had a nice walk through the woods in a nature preserve.
Steve bringing the boat in
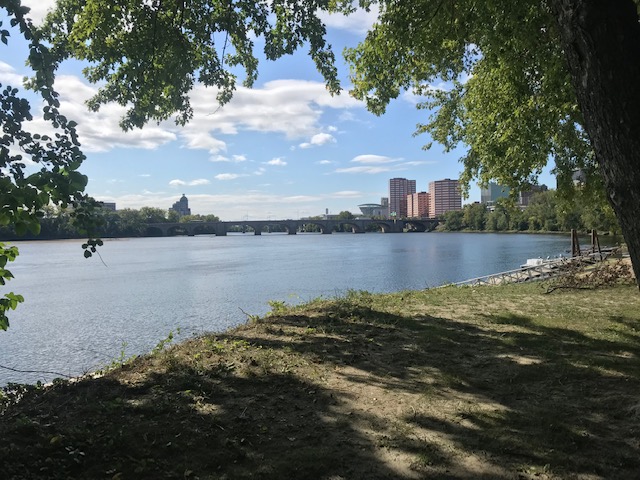
beautiful!
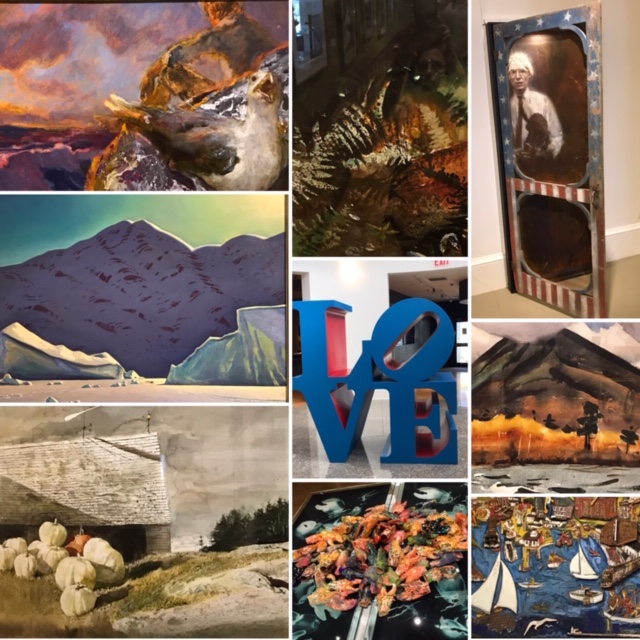
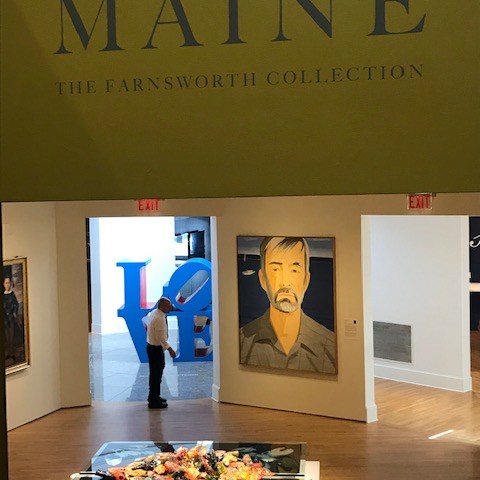
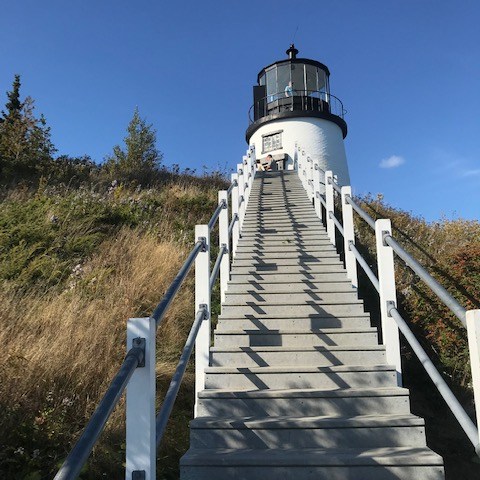
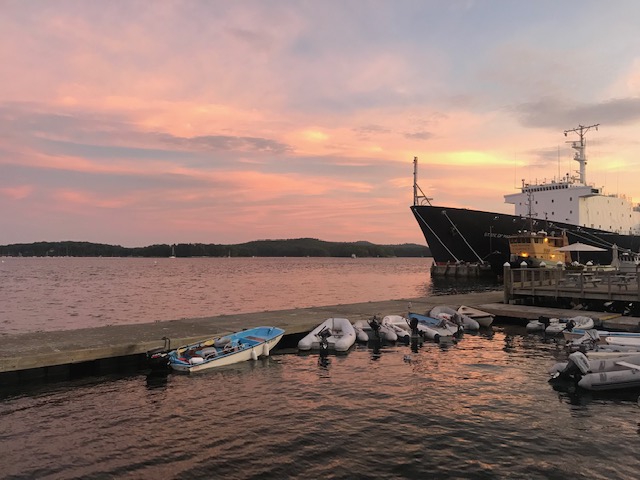
After this nice recharging visit it was onward up the coast to the city of Rockland, where I had hopes of taking the ferry over to Vinalhaven to see where Brockie drew so much inspiration for his paintings, but the fates weren’t with me on that, but I enjoyed my day in town just as much. I got to check out the Puffin Project visitor display (sadly not puffin season), see some great Wyeth family-heavy Maine art at the Farnsworth Museum (they really need some Brockie in there), and get some great food from a recommended cafe which I took out to the local Owl’s Head park and lighthouse for a picnic.
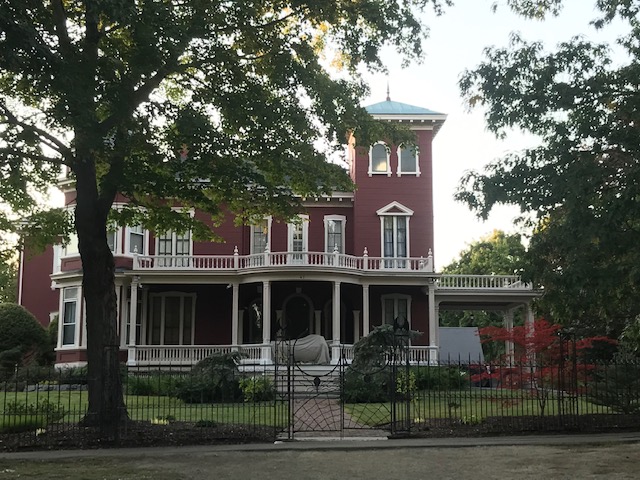
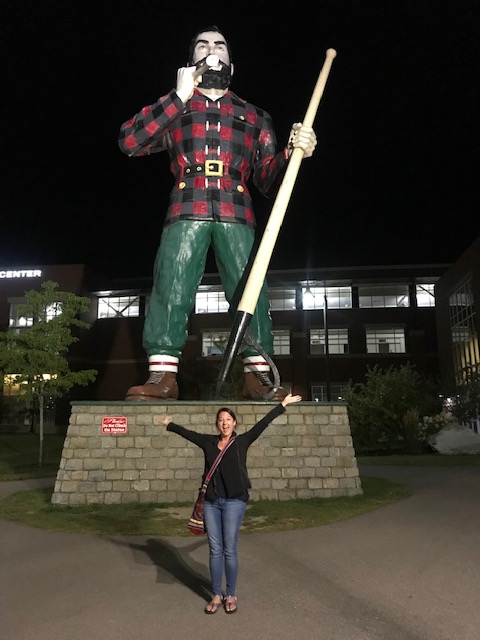
That evening continued on to Bangor, where I checked two tourosty roadside attractions off my list before spending a little while chatting with friendly locals at a hotel-adjacent brewery taproom. The first couple I met in the parking lot parked next to me and they were very intrigued by the van and offered to buy me a drink inside when they heard about my travels. Very kind, but the bartender rightly cut them off (but still got my free drink- score!) which they were none too pleased about, but after they left I chatted with another couple next to me who, coincidences abound, also have a Transit Connect they’ve turned into a camper. Of all the things!
Stephen King’s house
with cool gate details
Paul Bunyan!
These folks were super nice and we traded travel stories and compared vans- theirs sounds more practical and utilitarian (perhaps they’ve got the right idea since I’m guessing nothing is threatening to crash down in theirs) and have more stealth spot finding guts than I have yet. Sarah, one half the couple, kindly invited me to her free yoga class the next day which was a wonderful reset after the morning fixing up things in the van. Good van people vibes!
Later headed back to the coast to the town of Castine, which was beautiful but I also had the ulterior motive that one internet source mentioned that the overall character of this town was one of the influences for the fictional Cabot Cove of my beloved Murder, She Wrote fame. If Cabot Cove were a real place it would murder city, USA. Seriously. Like Cabot Cove, Castine dots the coast with white clapboard houses, manicured lawns, has a small but bustling dockyard, seems populated with mostly upper-middle class white folks, and is very proud of its local history. I mean there must have been a historical marker sign on every corner. Some more interesting than others… my favorite was one that stated the building formerly in this space was captured by the revolutionaries and promptly recaptured by the British the same day. Thrilling.
The town is home to the Maine Maritime Academy, and thus has a big boat and students practicing boat stuff and walking around in uniforms. I wandered the streets, admited the houses, walked through another nature preserve, and generally wondered what sort of murder Jessica Fletcher would uncover at each stop. Luckily zero actually occurred before yet another fantastic sunset (accompanied by a swarm of mosquitoes) ended my time in this picturesque spot.
As with most things in life, I thought I was good to go and learned early on that this was… less true than I imagined.
We had a fun set up and layout in the van from the building and planning, but once I was on the road I quickly discovered that reinforcement was sorely needed. My first stop after leaving Maryland was my parents’ house in Delaware where my dad helped me finish up some prep. This list now included adding better closures to the cabinets with doors because once I had loaded up the mounds of food I had left from my home life and didn’t want to waste, the heavy load flung the doors open and rolled all over the van floor on my way driving to the hardware store. Oops. Easily fixed though with some laches, grippy shelf liner, and an additional bungee cord.
oops.
Did some other last touch finishes like tacking up some wires, filling the cooler, gathering and culling items, finding space for all the books, and all that fun stuff.
All was well until a mere 3 or 4 days later. Driving down the highways was easy, but once I hit the potholes and bumps of Brooklyn streets, the construction zones here and there, and the gravel roads leading to my Maine destination my shelves were swinging more than they had been with each turn, and more rattles were getting my attention.
A quick check showed that the screws in one side of the shelves had come loose and were now squeaking against the wood of the cabinet. The weight of the cabinets and shelves had started to pull the wood base we created and secured to the van walls and floor away from the van wall. Some of the screws I’d put into headliner holes with plastic anchors were just hanging in by a thread. Oops.
oops
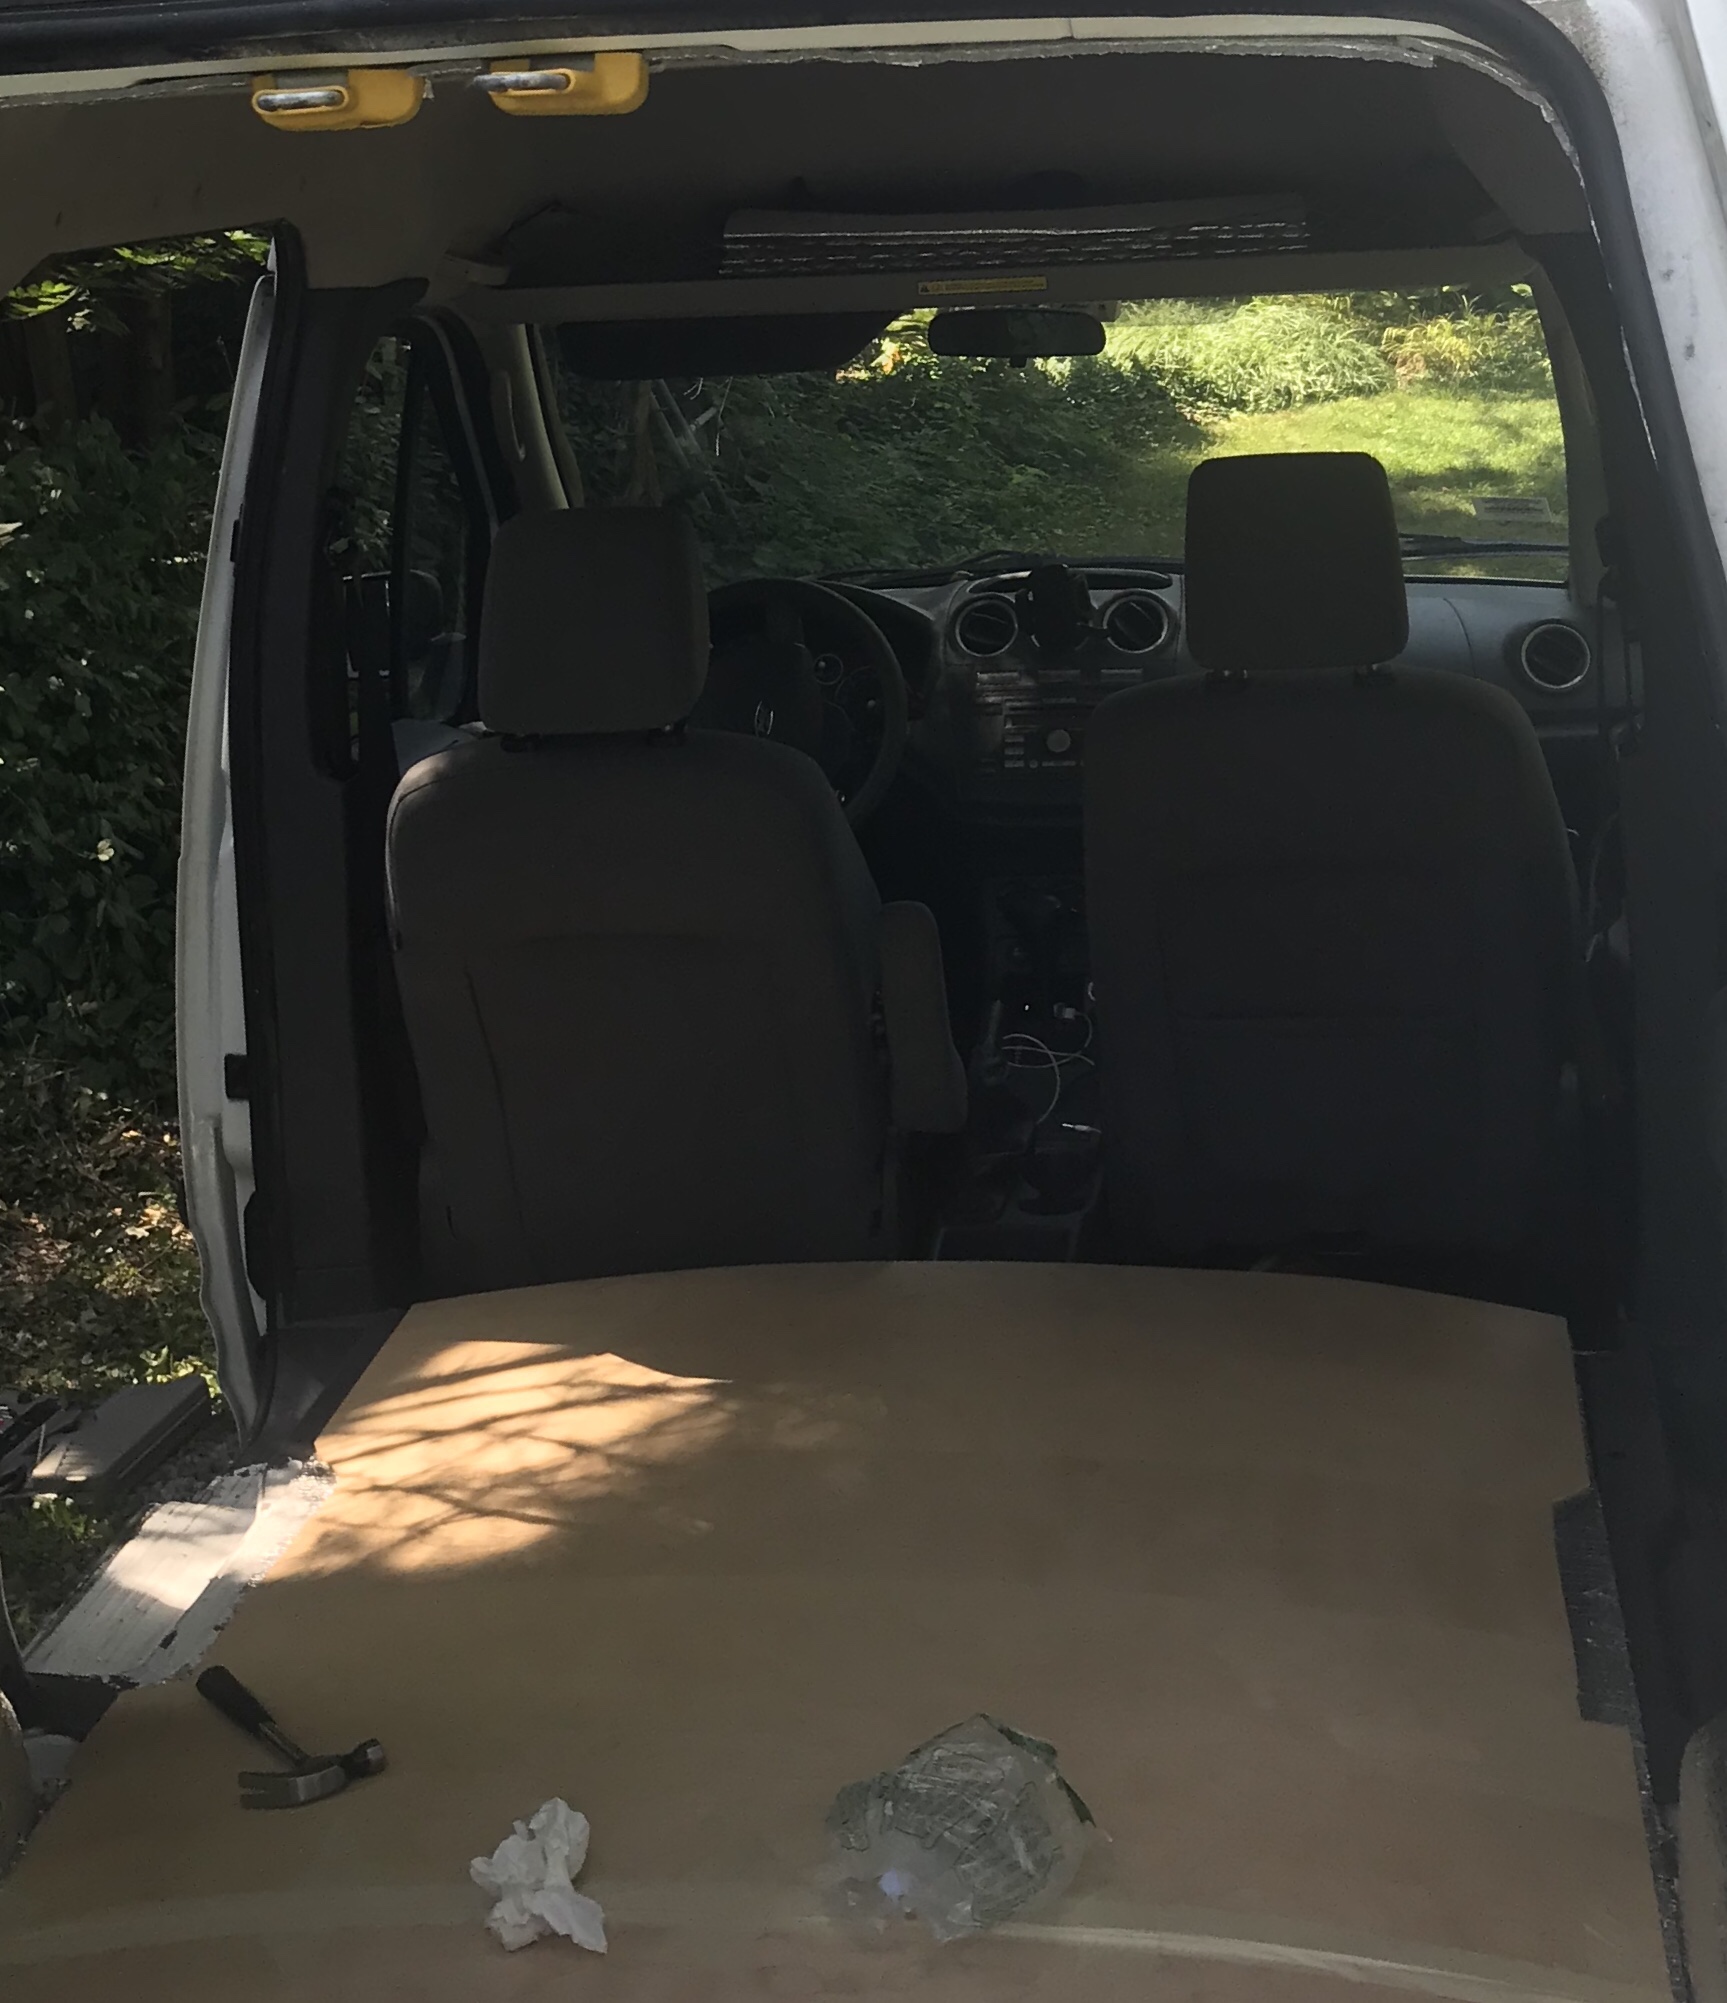
Made a trip to Home Depot and got more brackets, some butterfly anchors, and straps. Spent about 90 min adding more reinforcement to the shelving, tightening screws, hammering in anchors, and seeing what I could do in the time before I wanted to be somewhere. So far it’s holding up okay but I need a better long term solution once I’m back to real tools and some pieces I left behind to better anchor the tall shelves to the walls. A project for a rainy day perhaps.
Another factor which I’m sure didn’t help the state of things was… I may have gotten stuck in a ditch. By a graveyard. Oops.
oops
I overshot a trailhead and had a line of locals behind me playing parade as I tried to find a decent place to pull in and flip around. The first road I found was the drive going past a cemetery, so I pulled in and attempted a quick 3-point turn on a mostly level part of the road with wildflowers and weeds beside it. In doing so though the back tire got a little too close to the other edge and as I tried in vain to pull forward that stinking tire just pulled the whole backheavy thing down into a little ditch. No luck trying different wheel placement, sticking spare maps and boxes under the tires for traction, even tried putting a soft cooler and my floor mat under to try not to spin myself deeper into the soil and gravel, but zero luck. Couldn’t back up into a position I knew I’d be able to get out due to the cemetery fence.
So had to call my roadside assistance, which put me on hold… and hold… and hold… before informing me that all their contacts in the area were either too busy or not answering the phone. Great. The local police (who I called at the insurance roadside people’s suggestion) gave me the number of the service they use who picked up and said they’d have someone there within the hour. So much for everyone being too busy.
Finally he arrived with the tow truck and eventually after a few creative tried I was out- but not without him snagging the fence in the process under the wrathful watch of the man from the cemetery who conveniently appeared when the tow man did and showed zero interest for the two hours I’d been sitting there stuck. Oh well. Oops.
More adventures to come! And hopefully fewer ditches.
I didn’t stay long in Connecticut this trip, because I intend to come through for longer later on, but coming north from New York I stopped off for the night in Hartford and stayed at a Cabella’s lot, which was actually lovely and quiet and well organized. I’d never actually been inside one of these stores before, mainly because we don’t have any I’m aware of nearby my home, and I was overwhelmed at the range of outdoors products they offer. And the indoor waterfall and aquarium was crazy.
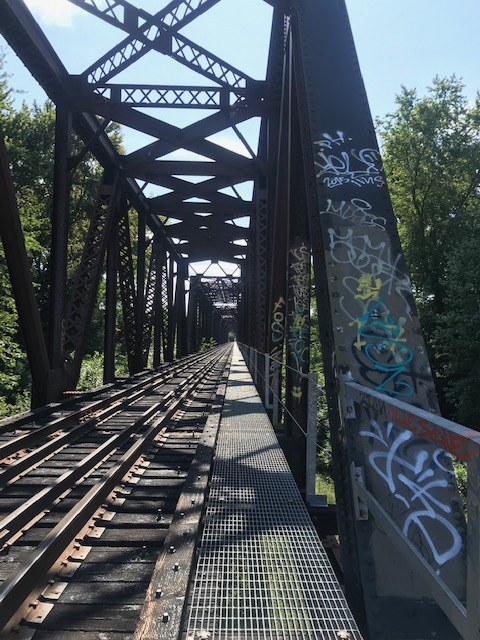
In the morning I found a park by the river on Google Maps and hoped it wasn’t sketchy. I’ve heard from many friends that Hartford has decent parts, bad parts, and worse parts, but hell if I know which are which. Riverside Park seemed very nice and clean and was almost empty when I arrived aside from a few dog walkers, rowers, and groundskeepers. Compared to the park I stopped in to look up directions while getting gas in Waterbury this was pretty stellar. Made some delicious eggs and tea, then took a walk along the river and watched a train go by rights as I was wondering ‘Hmm, could this still be active or is that part of the trail?’
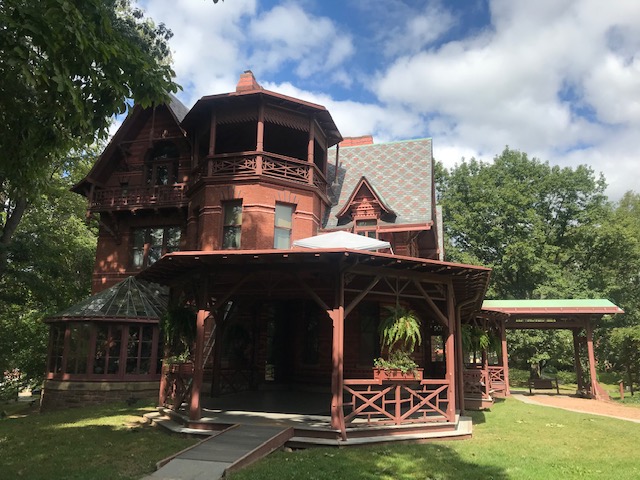
Visited the Mark Twain house after breakfast. They had some exhibits in the visitor center which told me more about Twain’s life than did the tour guide, but the real highlight was the house interior. No photos are allowed indoors but it is spectacularly designed. The exterior architecture captures Clemens beloved riverboats, and the interior features a plant room, the most beautiful bee wallpaper, Tiffany co. designed spaces, Arab inspired ceiling designs, and gorgeous, intentional details at every turn.
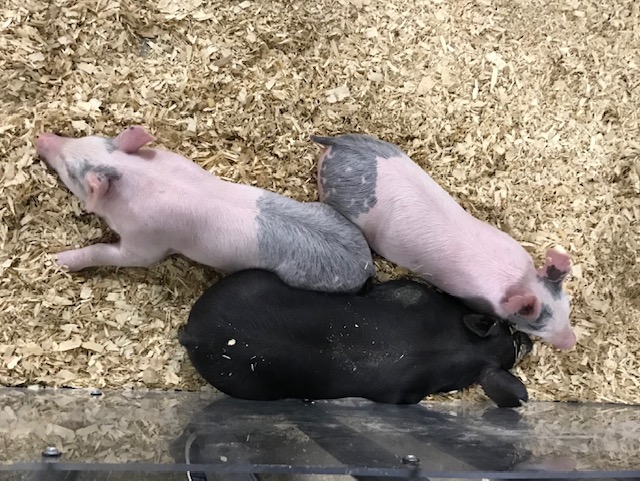
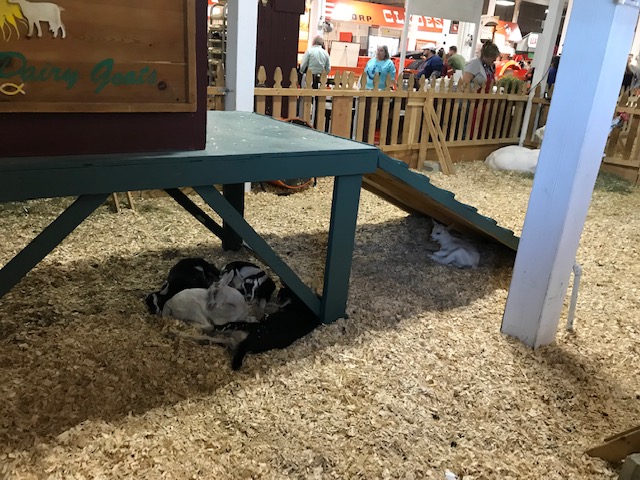
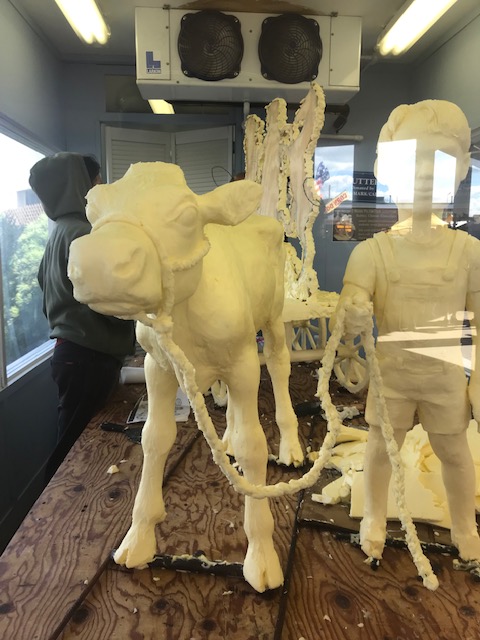
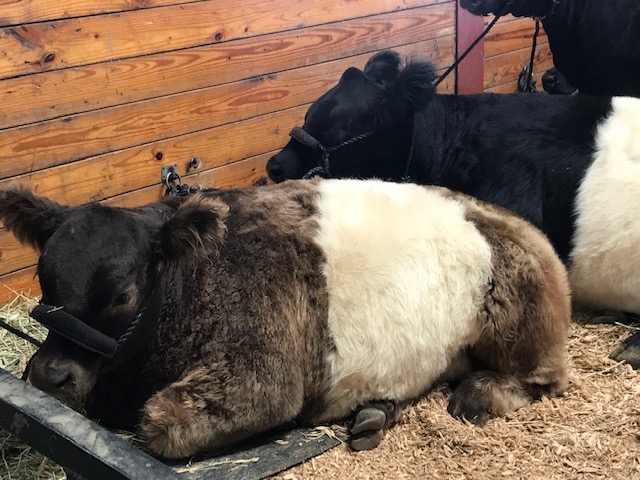
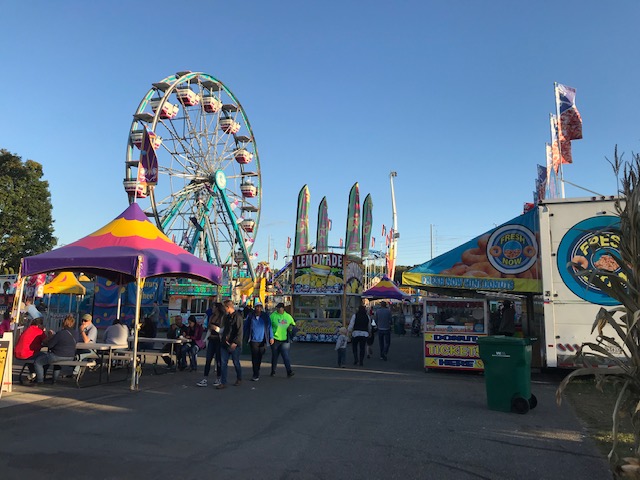
Later in the day I drove north to Springfield, MA to go to a giant agricultural fair named the Eastern States Exposition, but better known as the Big E. I’d been to the Big E years ago when my friend Pam’s parents still lived up there, so I decided I had to make her super jealous by going again now. It has the usual animal exhibits and competitions, adorable chicks hatching, fair rides, fried everything, games, etc. The thing that sets this fair apart is the building featuring local goods and foods from each of the New England states.
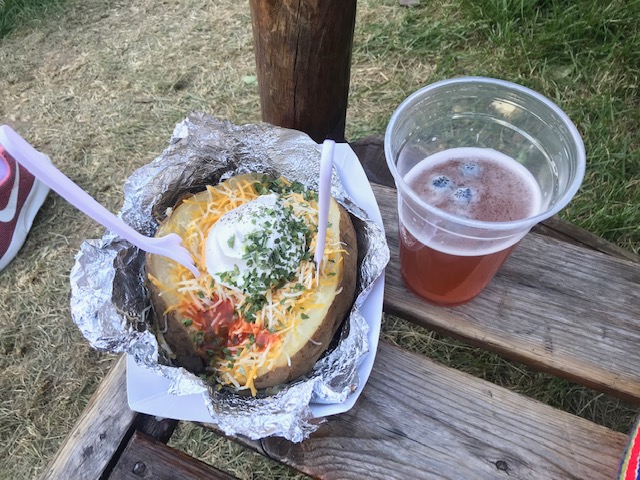
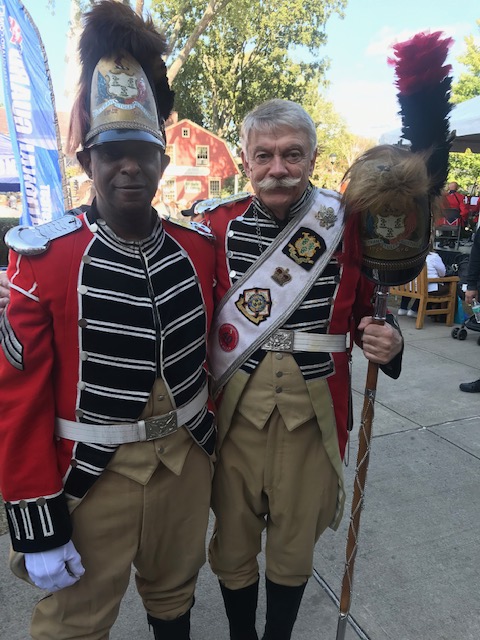
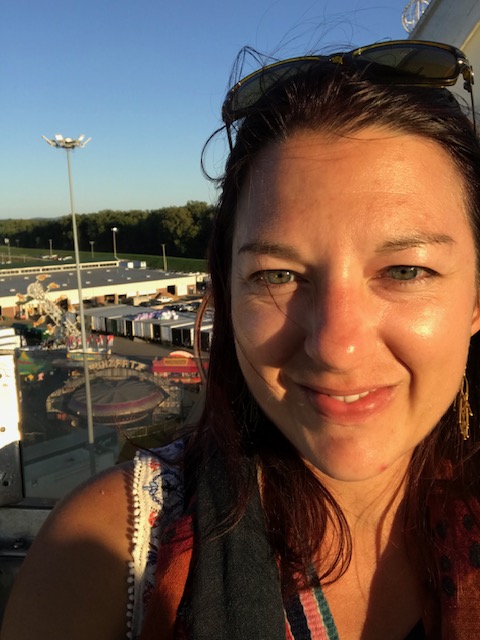
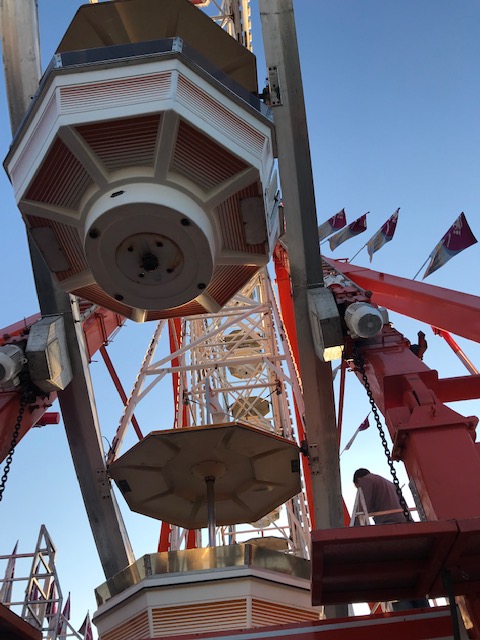
And man was it delicious. I spent pretty much the whole day eating free samples, and trying to decide which of the many state-specific fare to spend my limited budget and stomach space on. After much perusing I got some tiny doughnuts, a Maine baked potato and a blueberry beer from… New Hampshire? I don’t actually remember. But it was good. The day I visited happened to be Connecticut day, so there was a parade of Connecticut-y themed things and I chatted up some uniformed old dudes and learned more about Connecticut than I needed to from them, which I promptly forgot. I also got to watch a timbersports demo, and went on the Ferris Wheel solo. I did chat with many people who recommended food options and took photos for me, and sometimes hopped in.
That night an ex-DC friend graciously let me stay and showed me around his super bougie small town, complete with old white lady shoppes, a lacrosse store, and manicured ginormo homes. Pretty sweet place to grow up. I also got to wash out the grease stain on my jeans, a souvenir from my baked potato yumminess oozing out unexpectedly. Aside from getting to catch up with my rarely seen friend, this was the best gift of all.
The next morning, off through Mass and NH to Maine. Northward bound!
This was it. Aside from my test run trip and going to my parents’ house after packing up as much of my life as possible from Jane’s house, I finally hit the road on Monday, September 16, 2019. My general plan is to go north so I can come back south with the chilly weather, so I looked at a map halfway between where I was and wanted to go in the near future and an obvious choice came to the forefront of my mind.
In my newness to the #vanlife adventures and techniques, I relied on some apps to guide me in ensuring there would be likely decent overnight spot finding, and man if the northeast isn’t like a desert compared to the options where there’s less compacted urban centers. Oh well. While further north seemed daunting due to the paucity of options, there were many dots on my maps in Brooklyn of all places, so that decided for me.
I’ve been to New York City multiple times, but always Manhattan primarily. I’ve done the museums, Ellis Island, the big buildings… but there’s always something new to see. And good food to eat!
The drive north was smooth and I spent it listing to unlabeled cds from my giant cd book- you know, the kind that looks like a photo album and had a slot for the cd and the sleeve. What a dinosaur, I know, but let me tell you how much fun it has been rediscovering these homemade mix cds. Things I discovered:
I seem to have put the same songs sprinkled throughout different CDs, like maybe I thought ‘well what if I play this one and it’s not on there- what will I do?!? Better just repeat to be safe’. Not sure I need to hear that one Lifehouse song that was popular ever again now, but certainly it will pop up on at least one more mix
I thought I liked Incubus, and like 2 John Mayer songs a lot. Boy does that not hold up well
The most ridiculous ‘screams high school’ cd so far features Magic Stick to Britney Spears to Ludacris to Beyoncé circa 2003. It’s a gem. If anyone wants this magic, please let me know.
Bits of glass from a tree smushing your car plus rain water coming in the smushed windshield from that rainy day kind of ruin cds, so half the ones I try are straight error
I can tolerate a lot of skipping on a track but after 20 seconds straight I am ready to toss it into oncoming traffic (or the closest garbage bag)
Anyway, back to the trip. I easily found the street I was looking for and found free parking. The street was between two parks in the Williamsburg neighborhood, shaded and bustling with activity as schools let out and people enjoyed the lovely late summer weather.
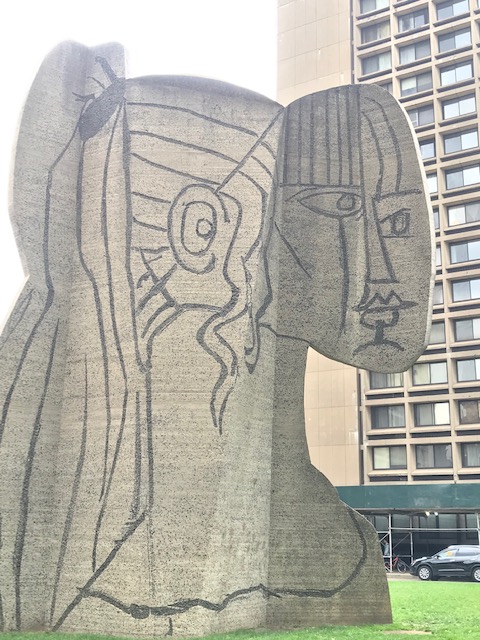
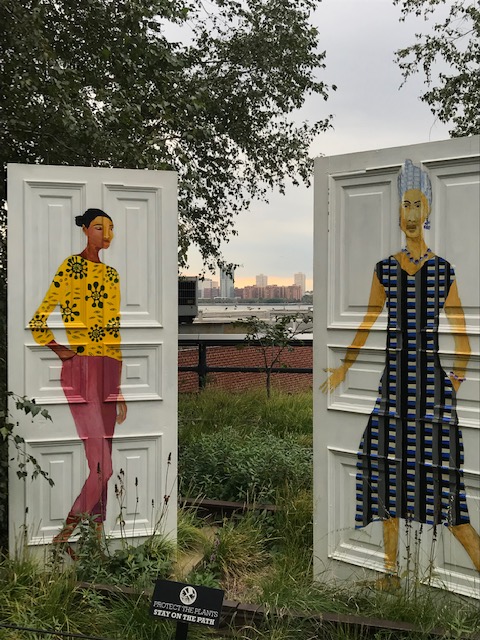
I popped on my sneakers and trekked across the Williamsburg Bridge, past many just opening restaurants I wanted to stop in but instead remembered I have a huge amount of food to eat before crossing the border, and made my way to the High Line. I’d heard about and seen photos of this relatively new elevated park revitalized old rail tracks running through Chelsea (or so says my map. I couldn’t identify neighborhoods to save my life). The juxtaposition of the delicate natural beauty of the gardens overlooking the graphic skyline and with occasional modern art pieces thrown in was fantastic.
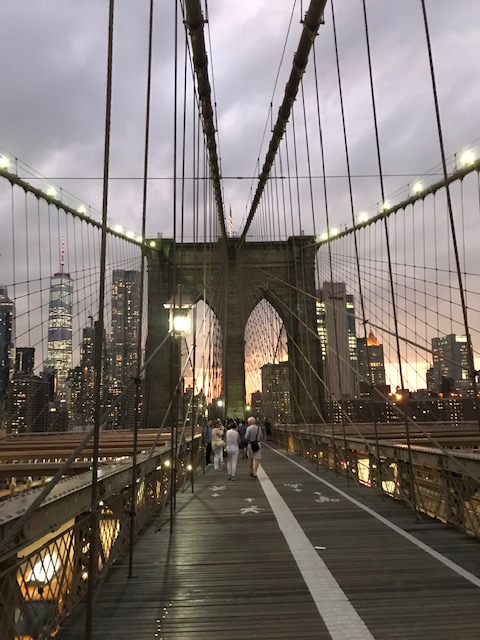
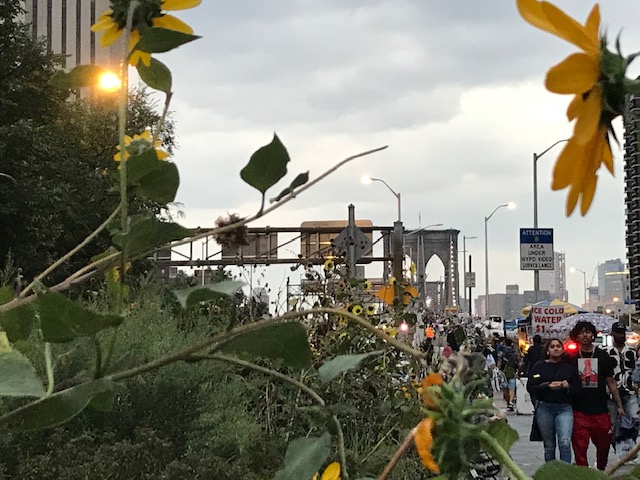
After ambling through the park and winding between hundreds of tourists (yes, I’m a tourist too but not going to stop for a full on photo shoot or argue over the map blocking the path) I made the long, drizzly walk back, hitting the Brooklyn Bridge right at sunset as planned. So so magical. A few couples taking their lives into their hands by posing on walls not meant for sitting but no one fell to their deaths while I was there. Took a water taxi back to the van, got my bed ready, then went for pizza. Sarah, a friend in the city, gave me food recs and man was she right on this one. I almost turned around for another slice at Paulie Gee’s but kept it together and went to bed.
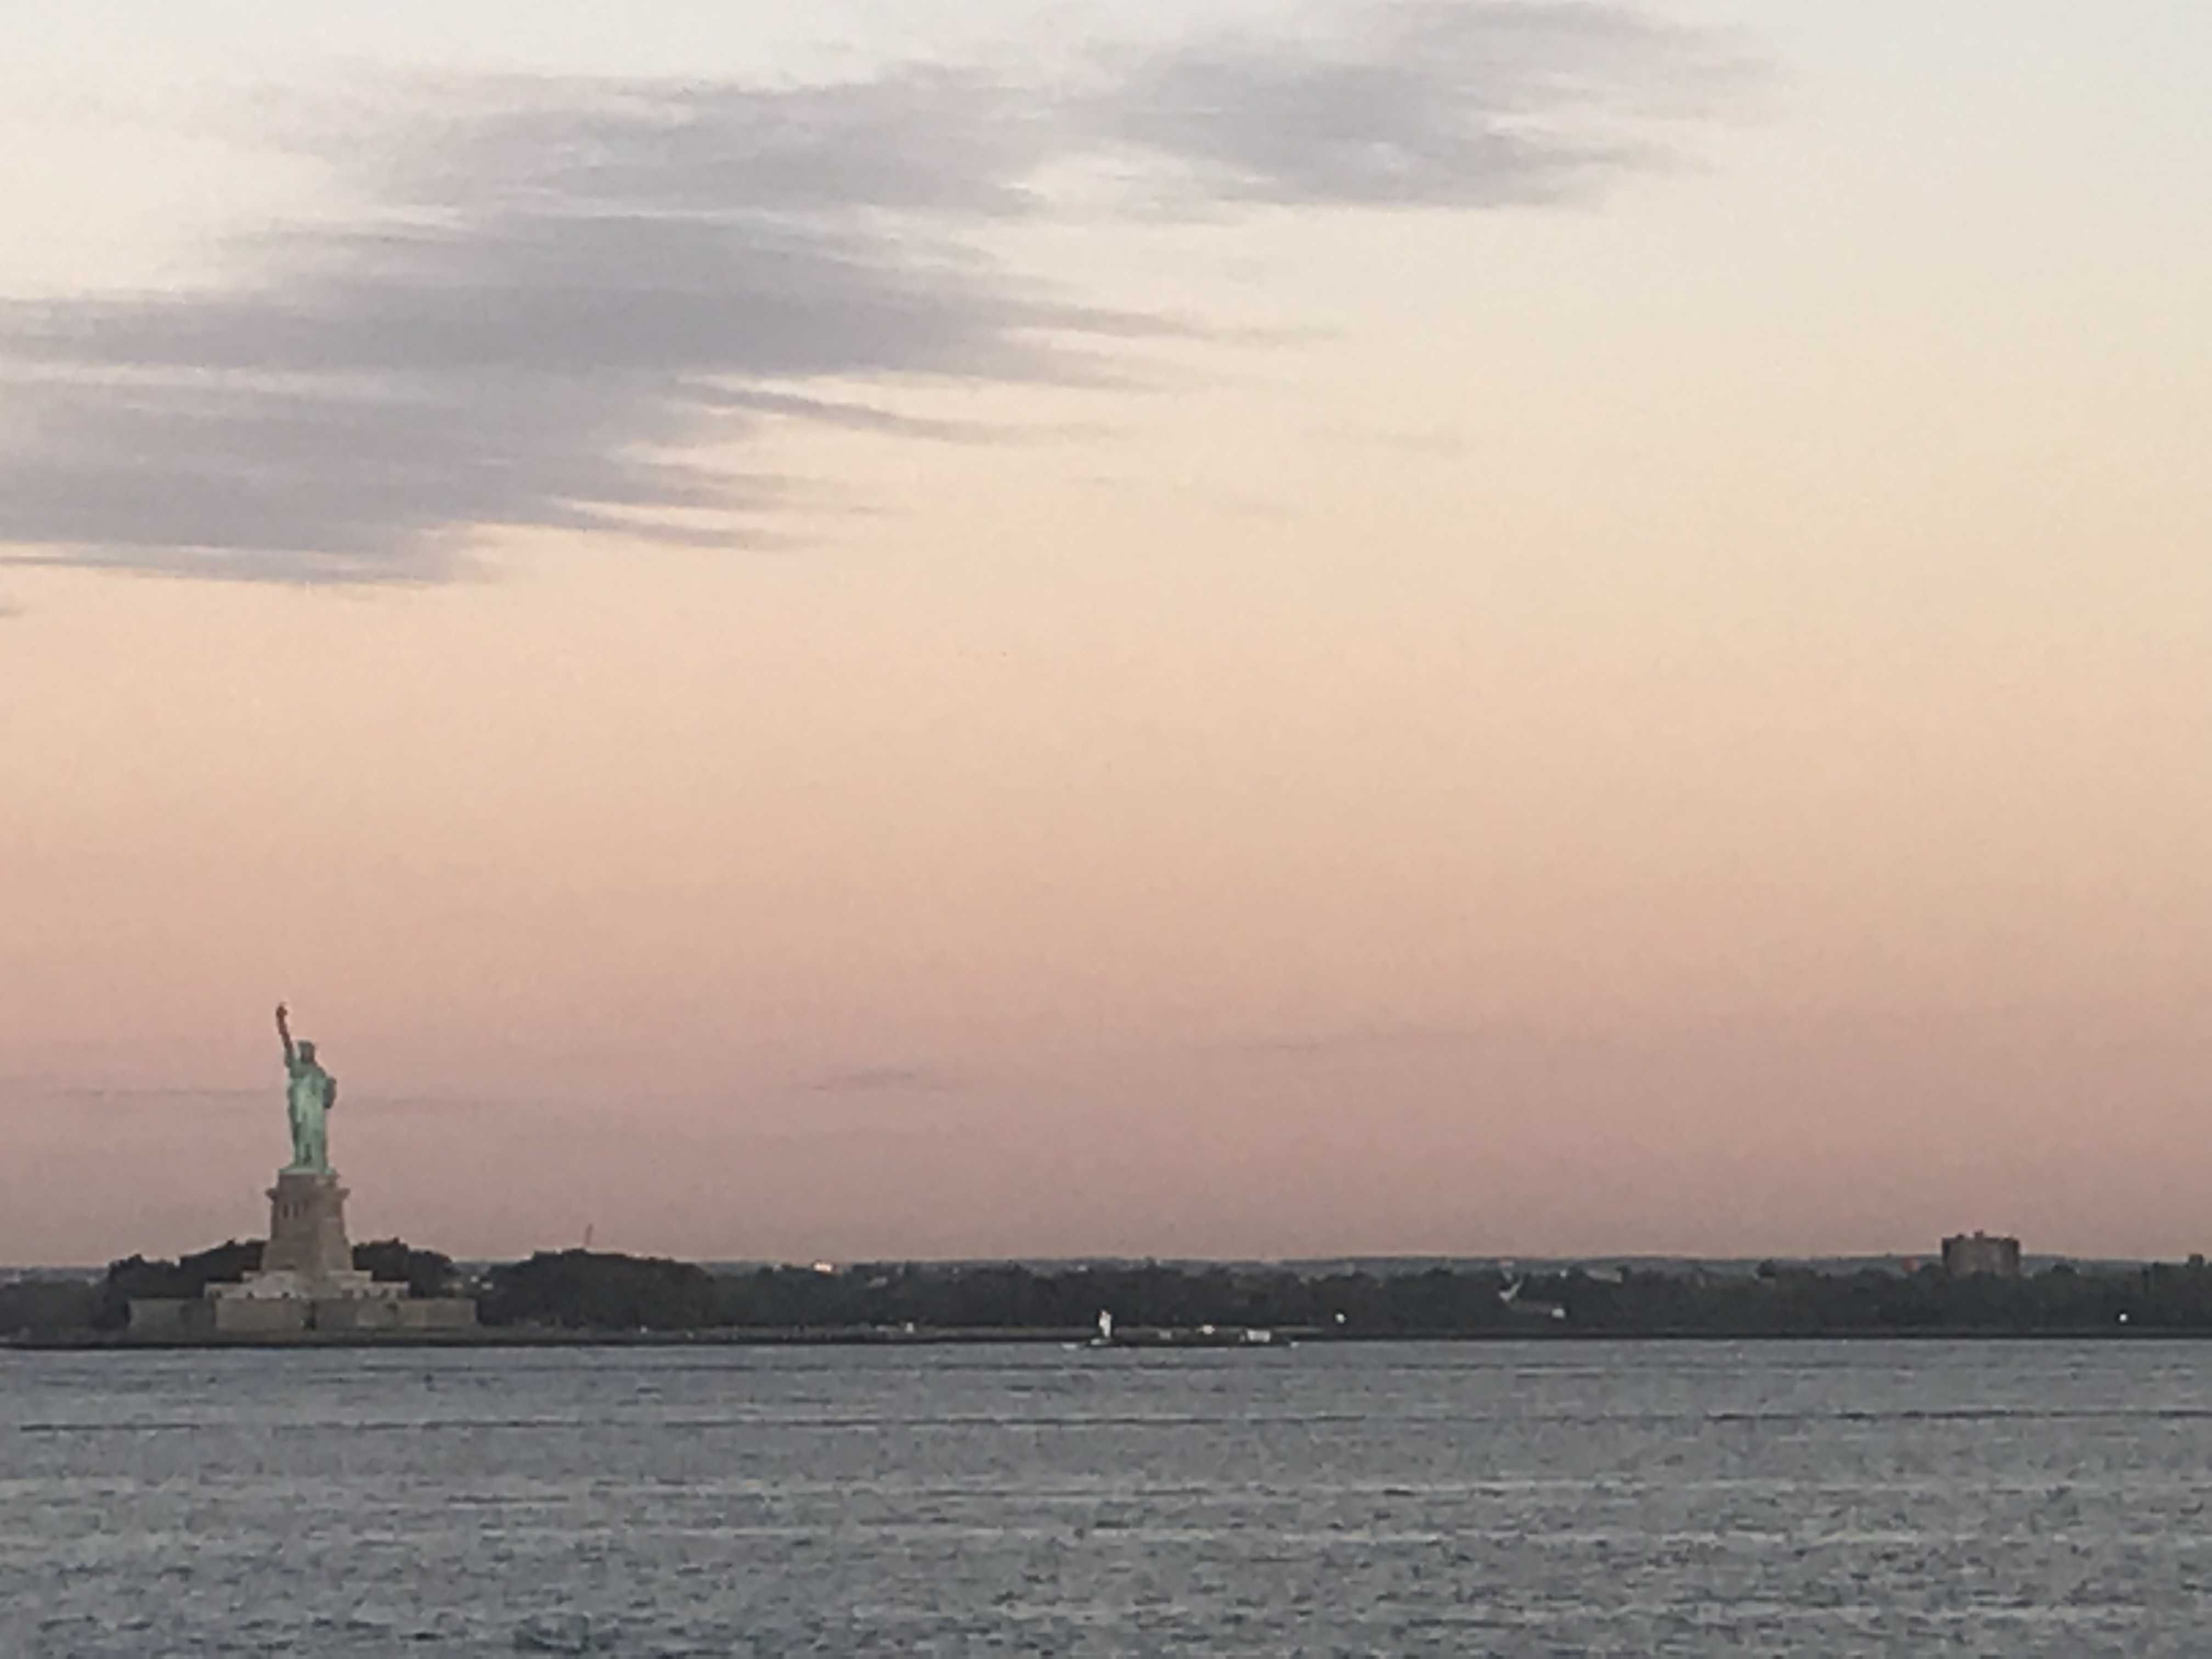
Woke up early in order to pack myself up and drive to the Valentino point pier for sunrise, and was treated to watching the skyline illuminate and lady liberty come into view from the darkness. Made some coffee after and battled traffic to the Brooklyn Botanic Garden. Looking for parking right when everyone is double parking to avoid street cleaning was not the best choice. I ended up just sitting in the street cleaning lane towards the end of the no parking time so I could move if need be it park as soon as 10am rolled around.
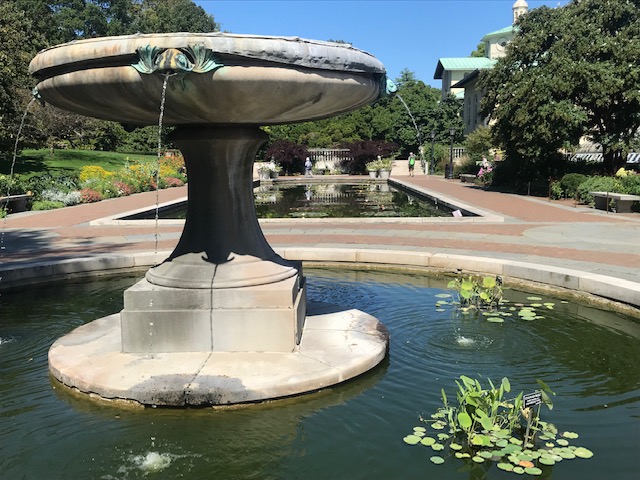
The gardens were typical botanic gardens, with a beautiful conservatory and nice tucked away thematic gardens, but the real highlight was the Japanese garden. A great way to end my visit to Brooklyn. Until next time, NYC!
I could have opted for a bucket or basin and a few gallon jugs of water, but to make the van really feel more like a tiny home on wheels rather than an extended camping trip I thought I should add a sink and ‘running’ water. Originally I decided to use a foot pump based on some online reviews, sites, and YouTube videos which mentioned that this system offered better control over the stream and volume of water, but once I’d ordered it and finalized the layout of the other furniture and stuff I realized that there really wasn’t any floor space available to have the pump, aside from maybe inside the cabinet, so that was kind of a bust. Oops.
So, plan B: install a hand pump to water tanks instead. I got three narrow water tanks that would fit inside my Ikea cabinet, one fresh water tank with tubing leading to the pump faucet, one tank to collect the drain yuckiness aka grey water, and one spare fresh water tank. I may add another in the future but for now going to try this set up.
I looked at a lot of sinks online and in stores, but almost all were too large for the 14″ square cabinet surface. The only option I could find online was a kind of dinky round RV sink that looked like someone took a cheap mixing bowl, drilled a drain hole in the middle, and charded $50 for it. Not my favorite. Again, online van people FTW. I found a video of some people who made an awesome sink setup using a wash basin which is the perfect size for the cabinet, but I hadn’t really considered because I didn’t think it would work, but lo and behold I followed the steps these people did and it worked perfectly (I mean, thus far, hope it holds up). I bonded a flexible drain to the underside of a wash basin really intended for dish washing in a sink using some great epoxy stuff, which felt like a badass science experiment I don’t understand.
Bonding drain to sink basin
Jane and I worked on a few sink plans, and figured we’d have to cut a rounded square for the basin to fit into leaving about an inch above the surface level, but that didn’t leave quite enough room for the faucet to fit fully and be attached down. My first though was that we could cut a small section of the basin away in that inch sticking up over the top to allow the faucet to fit in, but that didn’t quite work because the hose and intake below needed room, too. We cut it out further to see if we could make it work but the cut was too deep in order to fit the sink mechanism to really function while washing dishes. Womp womp. We ordered another basin and started again after Jane had an epiphany and added a backing to extend the sink counter surface. Obvious, so of course it never occured to me. Thanks Jane’s design mind!
Getting the sink cut just right
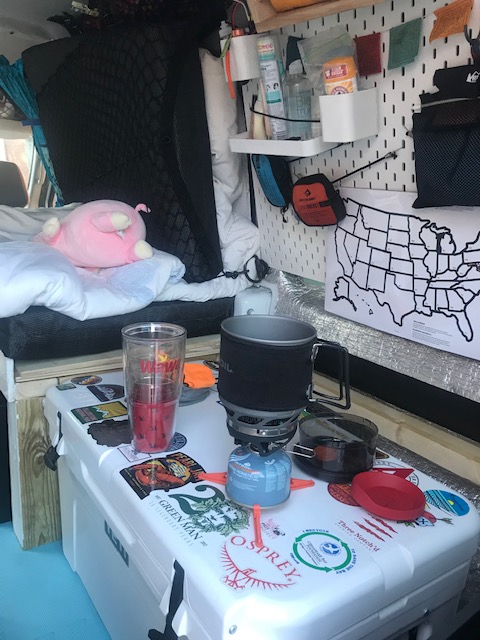
Jane did the cuts for the sink basin, faucet, and hose, and my dad helped me attach the intake hose and drilled the right size holes for the drain and the intake into the lids of two of the water tanks to attach everything, and screw down the hand pump. My mom cleaned the tanks for me, we filled them up, and it works! The first time I tried it the force of the water flow was surprisingly string and sprayed all over me out of the sink, but with a little practice all was well. As long as I can find refill stations occasionally I hope it all functions properly and I’ll be able to roll over in bed, brush my teeth, get a drink, or whatever without leaving the van.
Sleep was not always my favorite. My mother tells me that as a baby I tried my hardest not to sleep, not to nap, not to close my eyes because I didn’t want to miss anything. In retrospect the earliest sign of my major FOMO in alleged adulthood. But now sleep is THE BEST! Reading in bed, rainy day naps, collapsing exhausted after herding 3 year olds and realizing it is only 8pm but you can skip dinner and go to bed early because you’re a grown up and how sad is it that this made me so happy…. Anyway, figuring out a bed situation was a high priority.
Designing the Bed
As you can tell, I am a major social media stalker of other people’s awesome van and travel ideas. I must have looked at thousands of configurations and setups, some picture perfect and some reflecting reality, but not many in my actual van model. I stole the best ideas from the ones I saw that I could fit in my space constraints and fathom actually finding a way to recreate without professional help. Lucky for me, I actually have semi-professional help in that my godmother who is my project angel was once a woodworker, but still with me assisting it couldn’t be tooooo crazy.
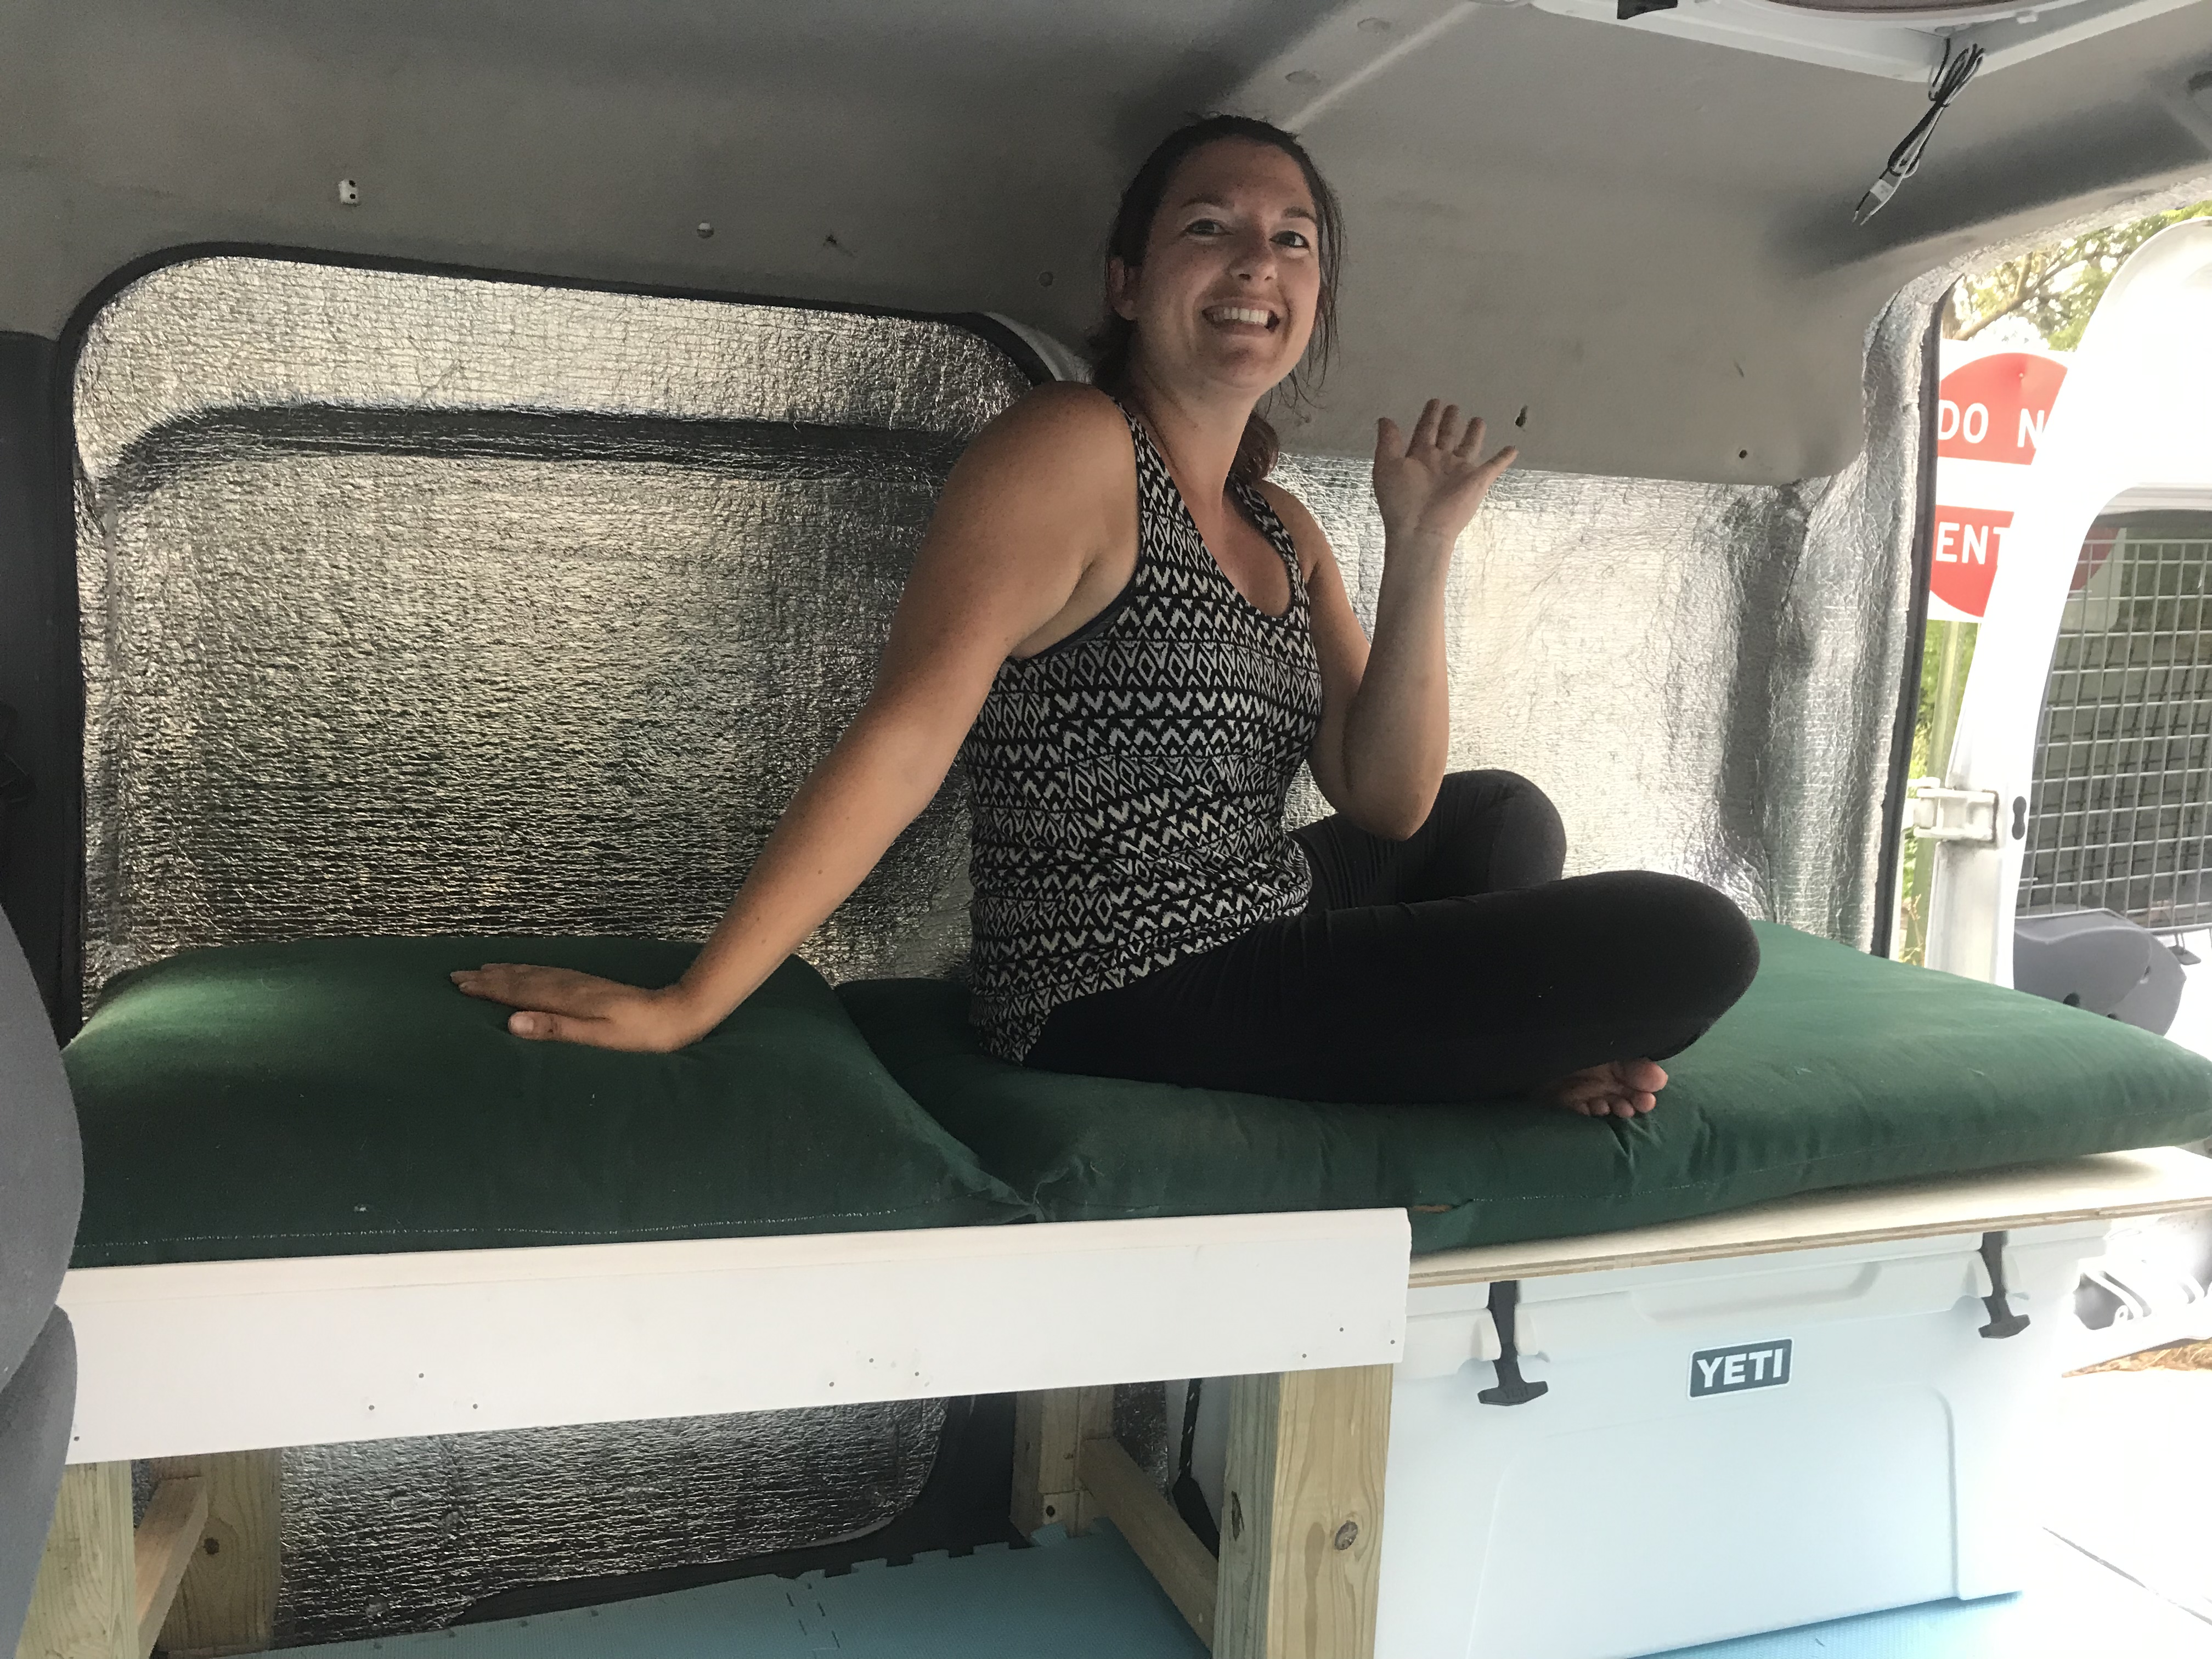
Based on some hardcore graph paper modeling, we decided upon a design which converts the bed into a seat by day, and uses my massive cooler in the support structure by night. This way in the day time, I have two cushions making a little sofa seat and can access my cooler and have more prep space, then in the evenings just pull a sheet of plywood out from under the seat, place it over the cooler on the bed frame outline, and put the back cushion down to make a bed. What magic!
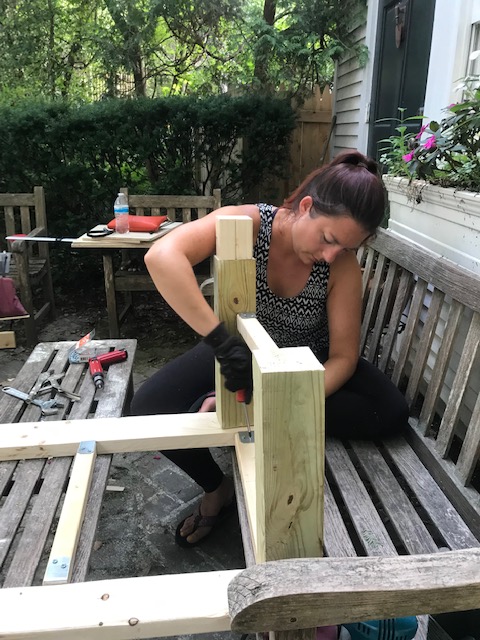
Building the Frame
The couple who sold me the van had already made custom bed frame pieces, but covering the whole interior which wouldn’t be super practical for me and my setup. I passed on the old mattress, took out the cross beams, but used the edge pieces of the frame in our new design. We cut down a few support beams, and used this to make a half-length bed frame with the back edge extending behind the cooler to the end of the van.
Original bed- I needed more versatility
We had to cut an indent in the frame to allow the cooler to open, and left the other end of the frame open around the cooler so I can get into it more easily and access the tab locks. We also left the back edge open so I can pull the cooler out to add ice or drain more easily.
For the base we just got a sheet of 1/2″ plywood and cut it in half to the correct dimensions, and sanded the hell out of it so the two pieces would slide rather than grate when moving, and to avoid splinters. On the permanent half we also added an edging of molding to keep the cushion and wood from sliding and shifting.
repurposing pieces of the old bed
The frame supports fit pretty snugly into the sliding door step. All together he bed is 66″x24″, with space under the bed for storage. Long enough to lie down straight when the passenger seat is pushed up some.
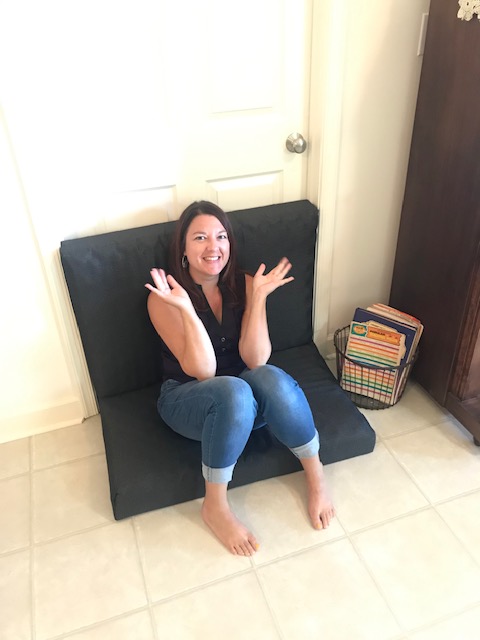
Finished bed with a patio cushion to test it out
Cushion Time
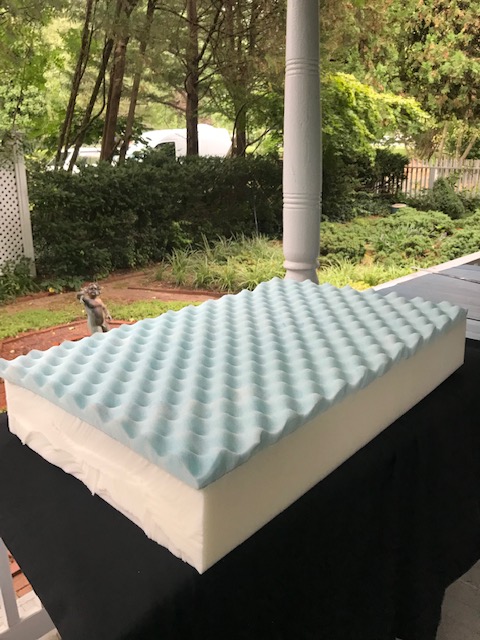
I ordered a roll of upholstery foam online, opting for 5″ because many reviews and info stated that the foam compresses with weight, so I figured I should go bigger in case. I also got a roll of memory foam mattress topper to make it extra comfy. They arrived, I let them expand from packing compression, and aired out a little of that chemical smell, then chopped the foam in half to match the size of the plywood sheets. I did the same to the memory foam, cutting it to size and using spray adhesive to attach the layers. Fun fact: a bread knife is killer on foam.
Now me being me, I of course overlooked an important detail. Once I placed the foam in the van, it was too tall to sit on without my head tilting against the ceiling. That nice, cushy 6.5″ of padding was a little too padded. Aside from the (important to me) issue of not being able to sit up, I also couldn’t fit the 2nd cushion on top as a chair back due to the height and the sloped roof of the van. Oops. I didn’t test it for a super long time but man if that foam did not compress one bit under my not so tiny weight. Well done foam, and nice trick review liars.
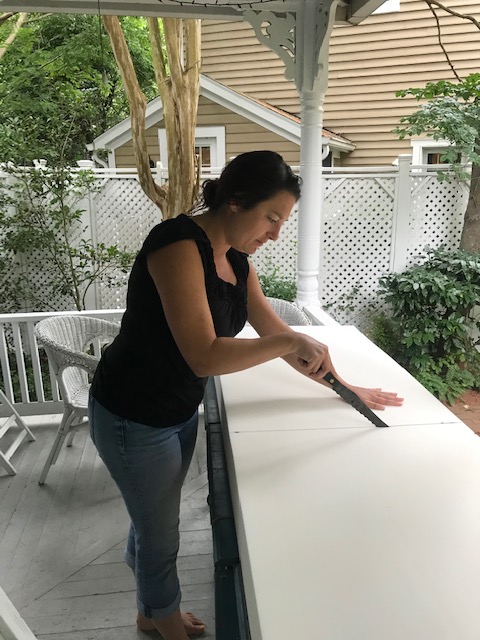
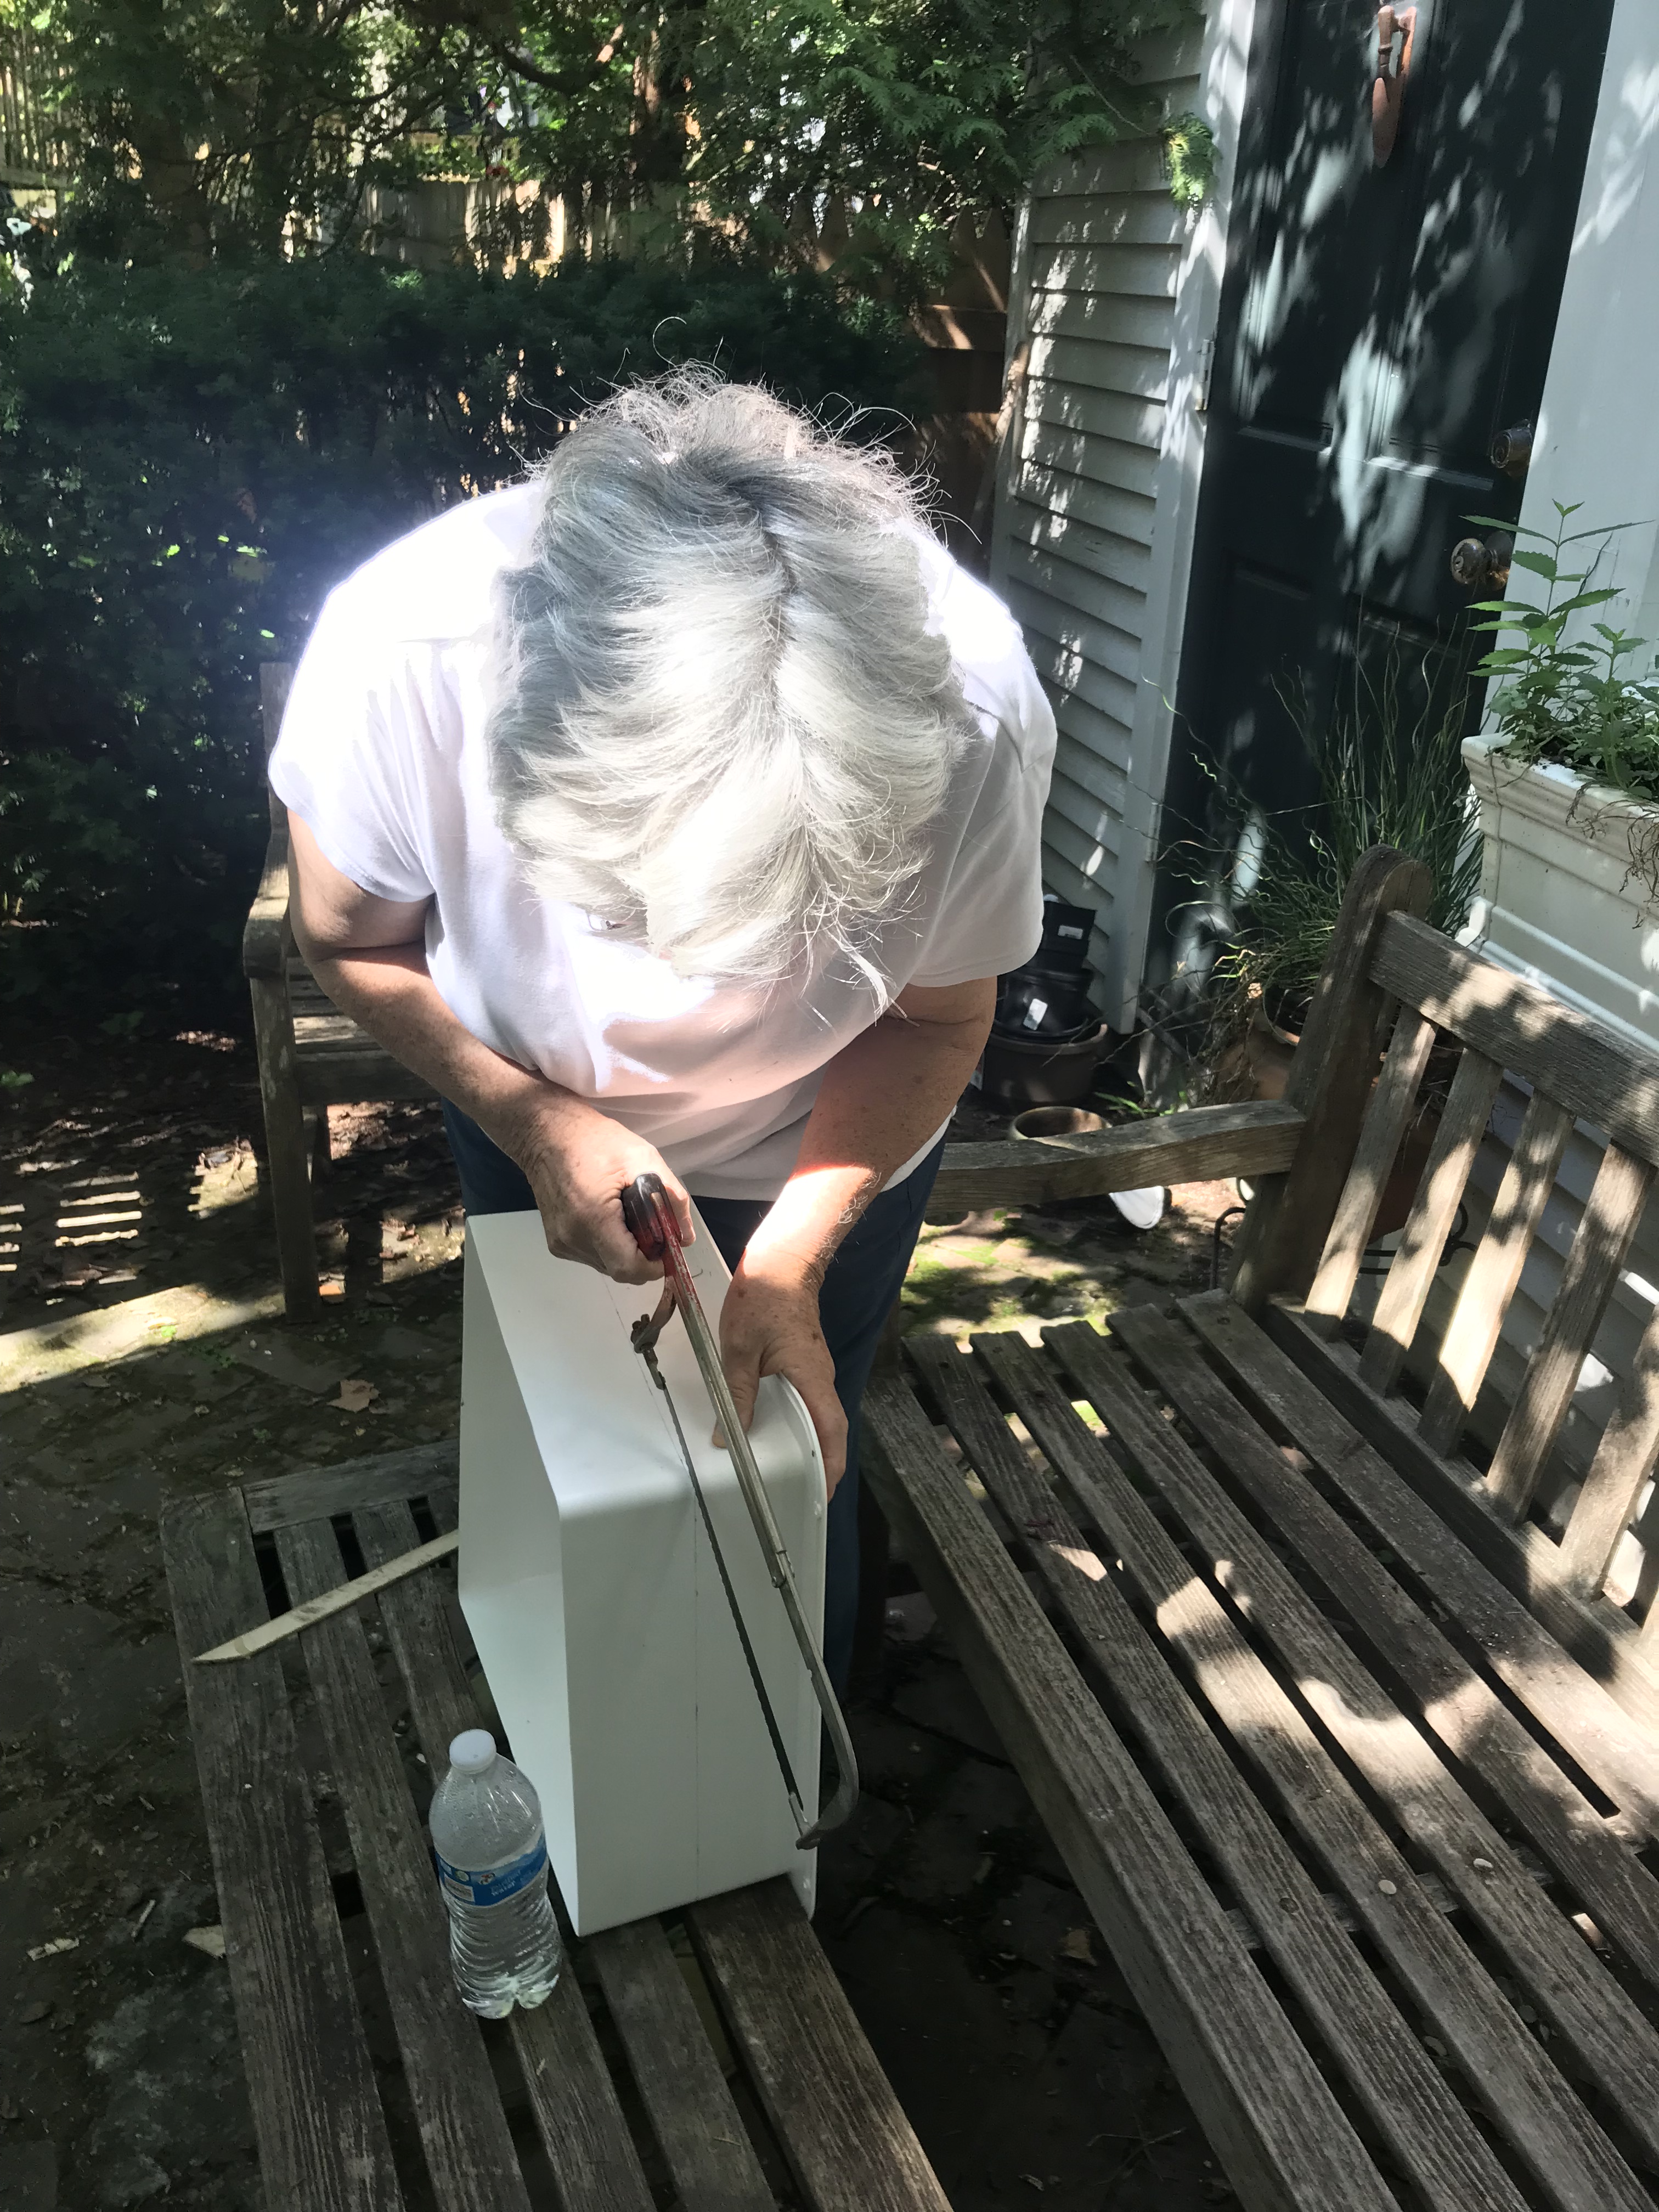
So, rather than do what I probably should have and just ordered smaller foam, I went the stingy route and decided to try cutting it down. I mean, I paid for it, and can’t return it since I’d already cut it in half, so why not try. Fun fact 2: a bread knife is way too short to get an even cut horizontally on this foam, but a saw worked okay. Yep, I sawed that craziness down 1.5″ by having Jane hold it still while I cut (one direction only- no clue why that worked better) across trying to keep straight to the line we drew around the whole thing. I *wish* we took a picture of this circus but we both had our hands full. The saw made a cool wave pattern, but that’s not really here nor there.
Fast forward ahead- better fitting cushions! Upside is of course that I can sit without my head smushing the ceiling. Downside is that in cutting it must have changed the structural integrity of the foam because now that damn thing does compress down as described. Also now that it’s shorter the molding edge kind of hits my legs while sitting.
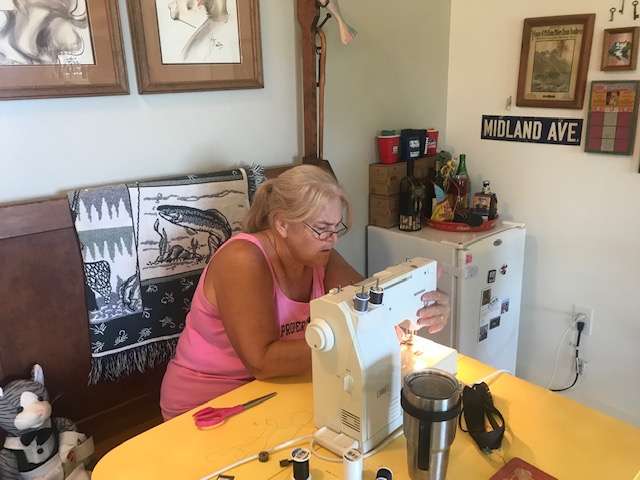
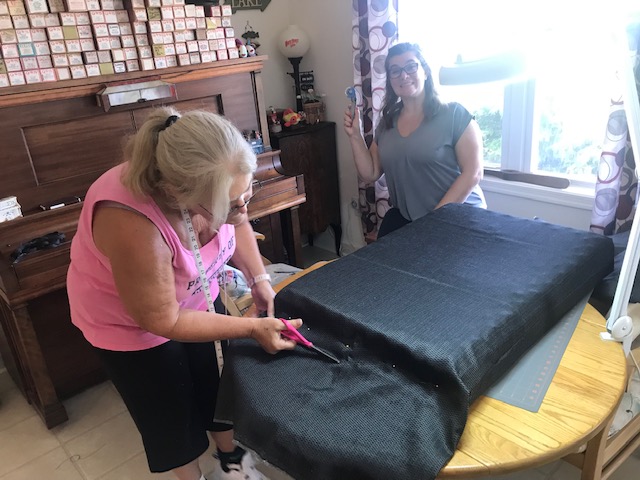
My friend’s mother graciously agreed to help me sew cushion covers, and by help I mean she supplied the fabric and basically did it while I watched in awe and then extremely inexpertly sewed a few inches of a seam. It’s 100% obvious which parts she did versus my ‘looks like a 12 year old’s home ec project’ part. Luckily it’s 95% her and looks great. Comfy! Thanks Julie & Pam!
If I’m going to live in the van, I suppose I need some furniture in there to make it feel like home and hold all my stuff. First of all, I had no clue how to attach anything to the sides of the van. I know it can be done, I mean work vans have shelves built in and all, so I figured we’d find a way. This was a problem for future Mary.
Surprising, I know, but less work sounds nice to me unless there’s a real benefit to more work. This translates to seeing if there’s any prefab stuff that would fit, so a trip to IKEA! I have a love/hate relationship with IKEA.
Love:
The food! Free coffee that magically tastes like melted coffee ice cream with my perfected balance of add ins? Giant breakfast for less than $5? Making a meal of kids’ sides? That yummy jam? What’s not to love.
The stuff! Wandering through IKEA is one giant impulse buy waiting to happen. People hate on IKEA but all my stuff from there has held up just fine for a decade thank you very much. It all goes together, too, so one less thing to worry about.
Putting stuff together! I don’t mind assembling. It’s easy for the most part. and makes me feel accomplished in a short period of time. I admit it’s crazy to disassemble, but I wouldn’t even know where to start if I needed to take apart something of higher quality so what’s the difference.
The price! So affordable.
Hate:
The people. Oh my god the people. Standing in the aisles, not moving, blocking everything, children running everywhere…, That said, the people watching is gold. Witnessing from close but far enough the demise of a relationship due to IKEA induced argument is like a free movie.
Anyway, we went first thing on a Saturday morning, and it was Jane’s very first time at IKEA. Prepare to be amazed. We had breakfast in the restaurant so we were inside when the store opened and before too many people. We wandered the aisles, measured, pondered and planned and ended up with some cabinets, peg board, and other odds and ends.
We took them all home, I assembles them all, and discovered that one cabinet wouldn’t actually work due to the curve of the van but most of the rest is a good fit. We attached a bunch of cubes together and added some extra screws to make it more stable.
We modified a piece of the original bed frame that came with the van to create an anchor for the furniture. We attached the wood frame to the van floor with brackets to a bolt in the floor and to the subfloor, and then attached the cabinets to the wood frame with more brackets.
Jane graciously built some shelves to go above the cubes using some leftover wood, and shaped the edges to fit the curve of the ceiling. She’s a master. It fits snuggly and adds to the stability and will hold so much more stuff. I think I’ll be able to hang some things behind the backing or shove some things to store in the gap between the wall and the shelves.
building prep
all the anchors and attachments behind
we have shelves!
Going to try to make the last taller cabinet from IKEA into a sink, and build a fold out table on the side of the cabinet by the sliding door, as well. It’s coming together!
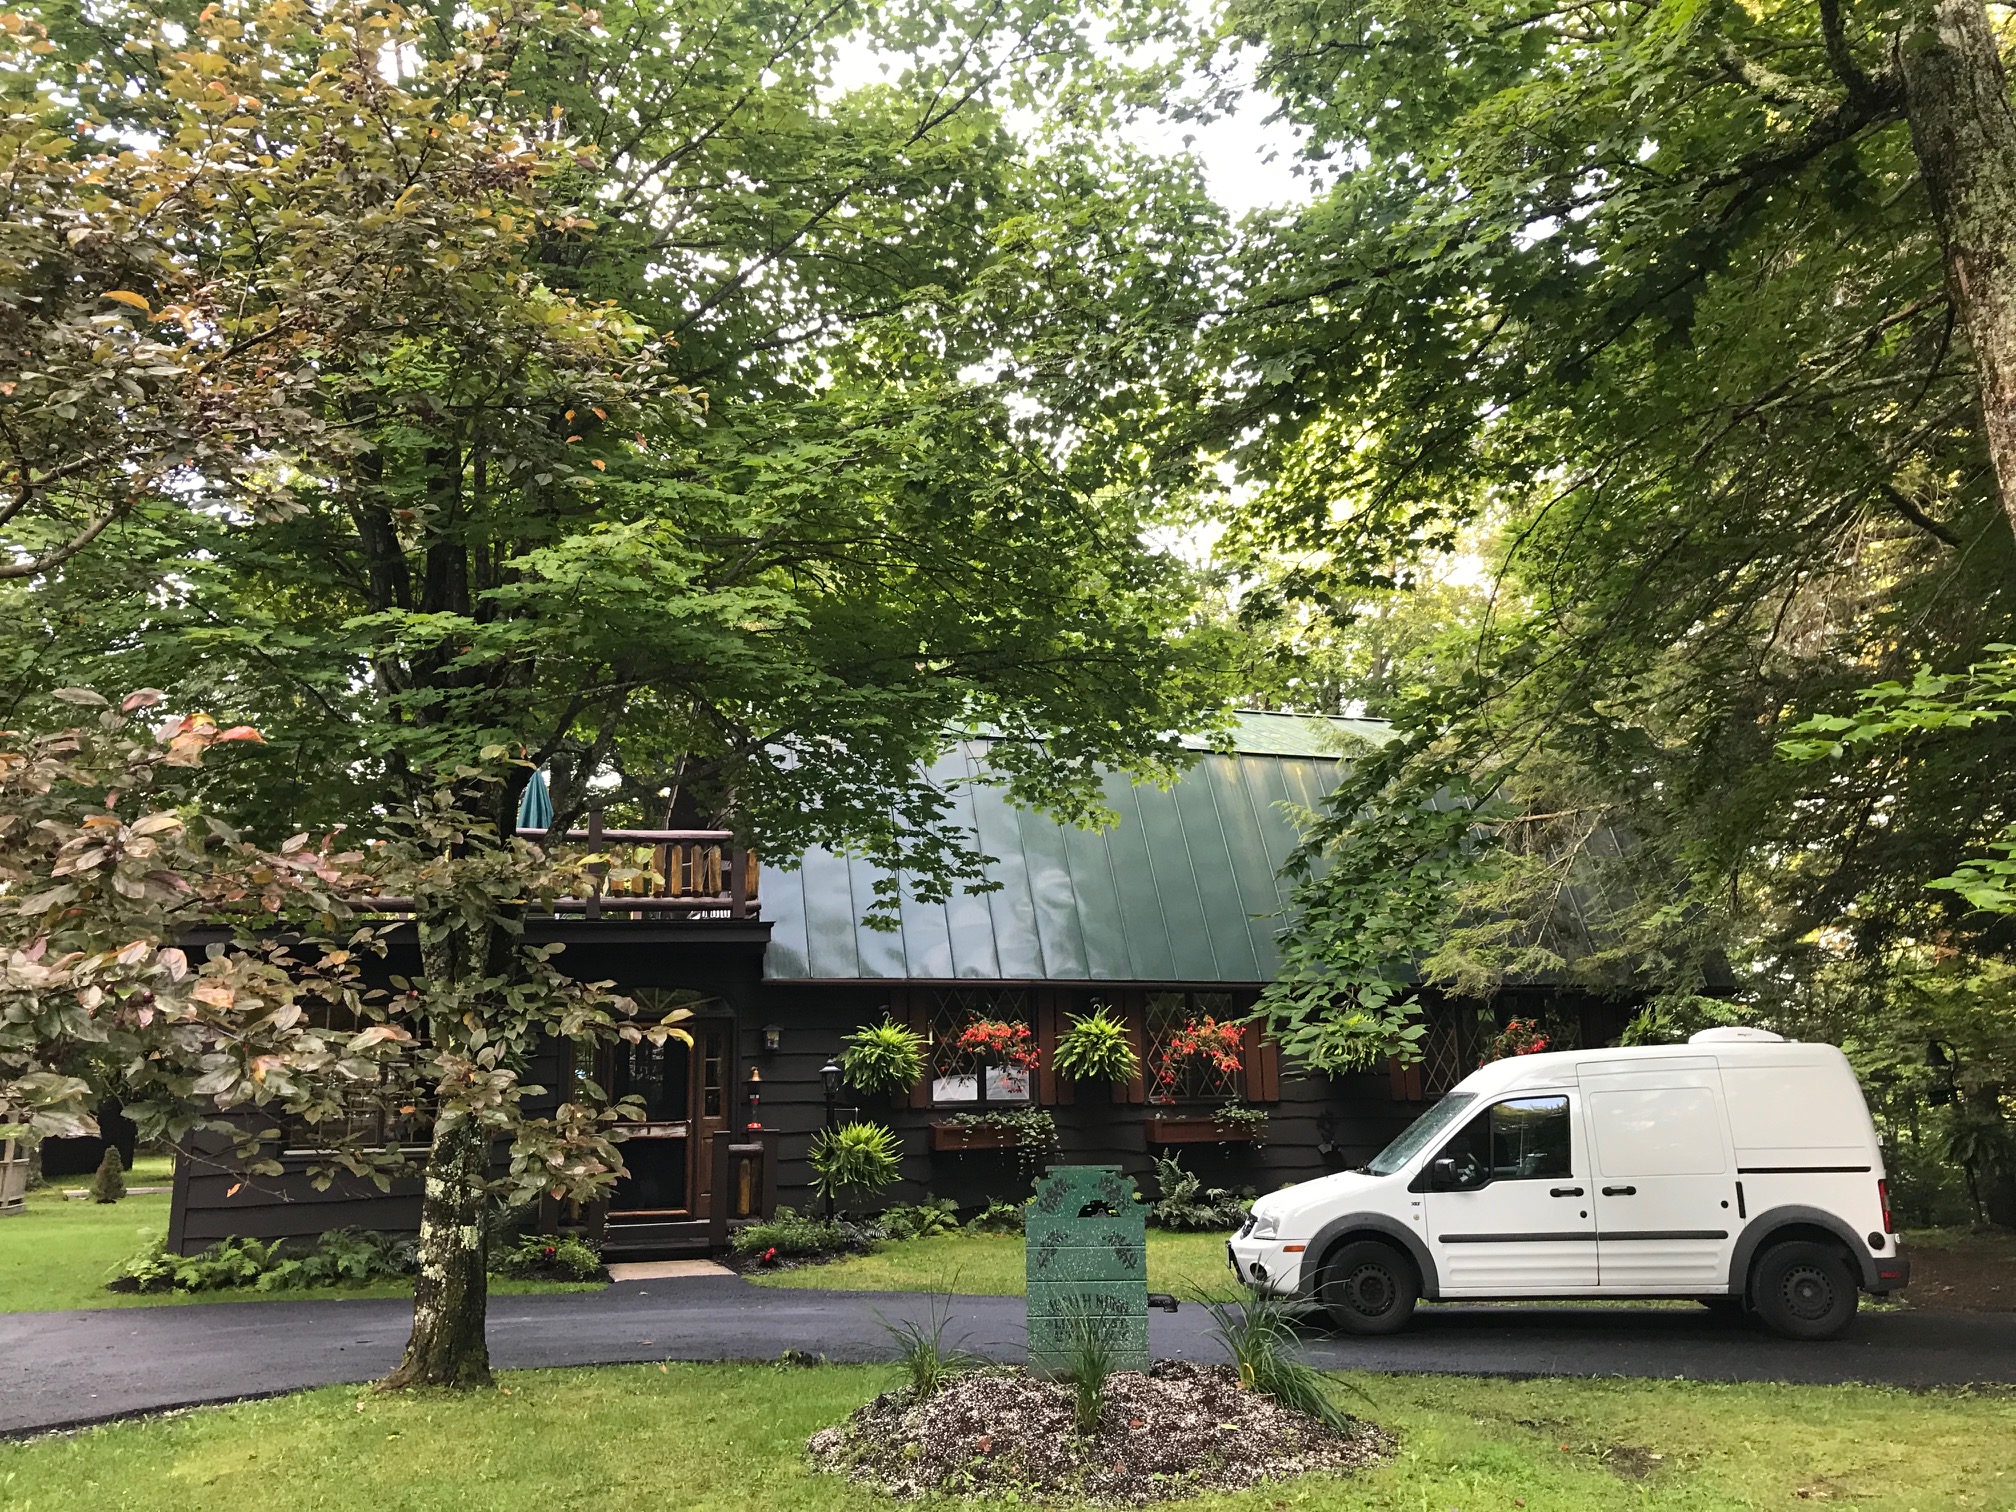
A friend from (my now former) work invited me to visit her family’s vacation camp in the Adirondacks, so it was the perfect excuse to take a few days away to test out the van, make sure it was road-worthy on a longer trip, and relax!
Adirondack trip!
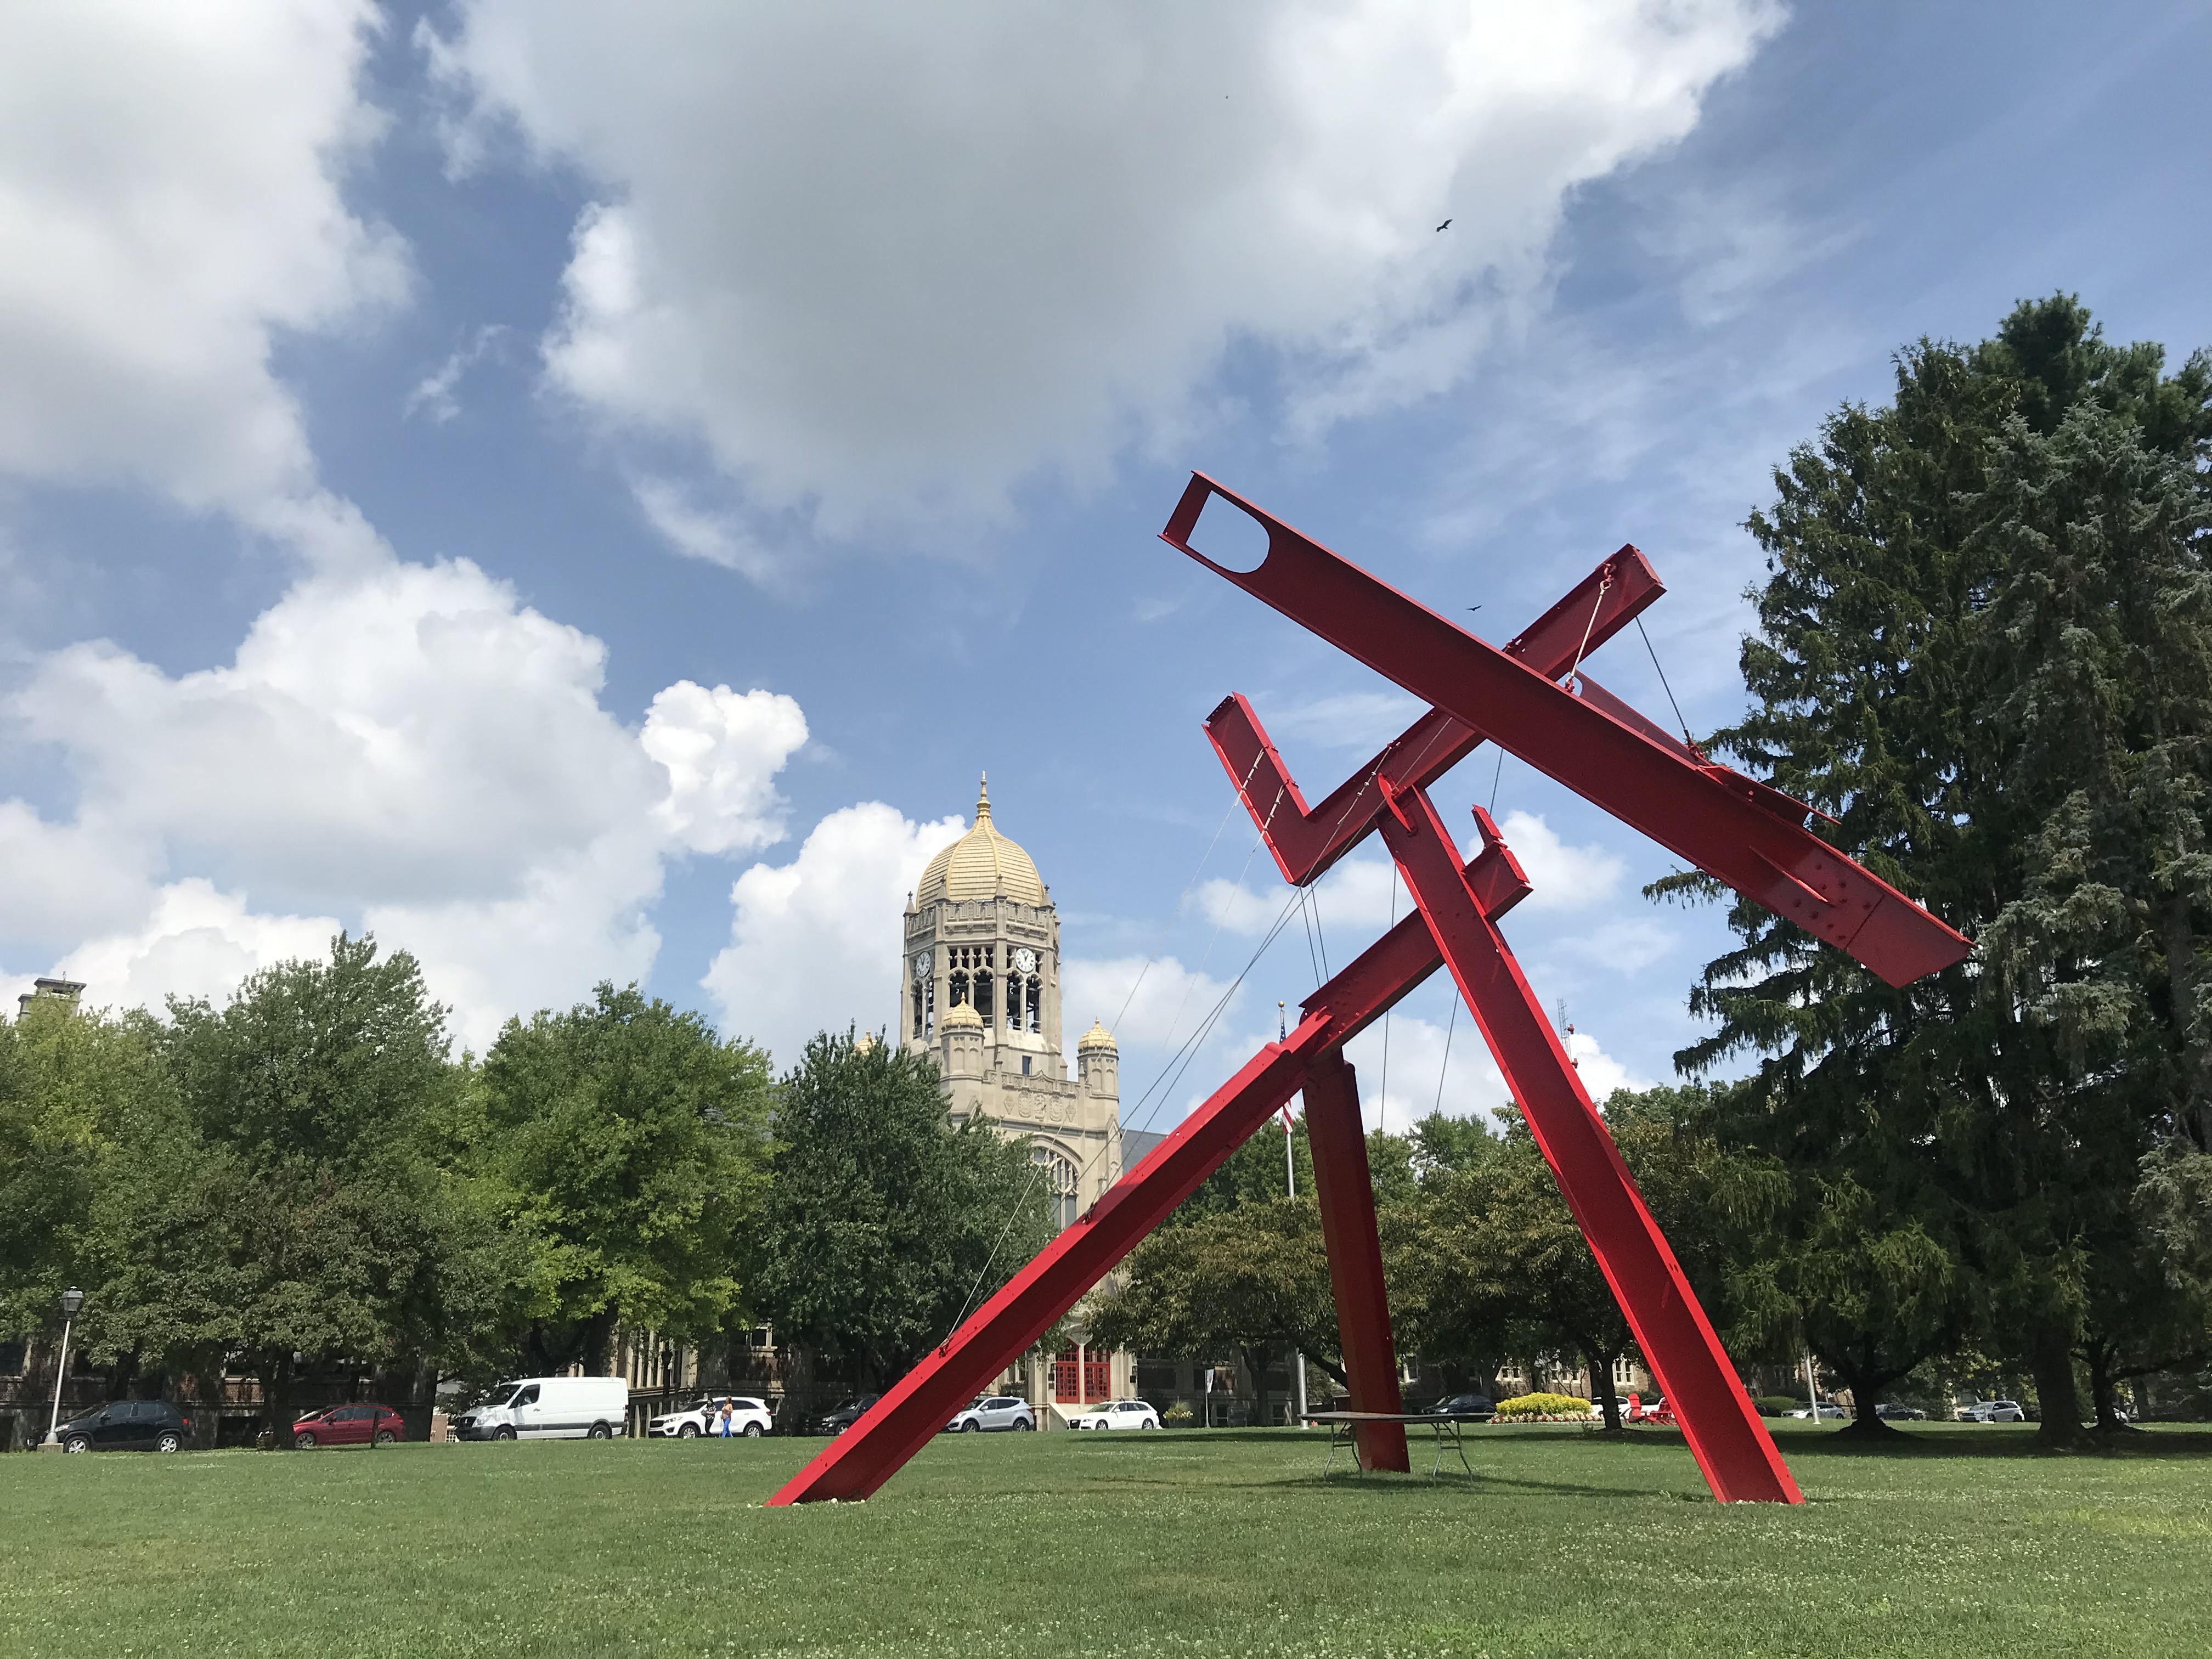
I drove north from Delaware where I’d been visiting my family, and made a pit stop in Pennsylvania for lunch and to walk through my college campus. ‘Berg friends: Parma Pizza is still delicious. The route north from Allentown past Scranto and Utica was full of cute small towns, rolling hills, hay bales, and areas of zero cell service. I got through almost a whole audiobook which was a nice bonus.
Pit stop at the undergrad alma mater 👩🎓
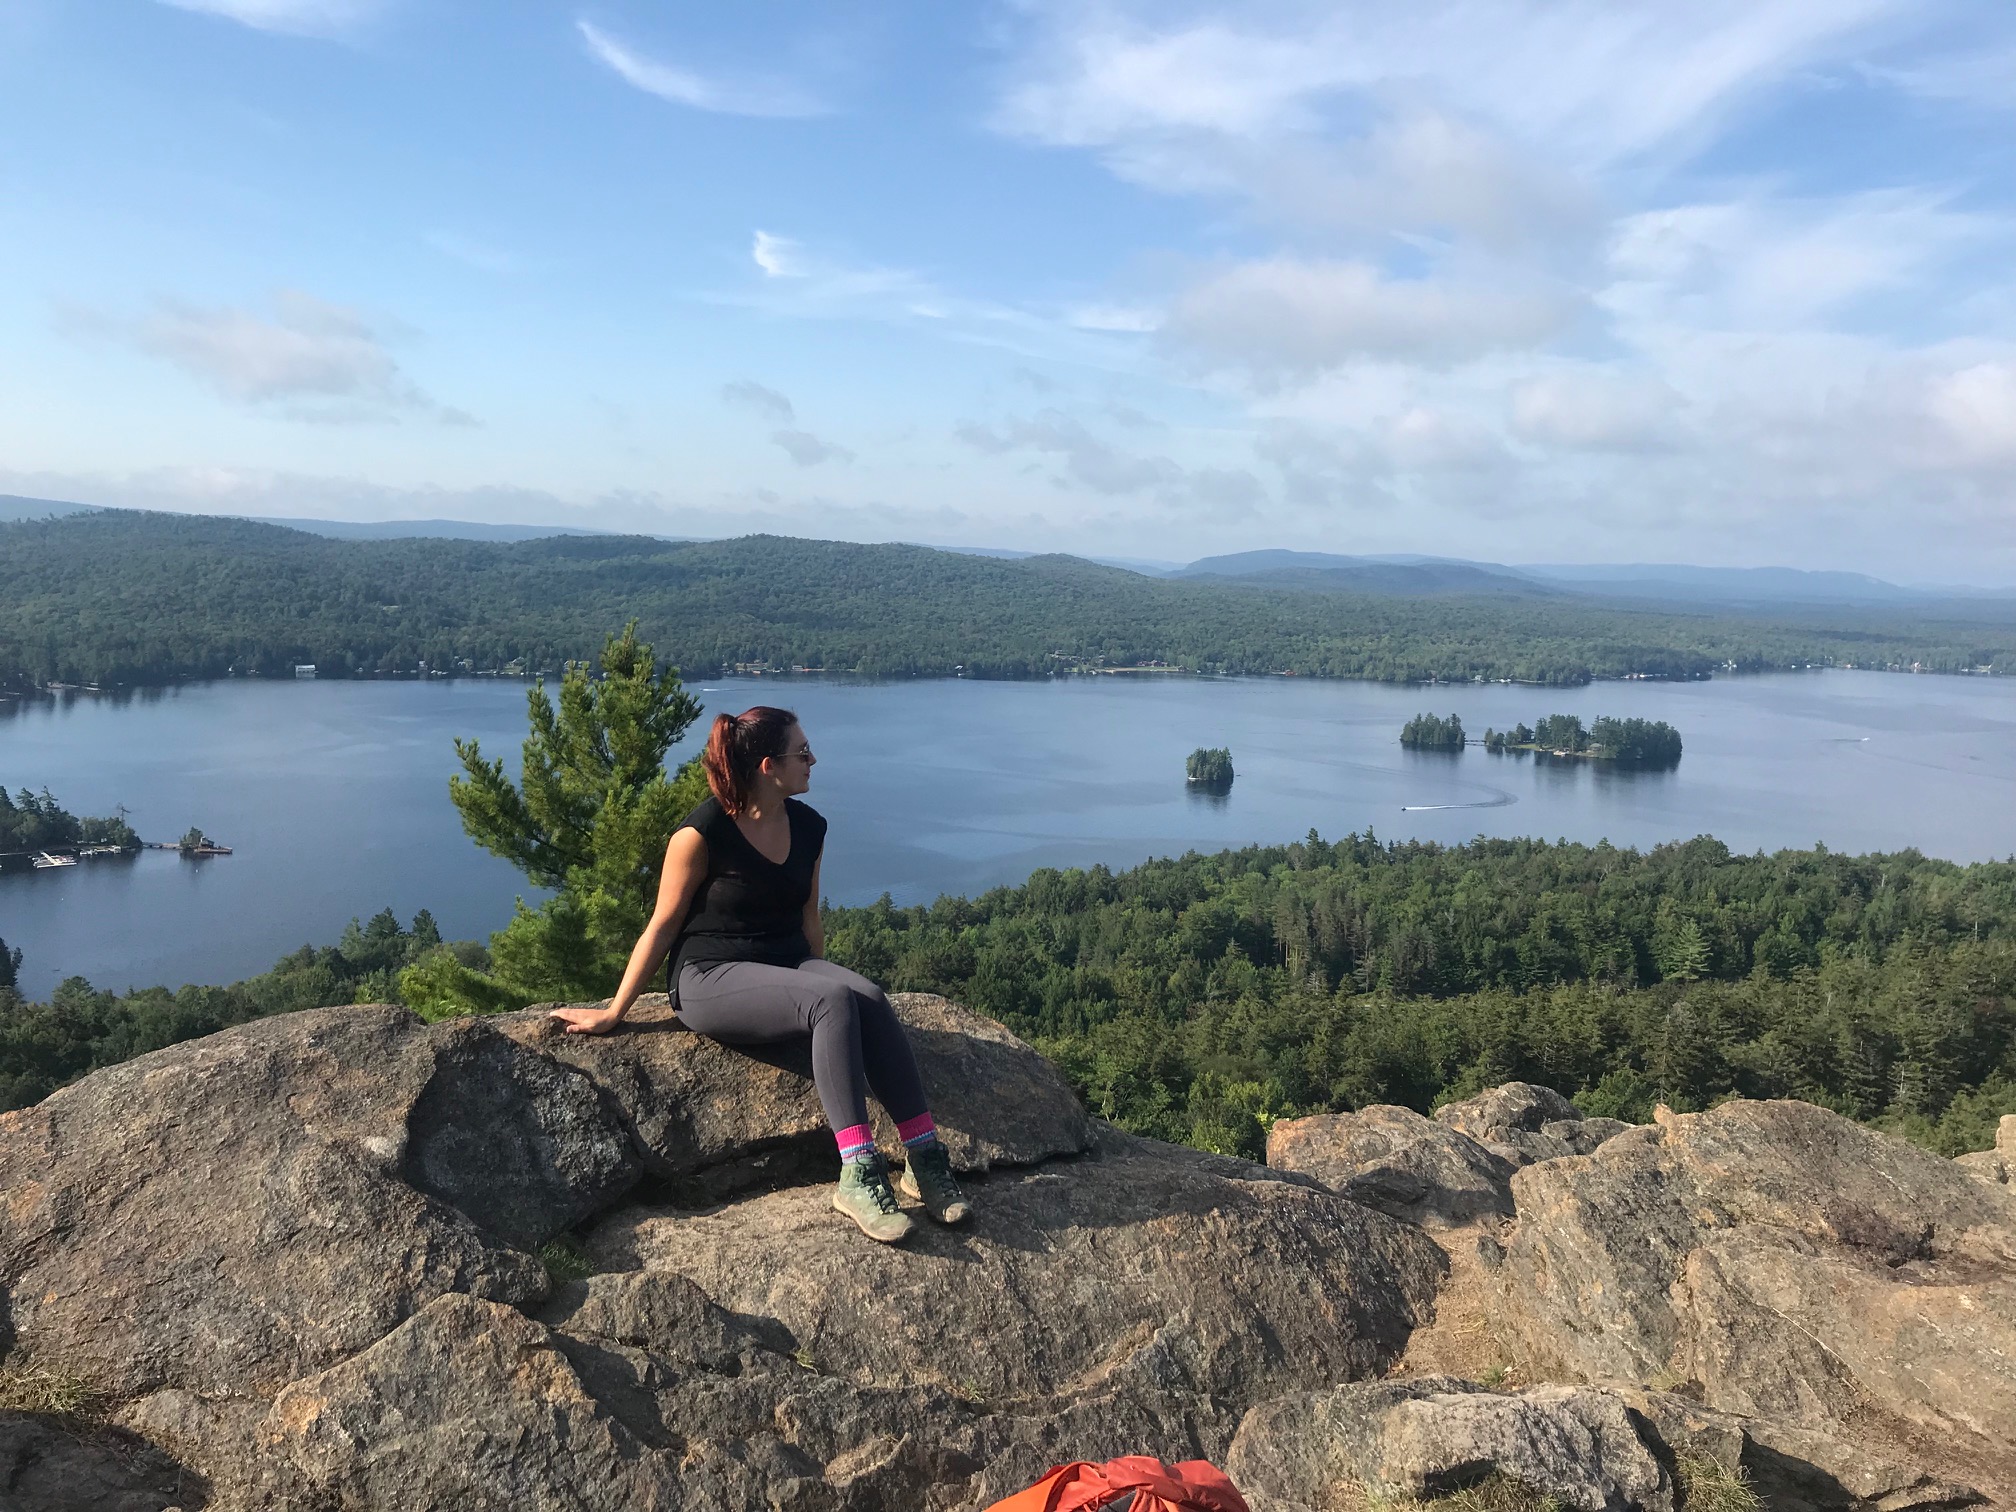
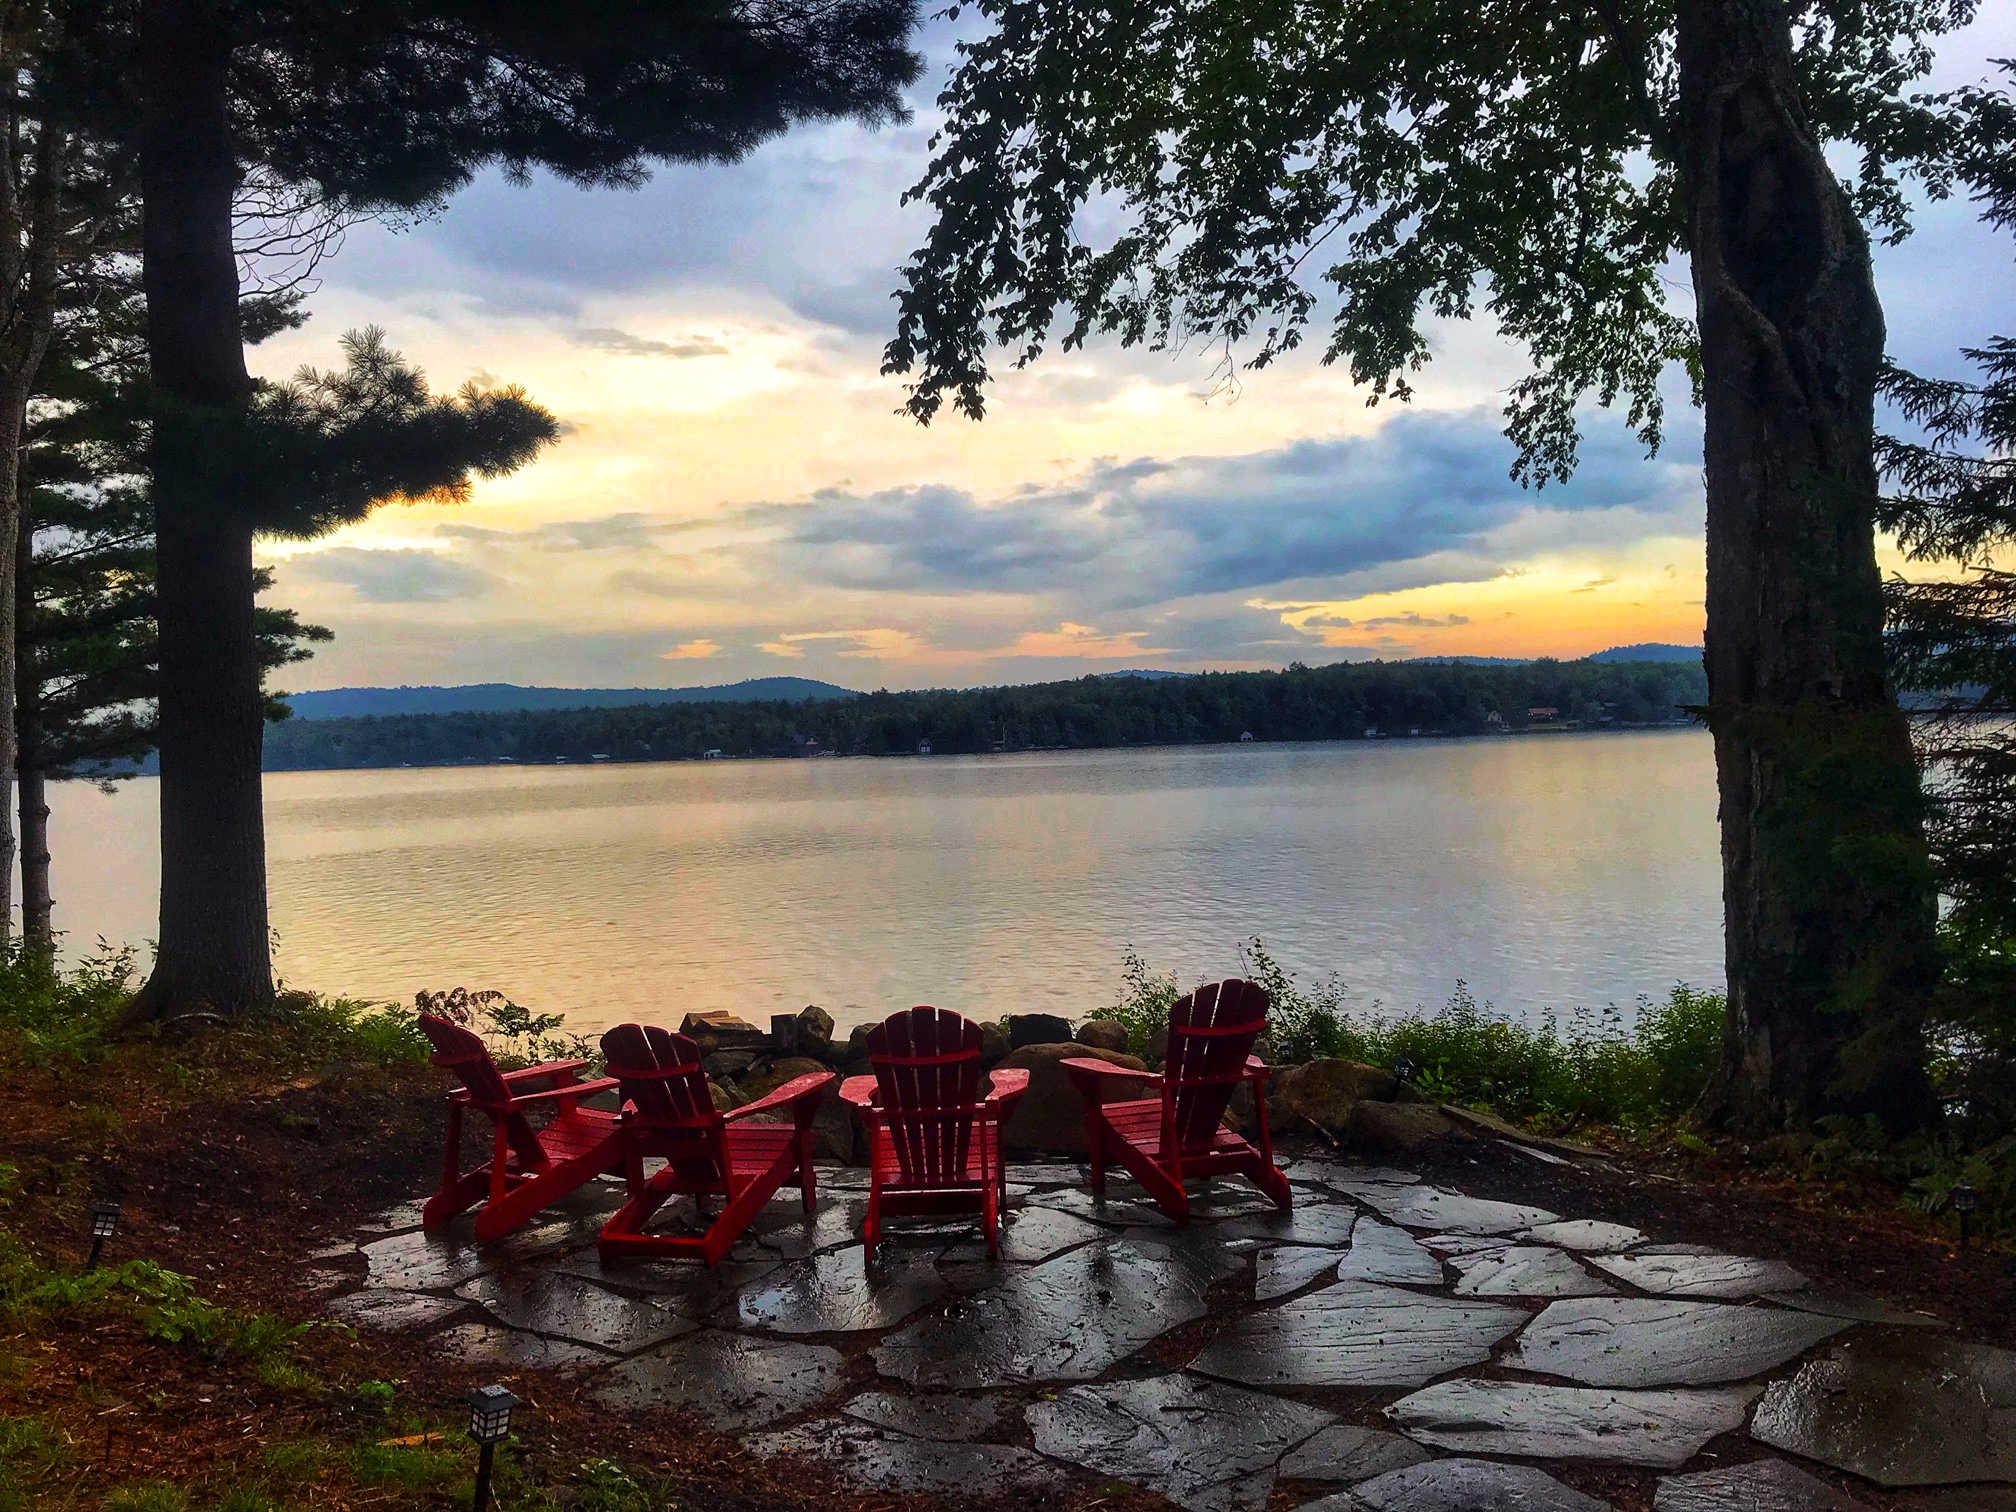
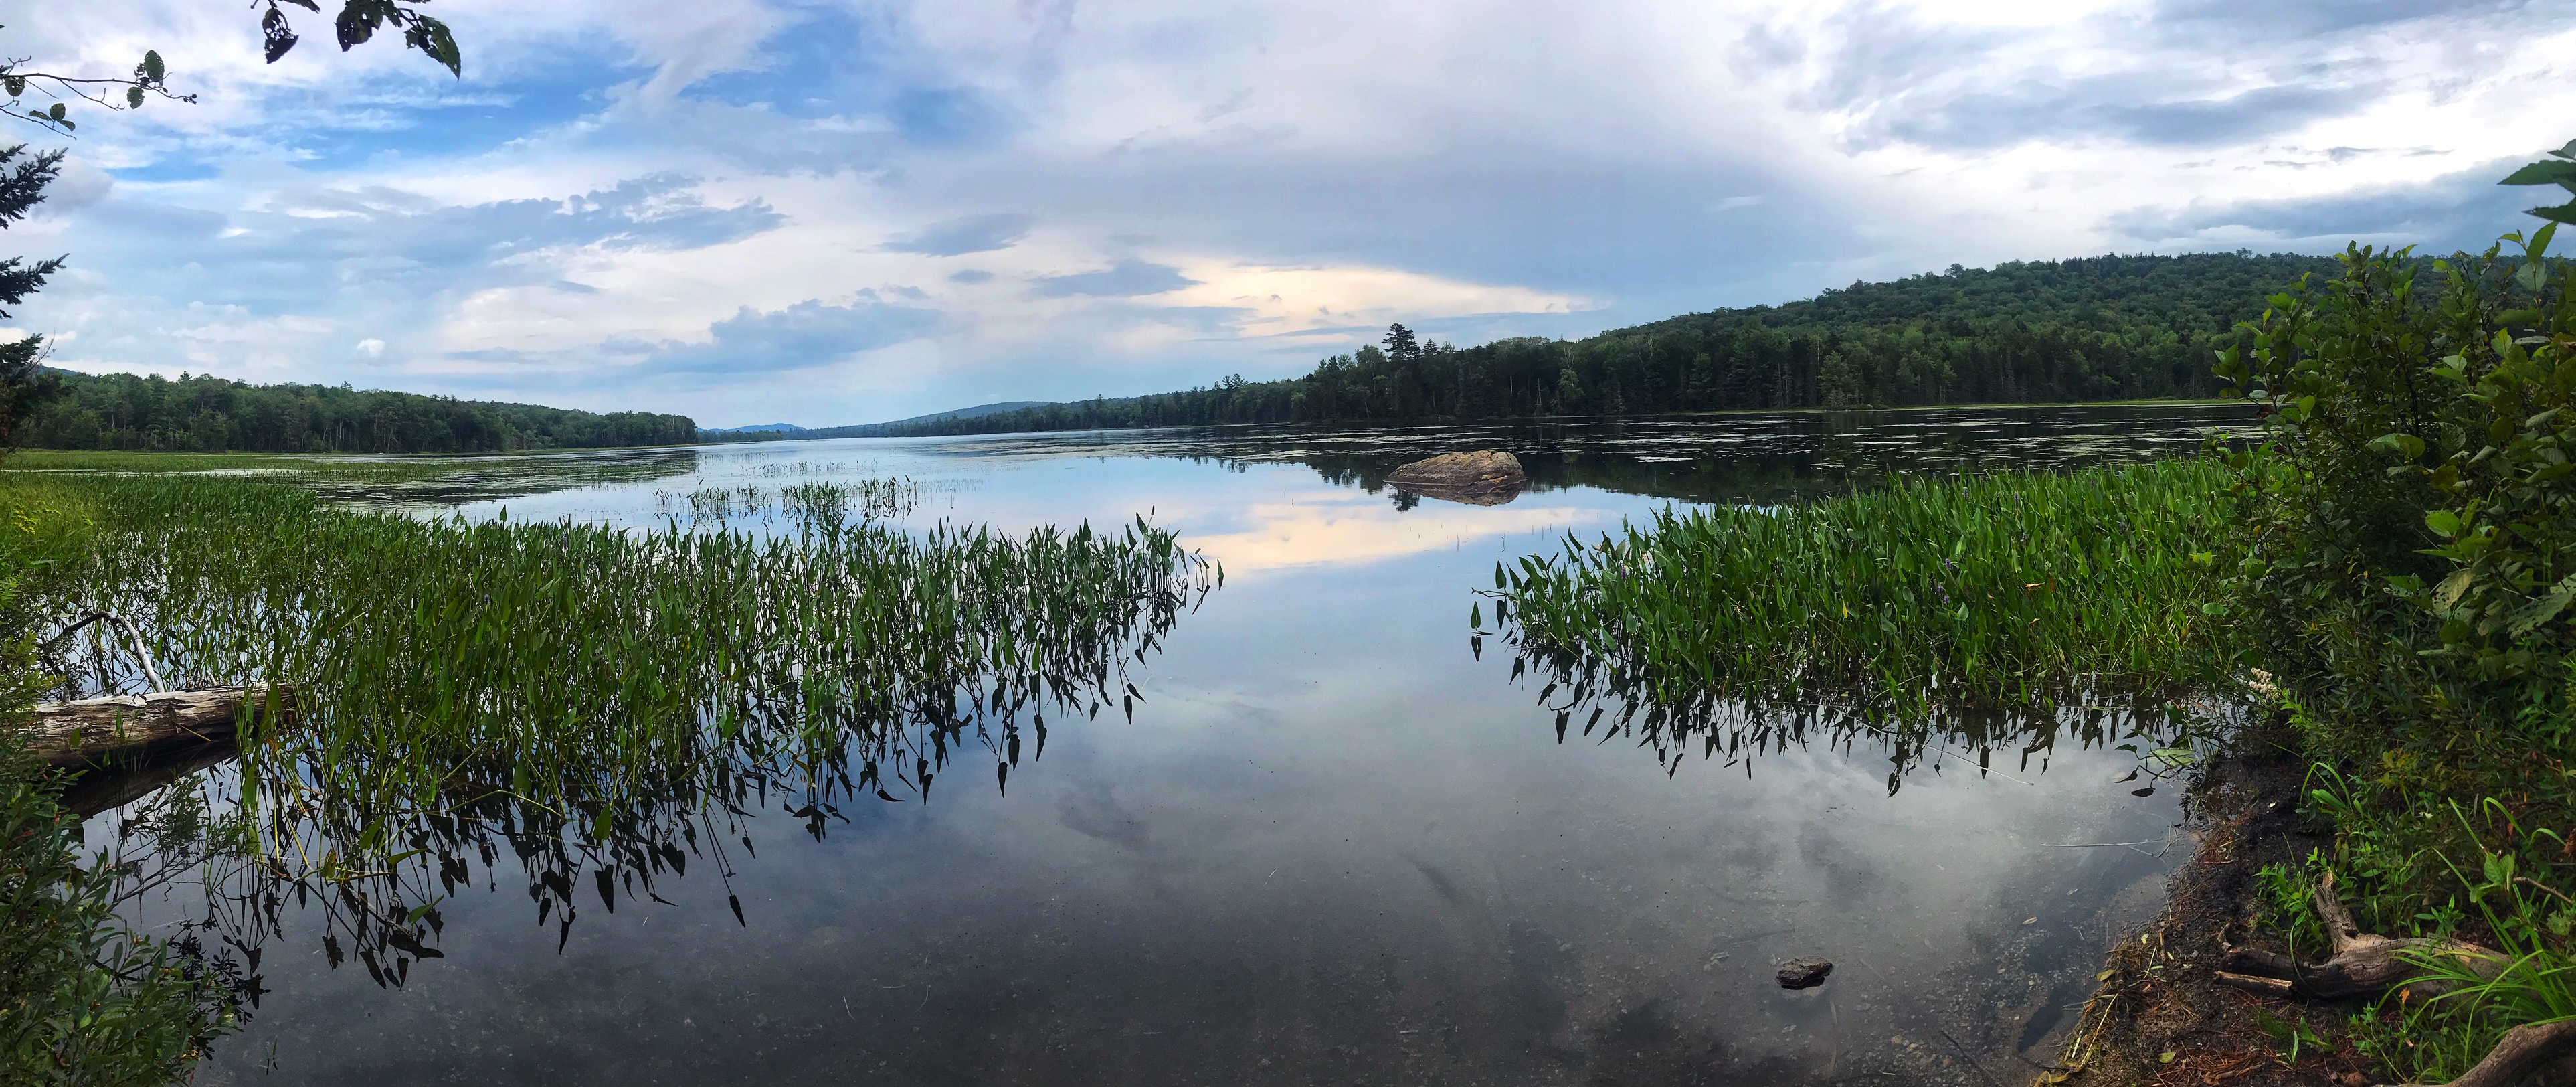
I rolled into the large Adirondack Park, which was the first large tract of state preserved forest/wilderness area of its kind, and unique for how much of the regulated land is privately owned. It felt like around every corner was a new, stunning lake view.
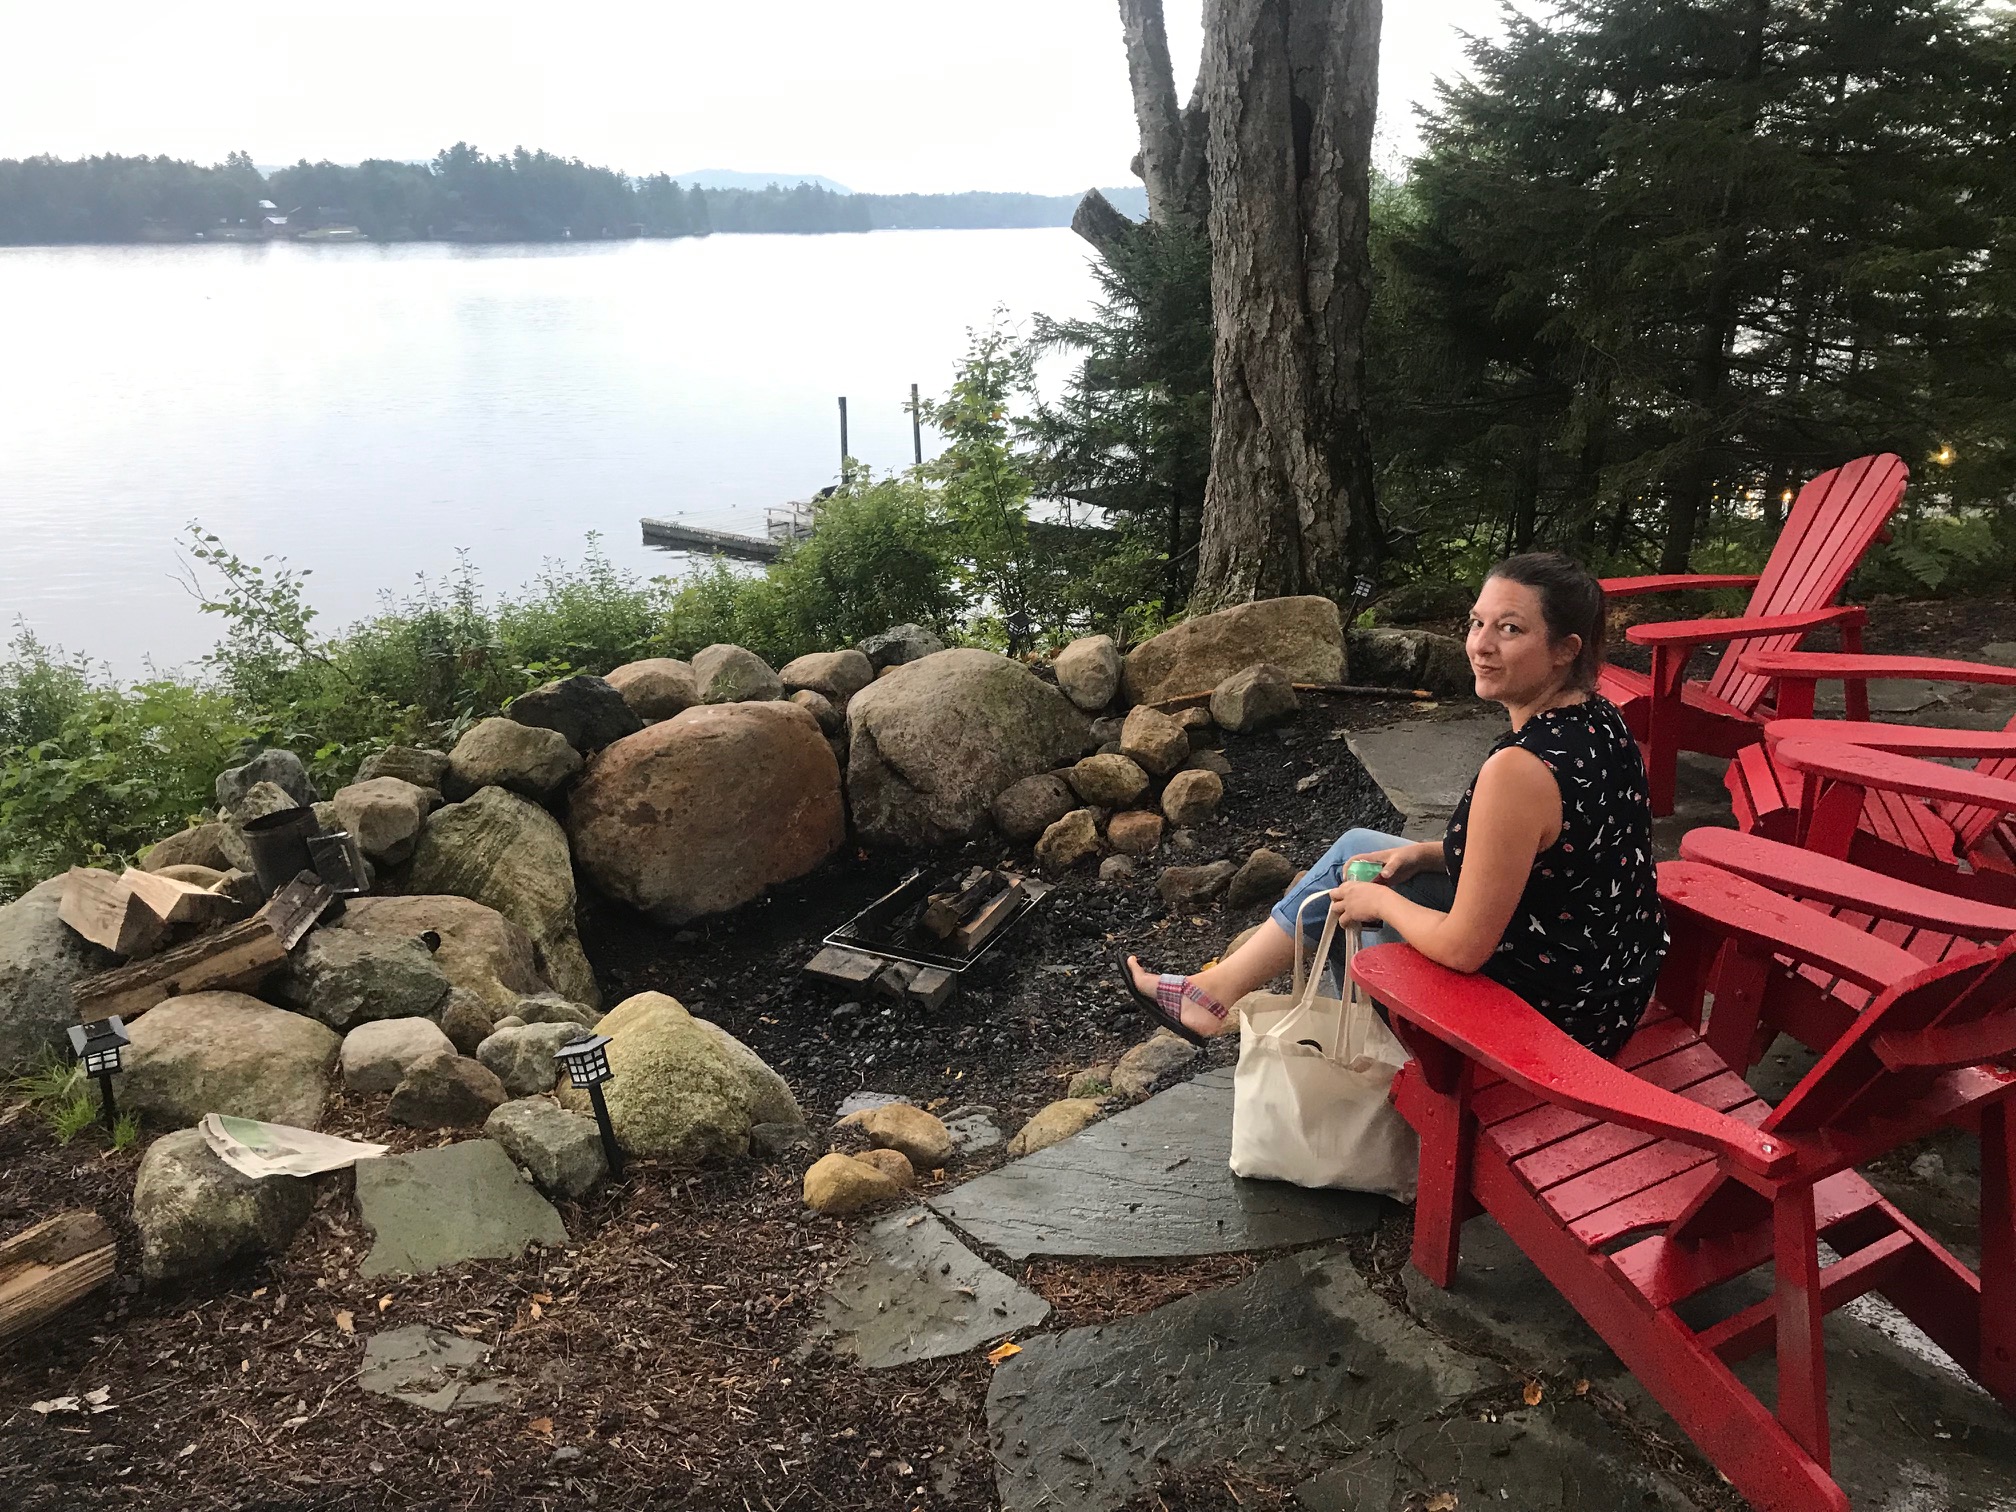
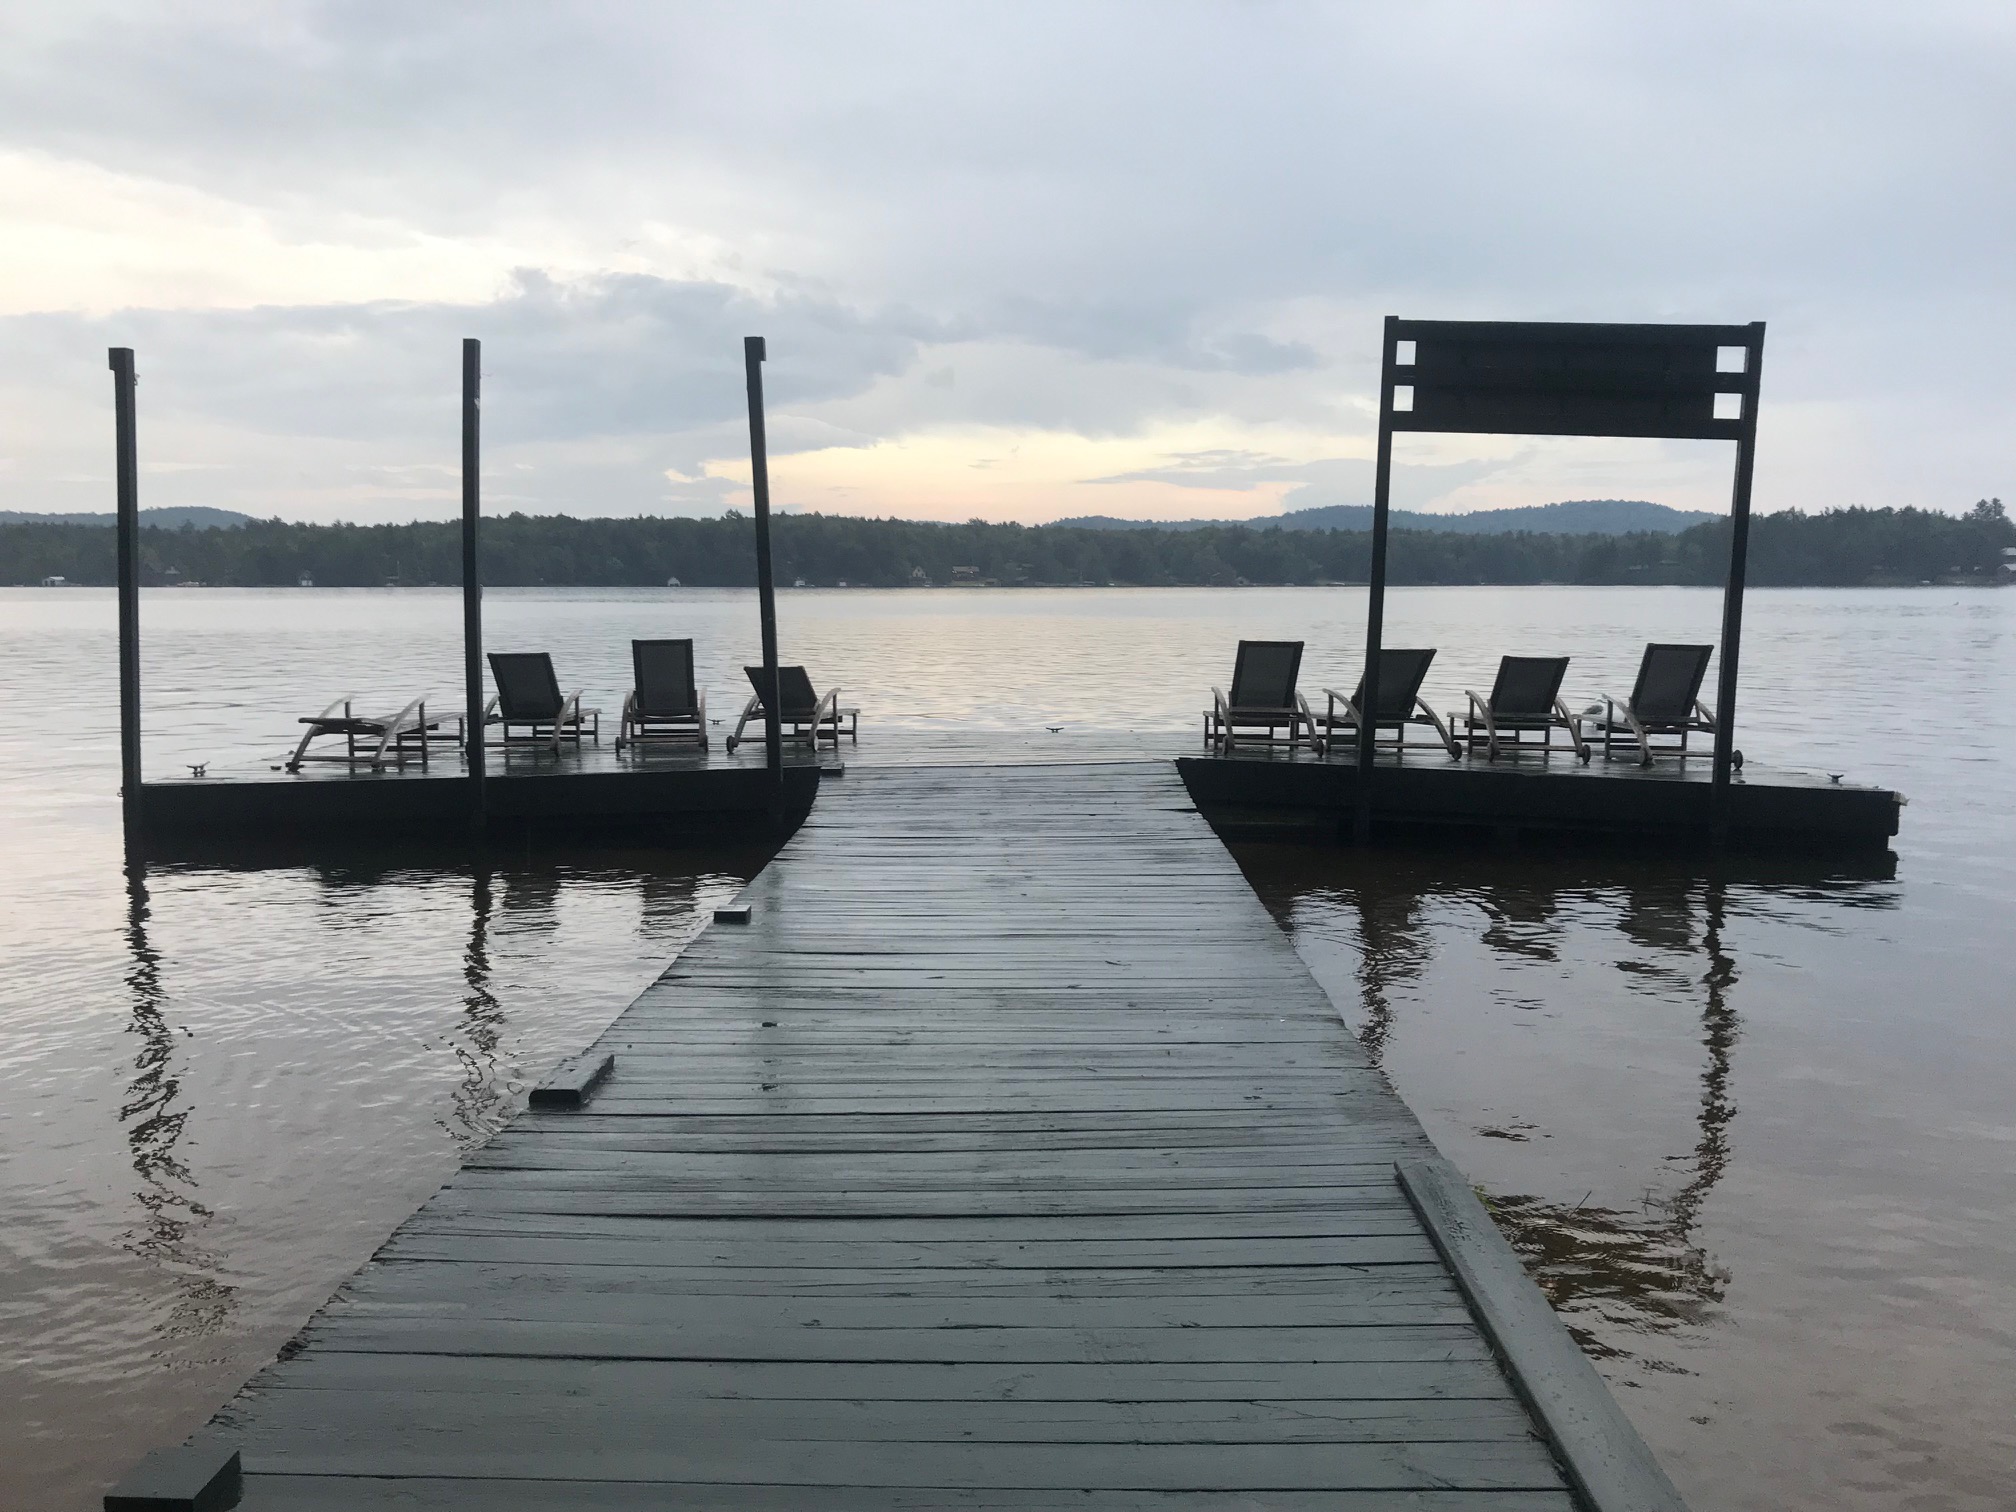
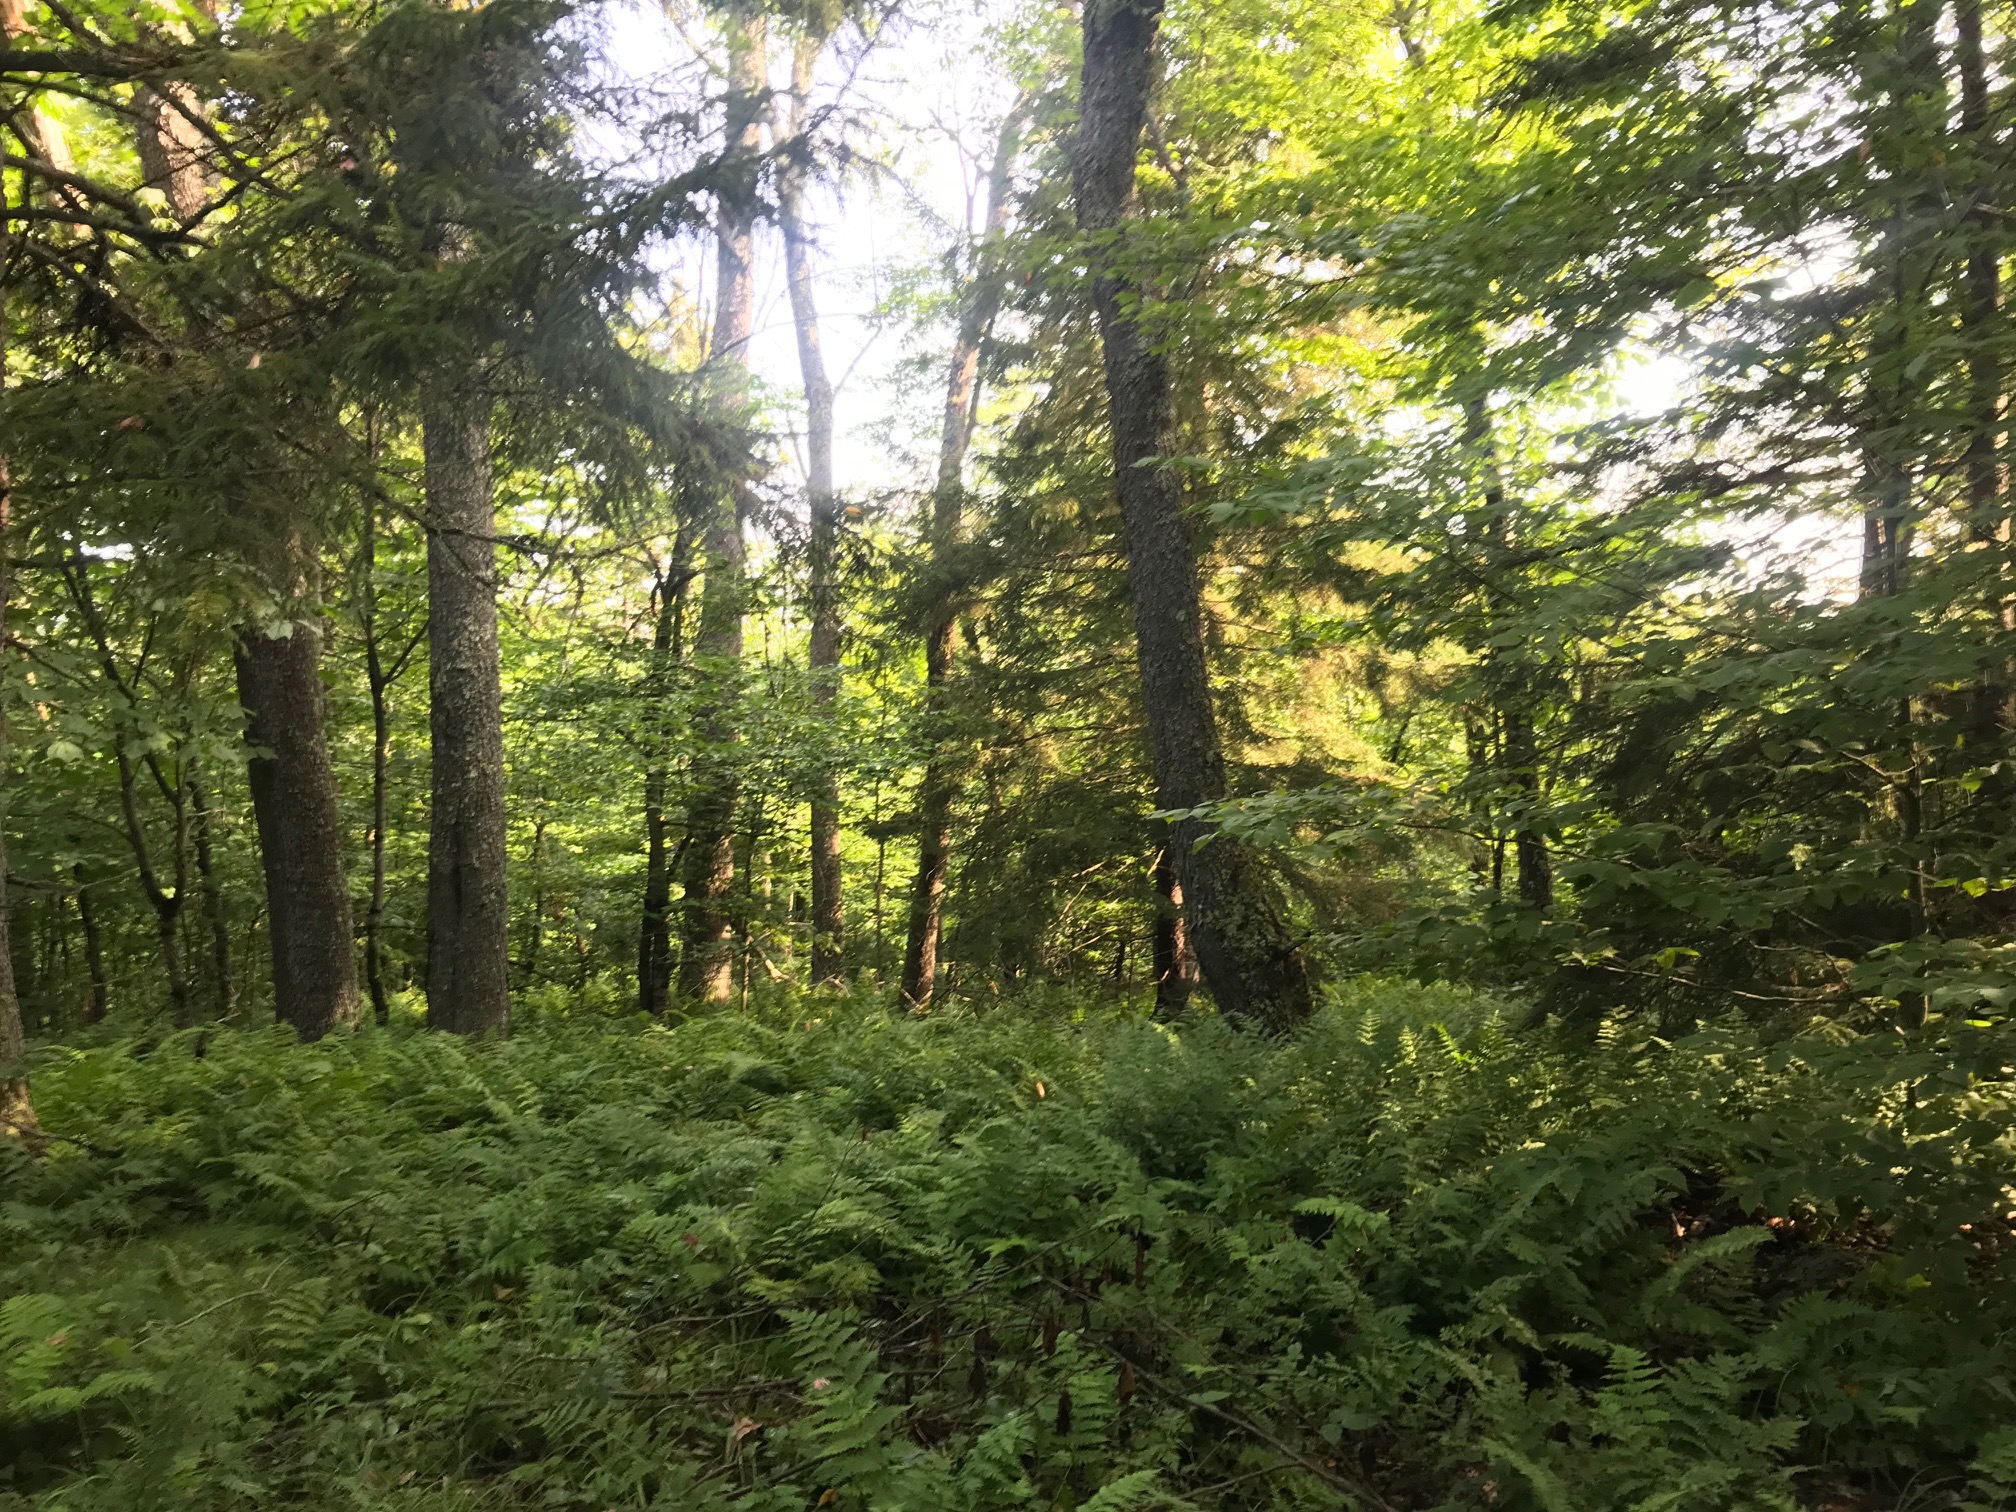
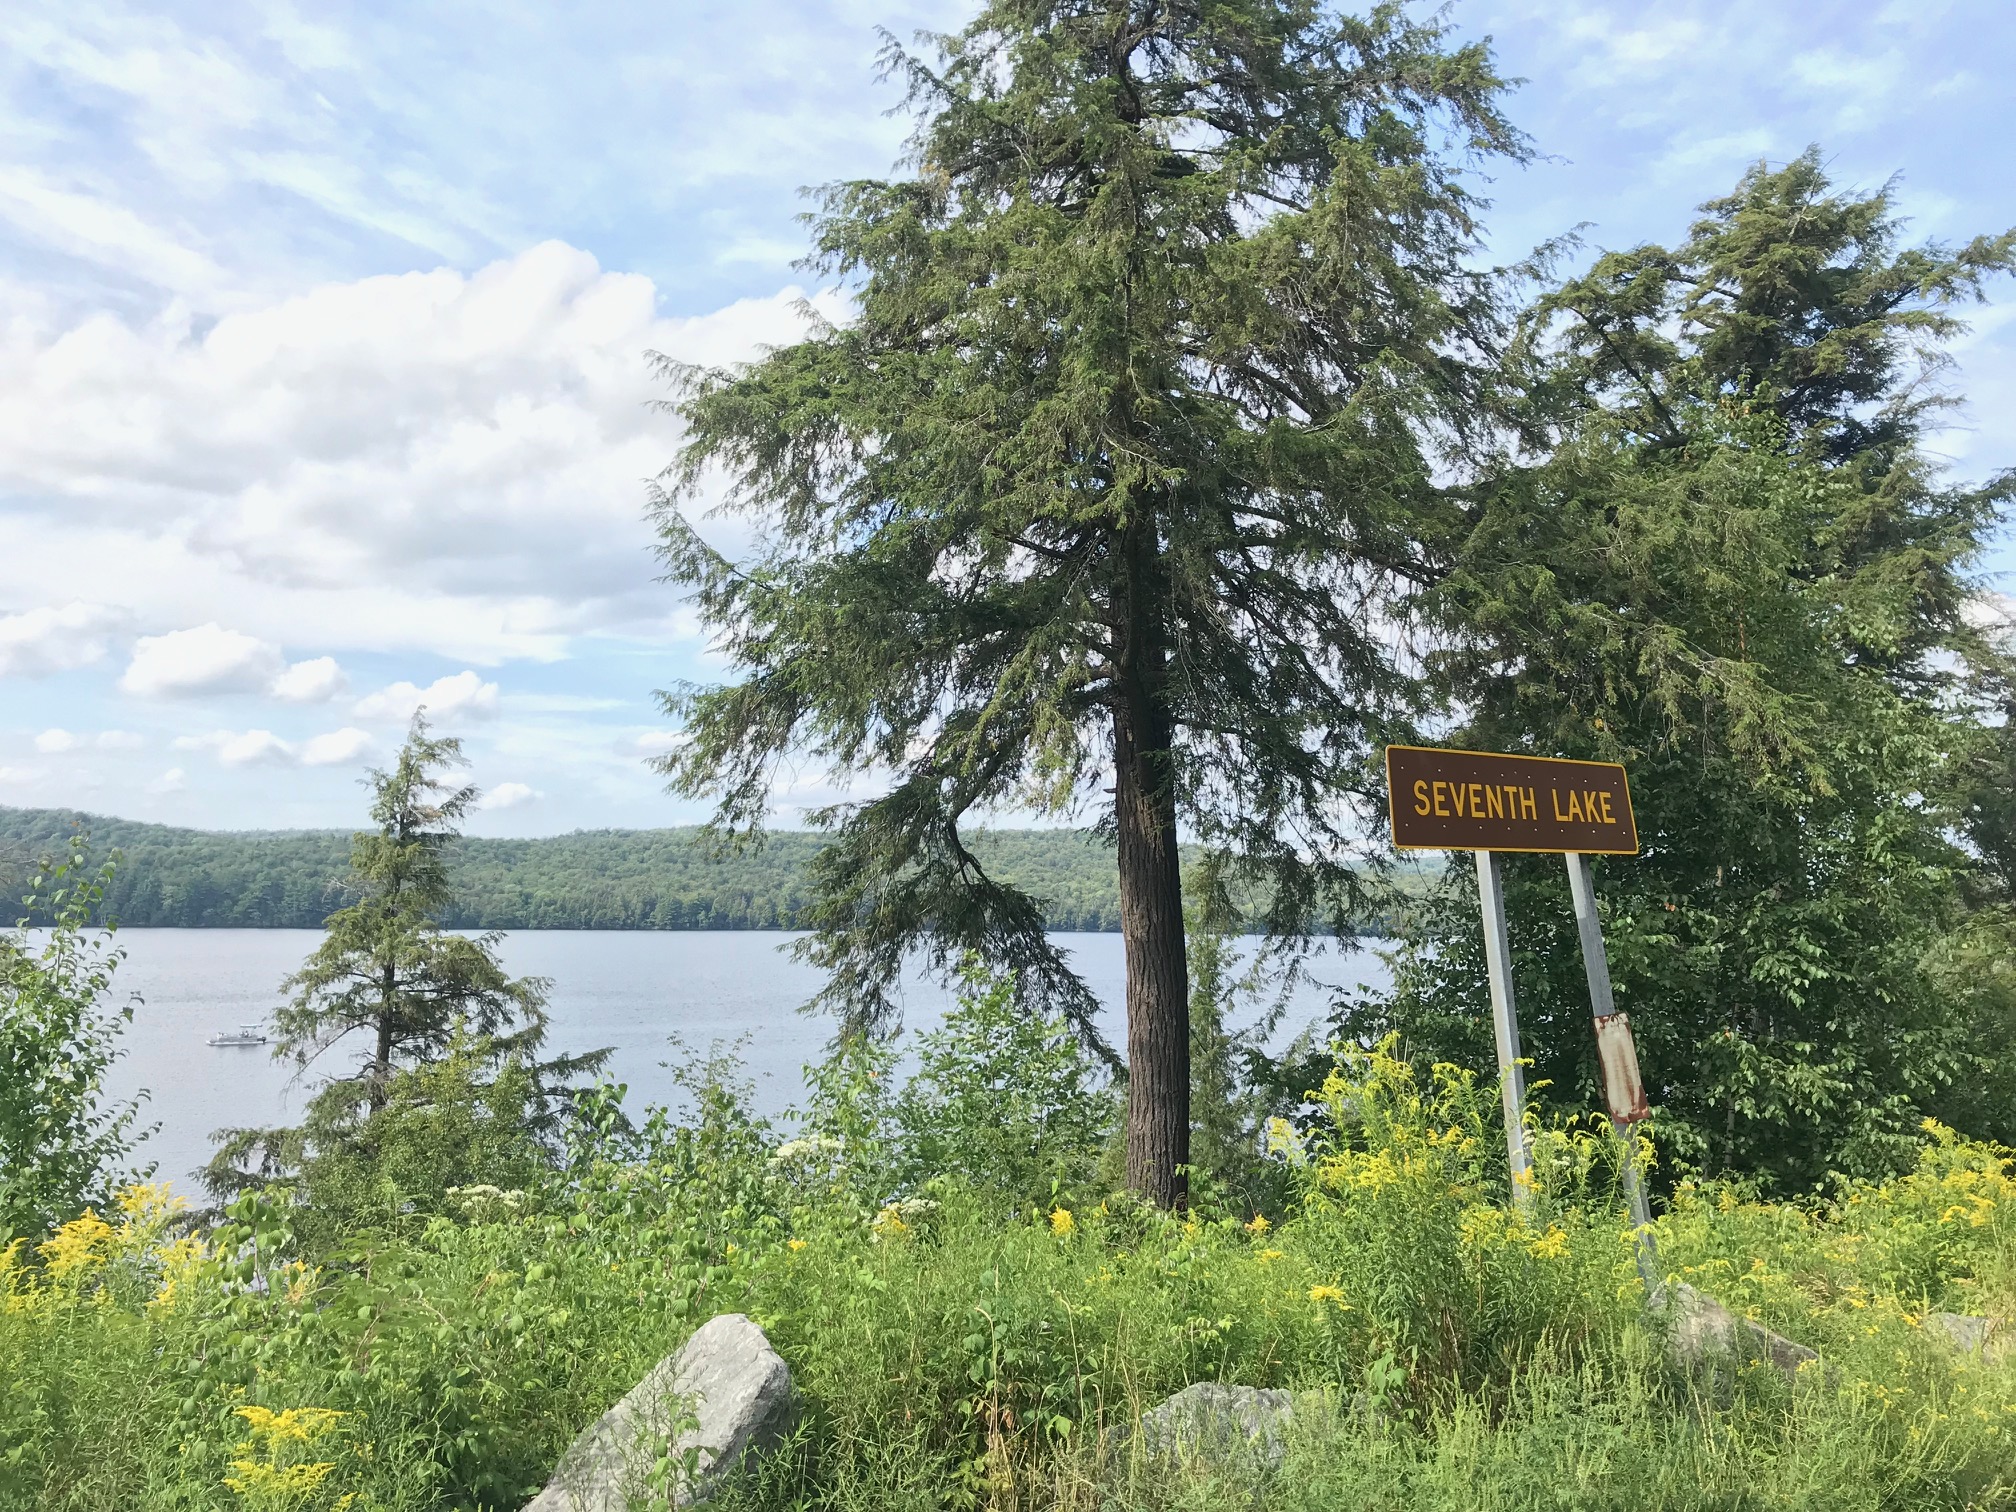
My friend Shea’s family has been staying in the area for generations and graciously let me stay for a few days and showed me around. We kayaked on the almost empty Fourth Lake between rain storms, I went on my first jet ski ride (terrifying but fun), did some quick hikes through fern-filled forests and up a nearby hill, and I overloaded on sugar between doughnuts and gelato in Inlet and Old Forge. This part of the area was relaxed and relatively quiet compared to the only other part of the Adirondacks I’d previously visited- sorry Lake George, you’ve been outdone (we passed through a few years ago and I may have labeled tourists there ‘garbage people’ because so many wandered into traffic without looking or caring. Sorry, tourists, you aren’t garbage people, some of you definitely do garbage things though. I stand firm on this.).
Fourth Lake
Thanks for letting me crash!
Rocky Point
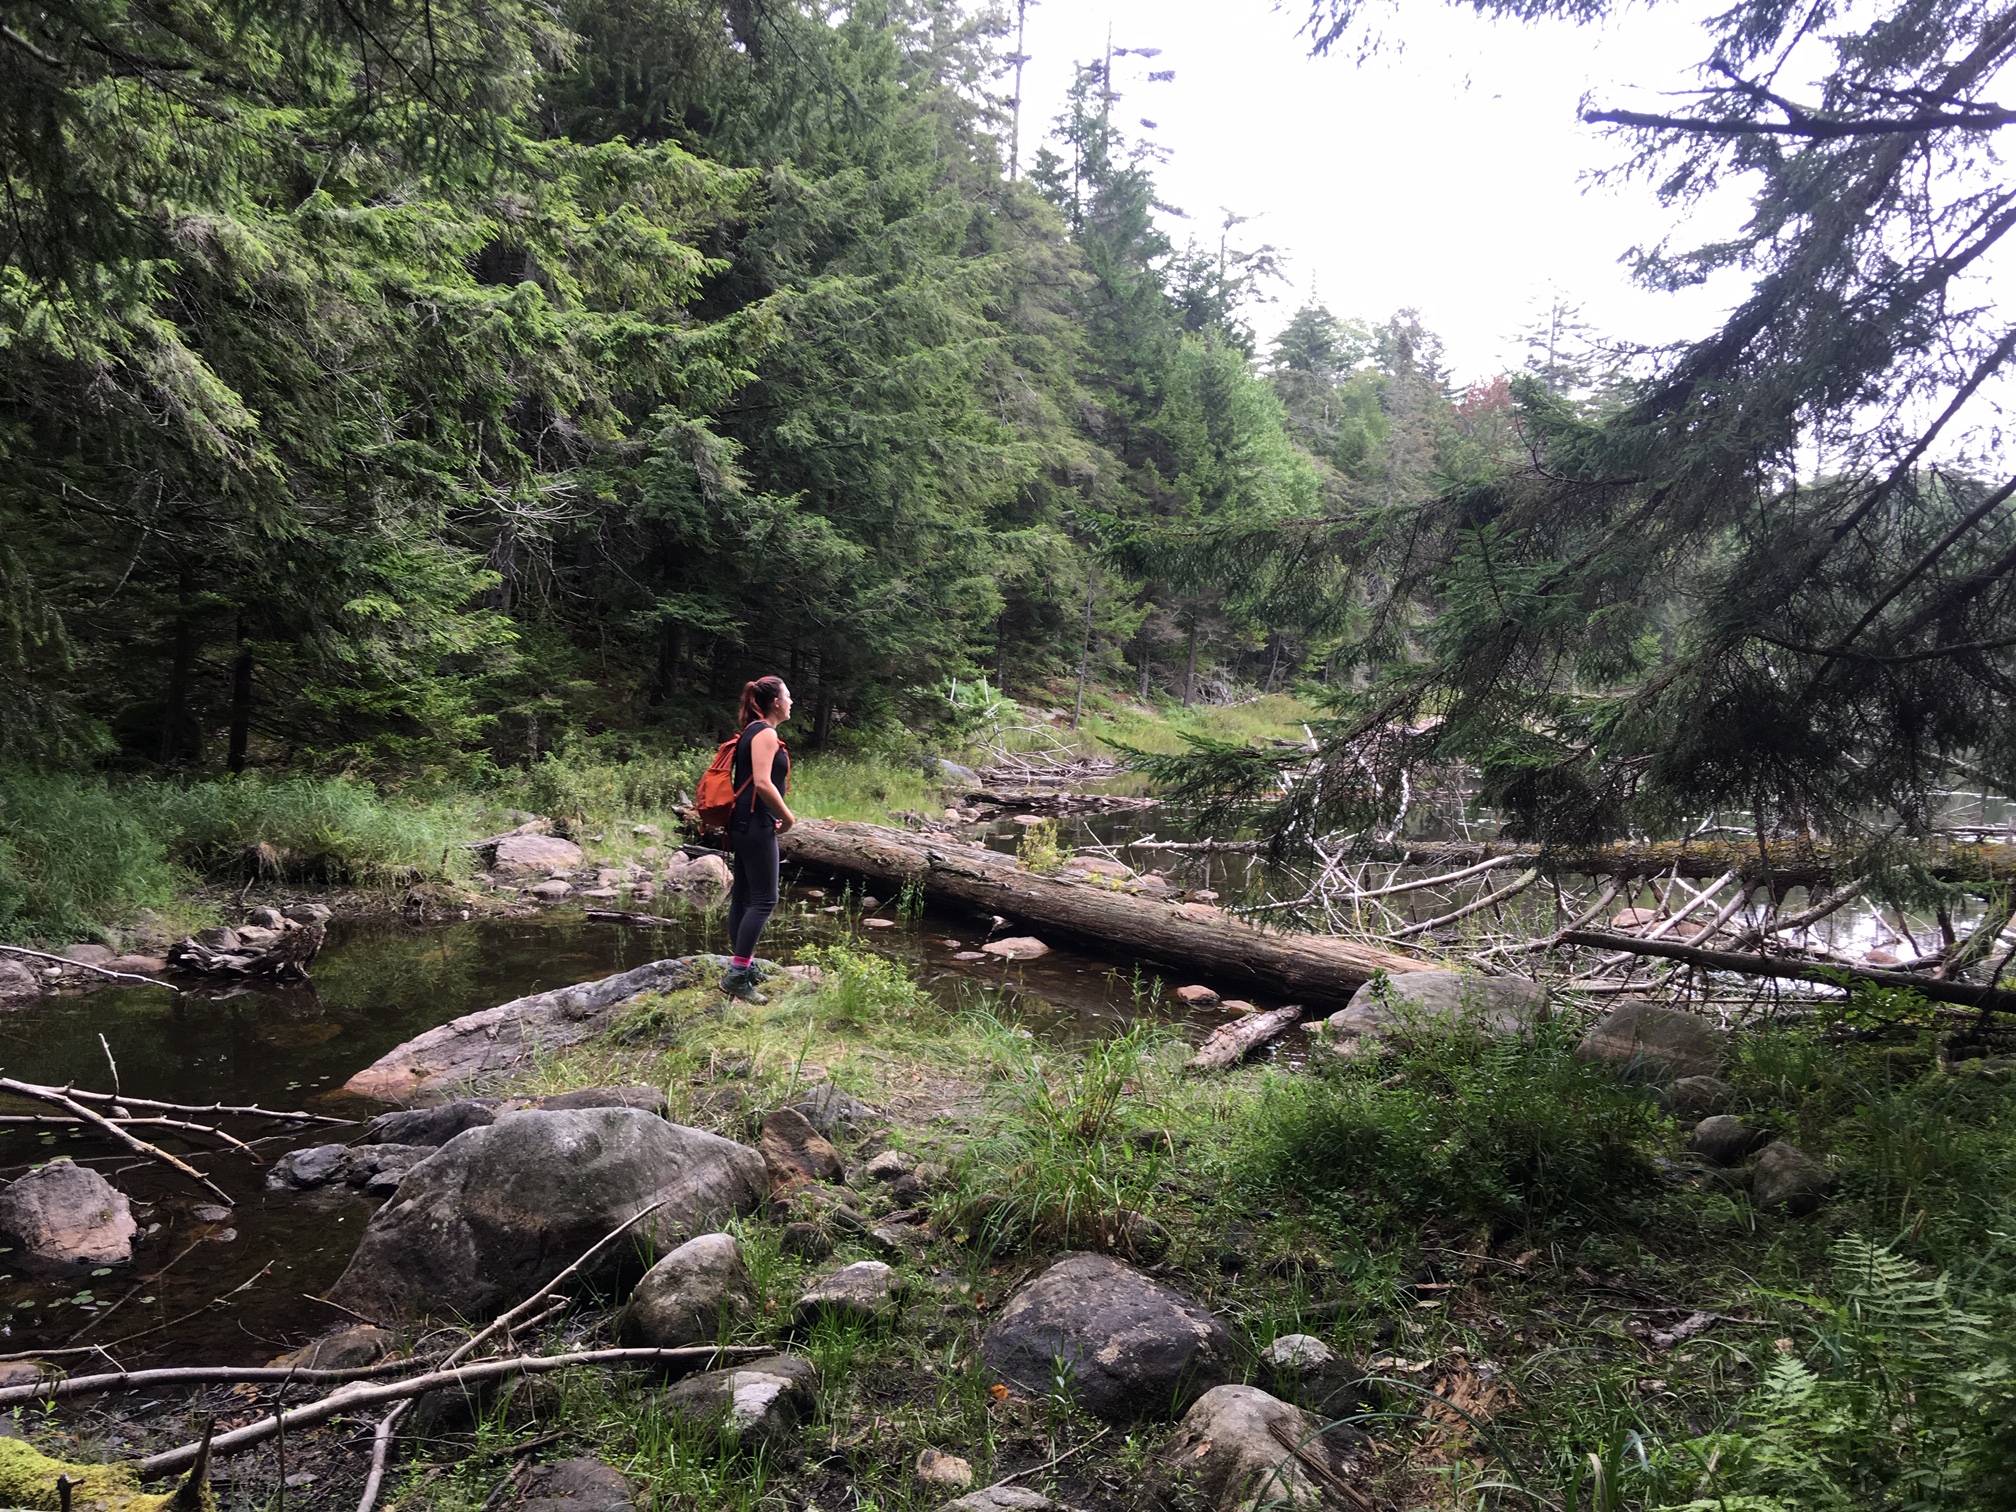
Walk to a pond
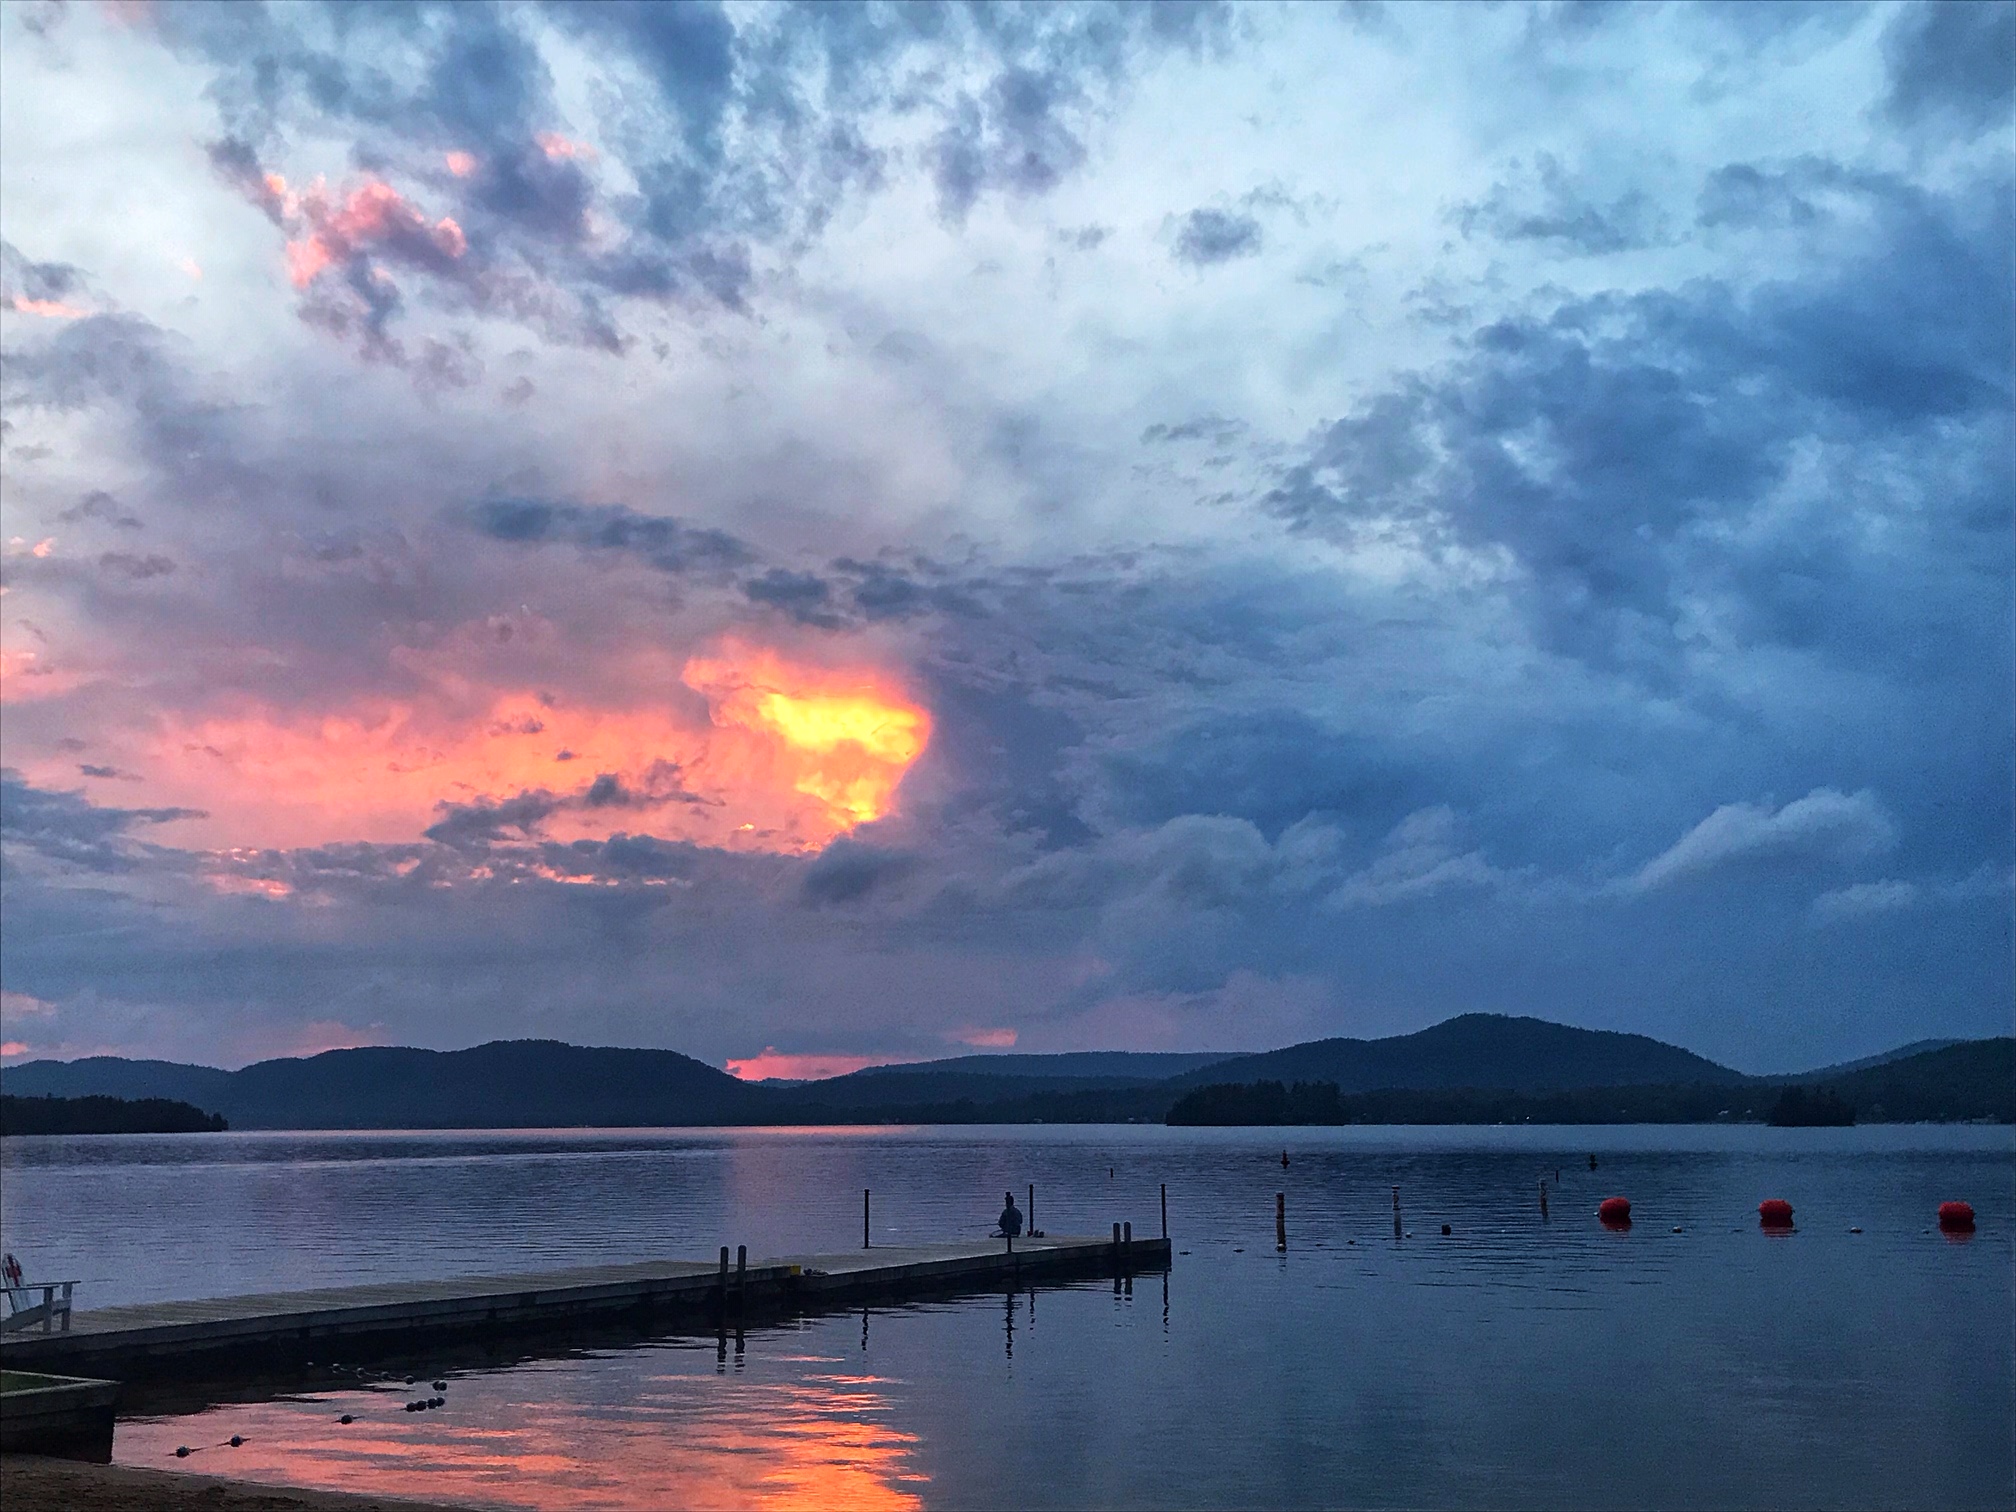
Sunset + gelato + water? Win
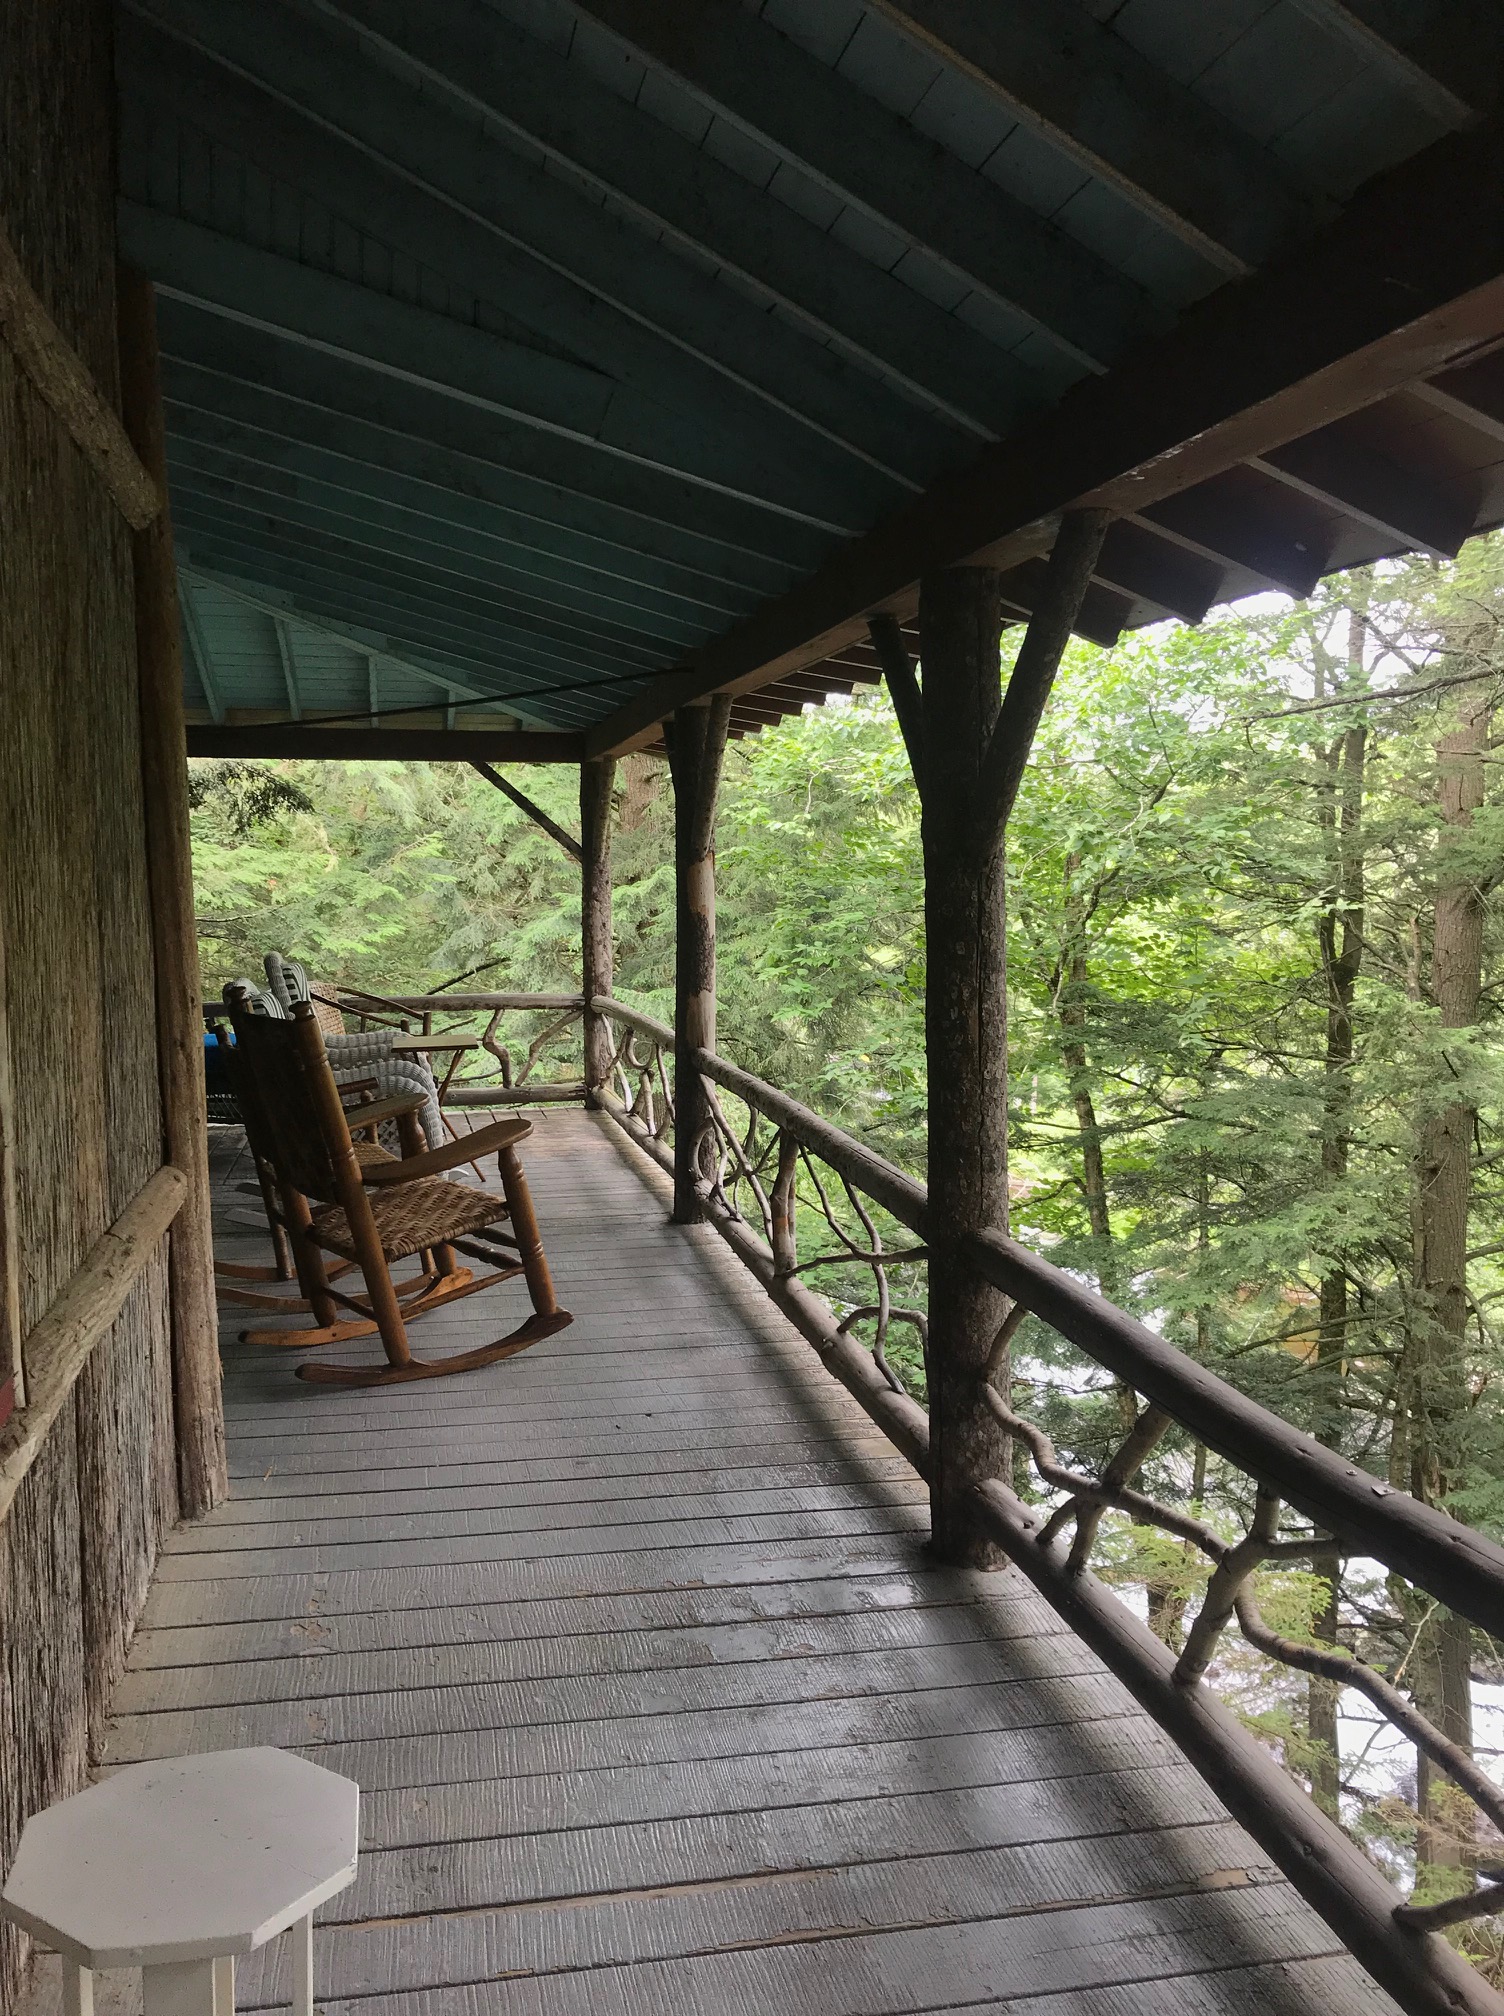
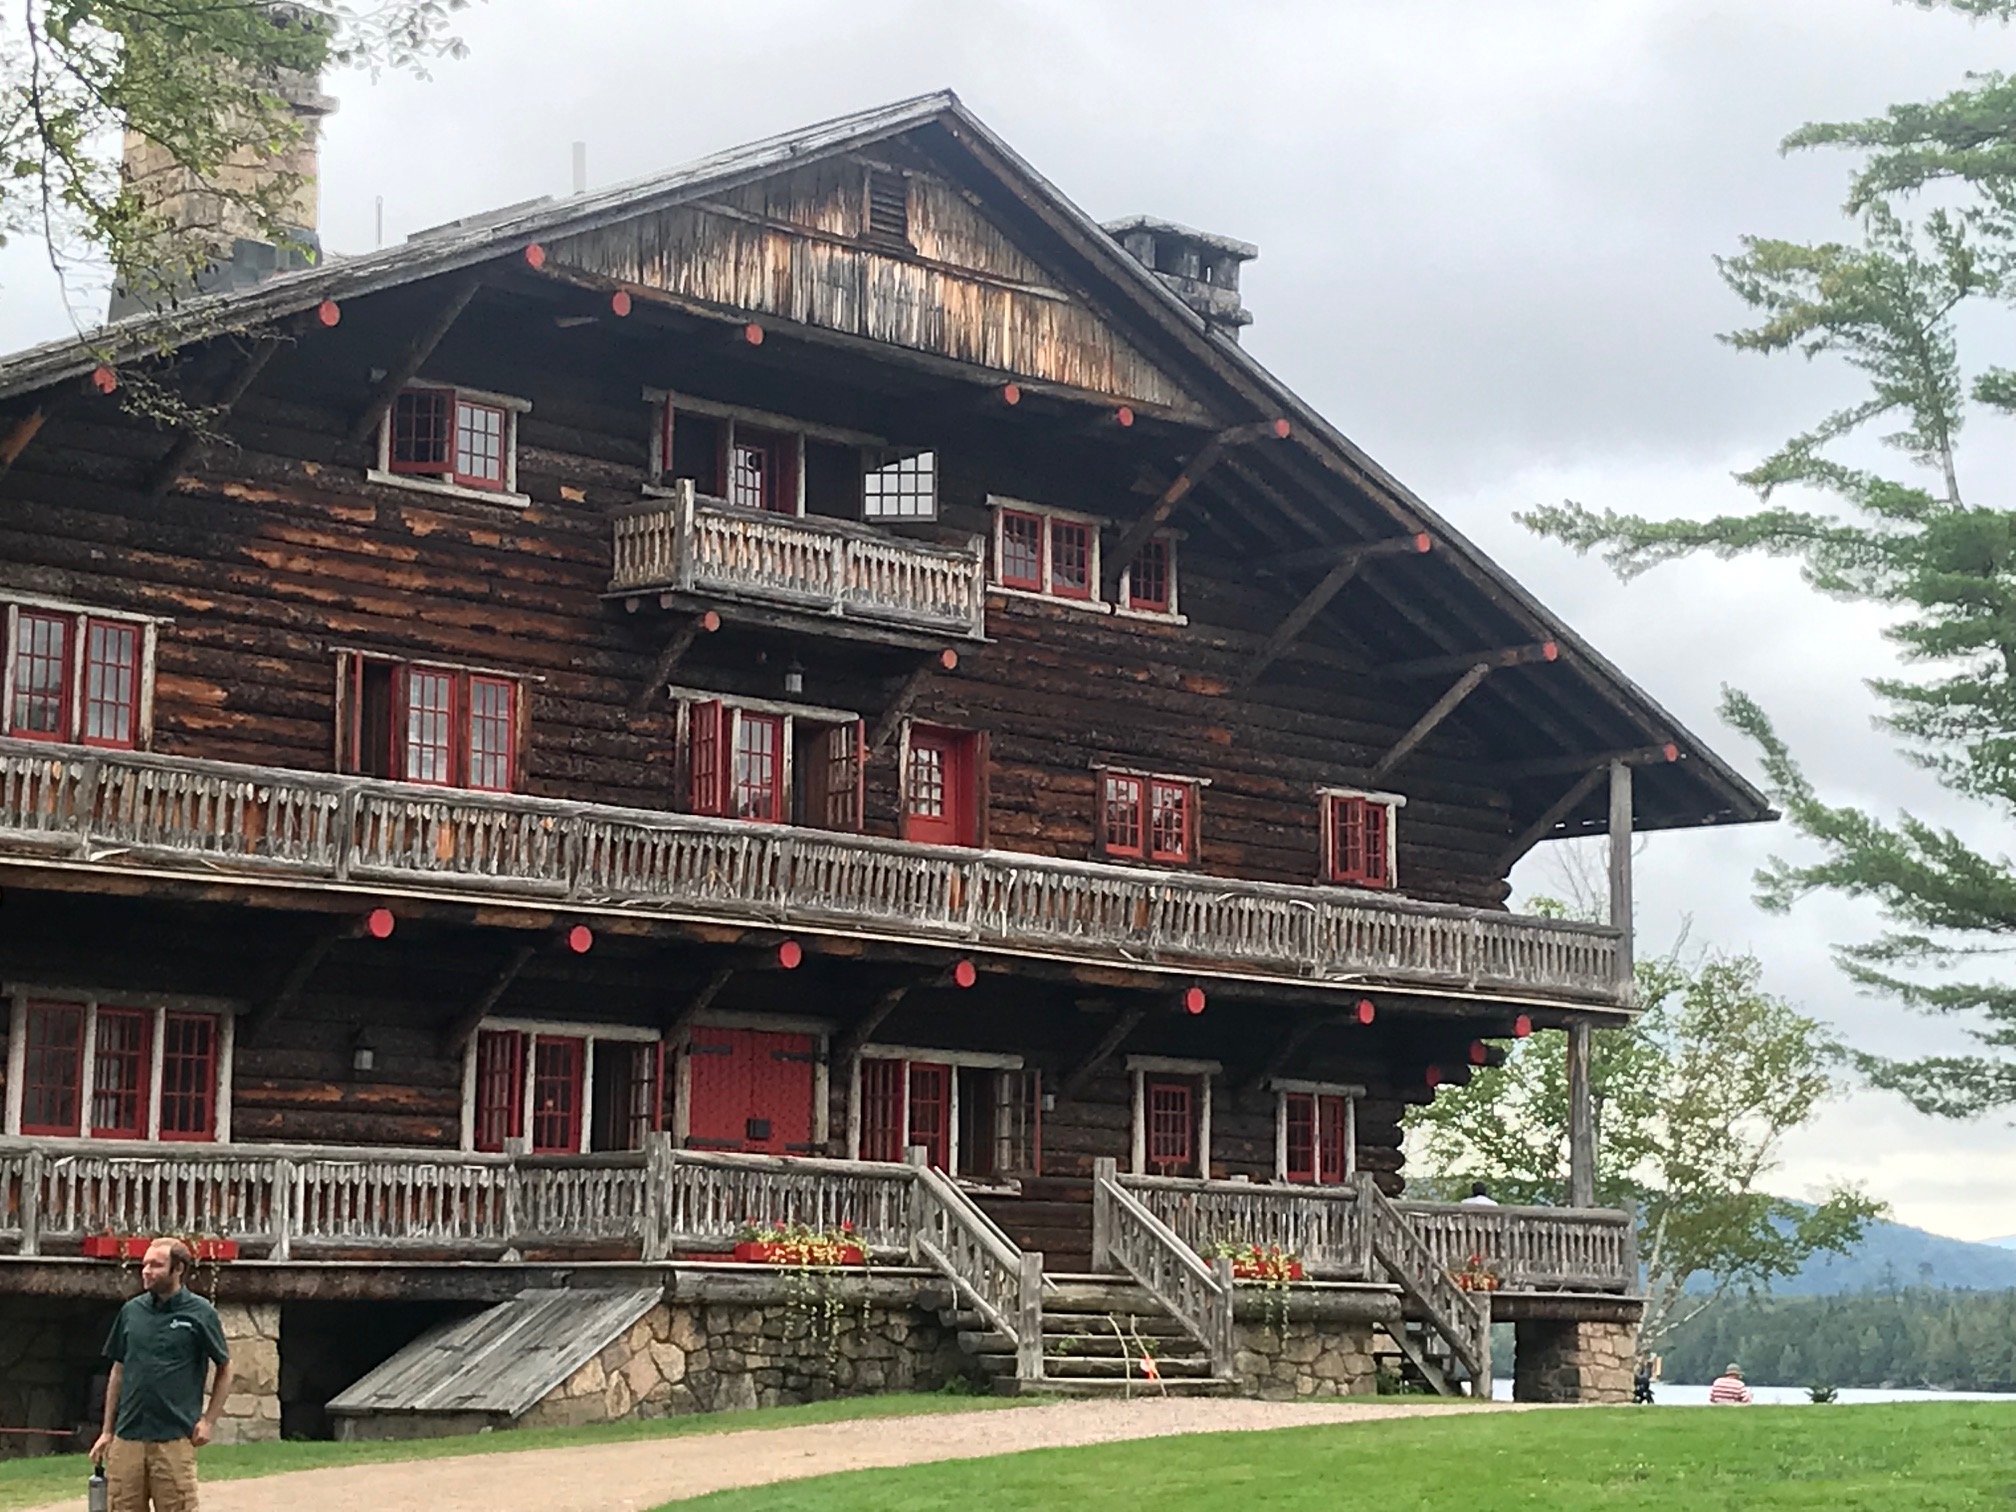
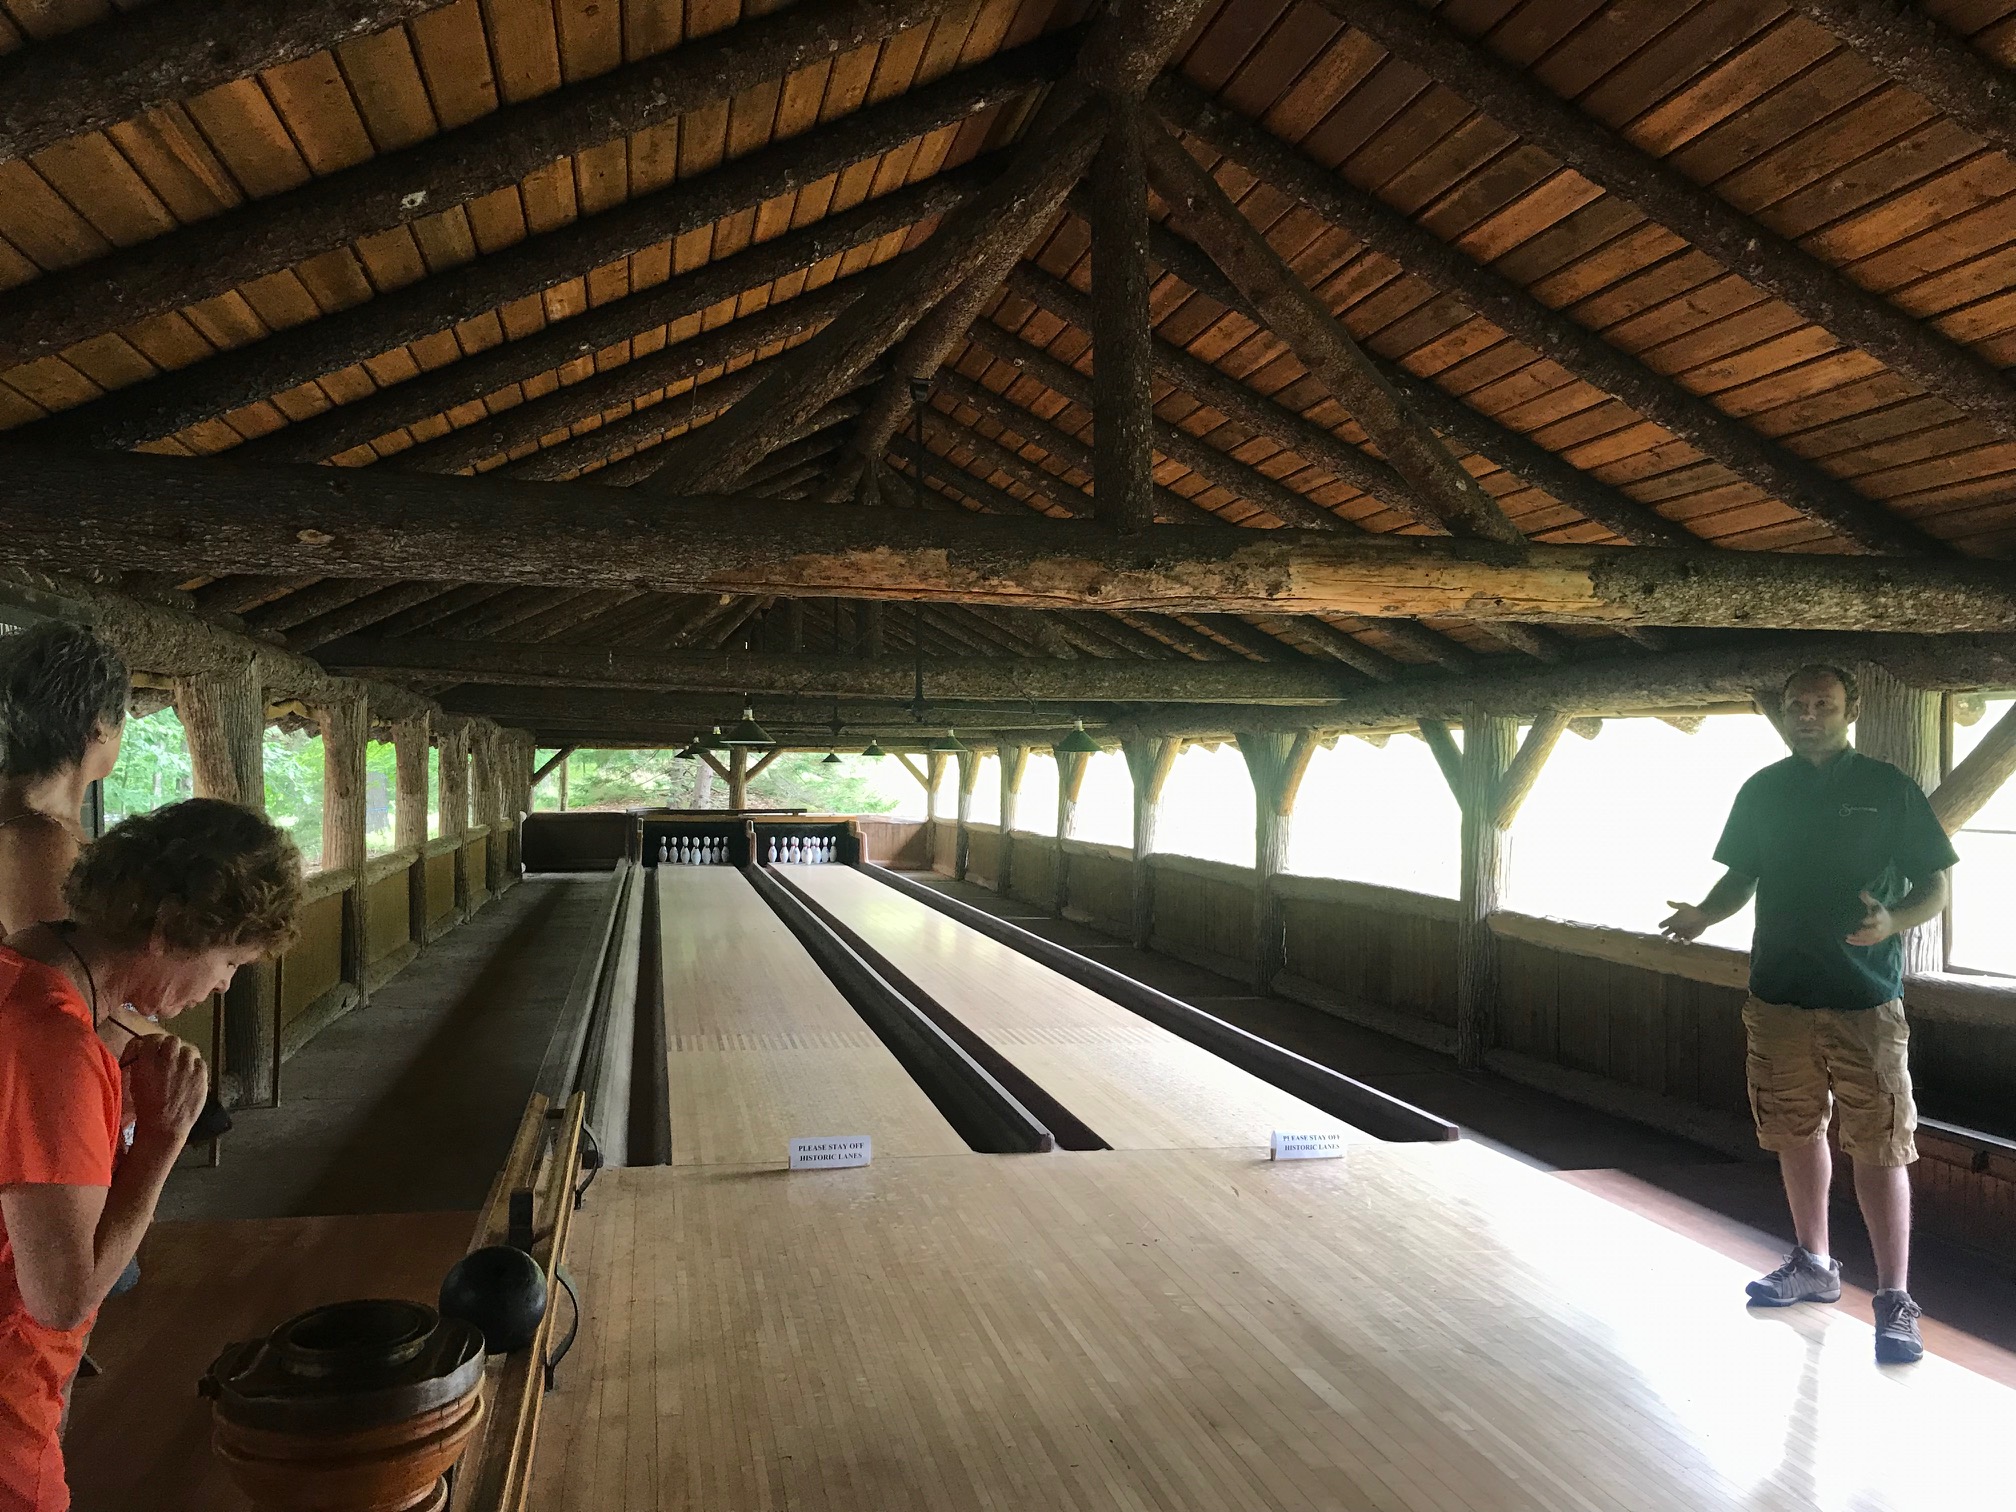
On my way out of town I stayed a night by Lake Durant, which was peaceful and looks like a great fishing spot, and toured The Sagamore Great Camp, which was once owned by the Durant railroad family and later the Vanderbilts. Wish I’d had longer to linger and go on some of the trails there, but got some good background on the history of how the Adirondacks were settled before heading south.
Lake Durant & Great Camp Sagamore, complete with bowling alley
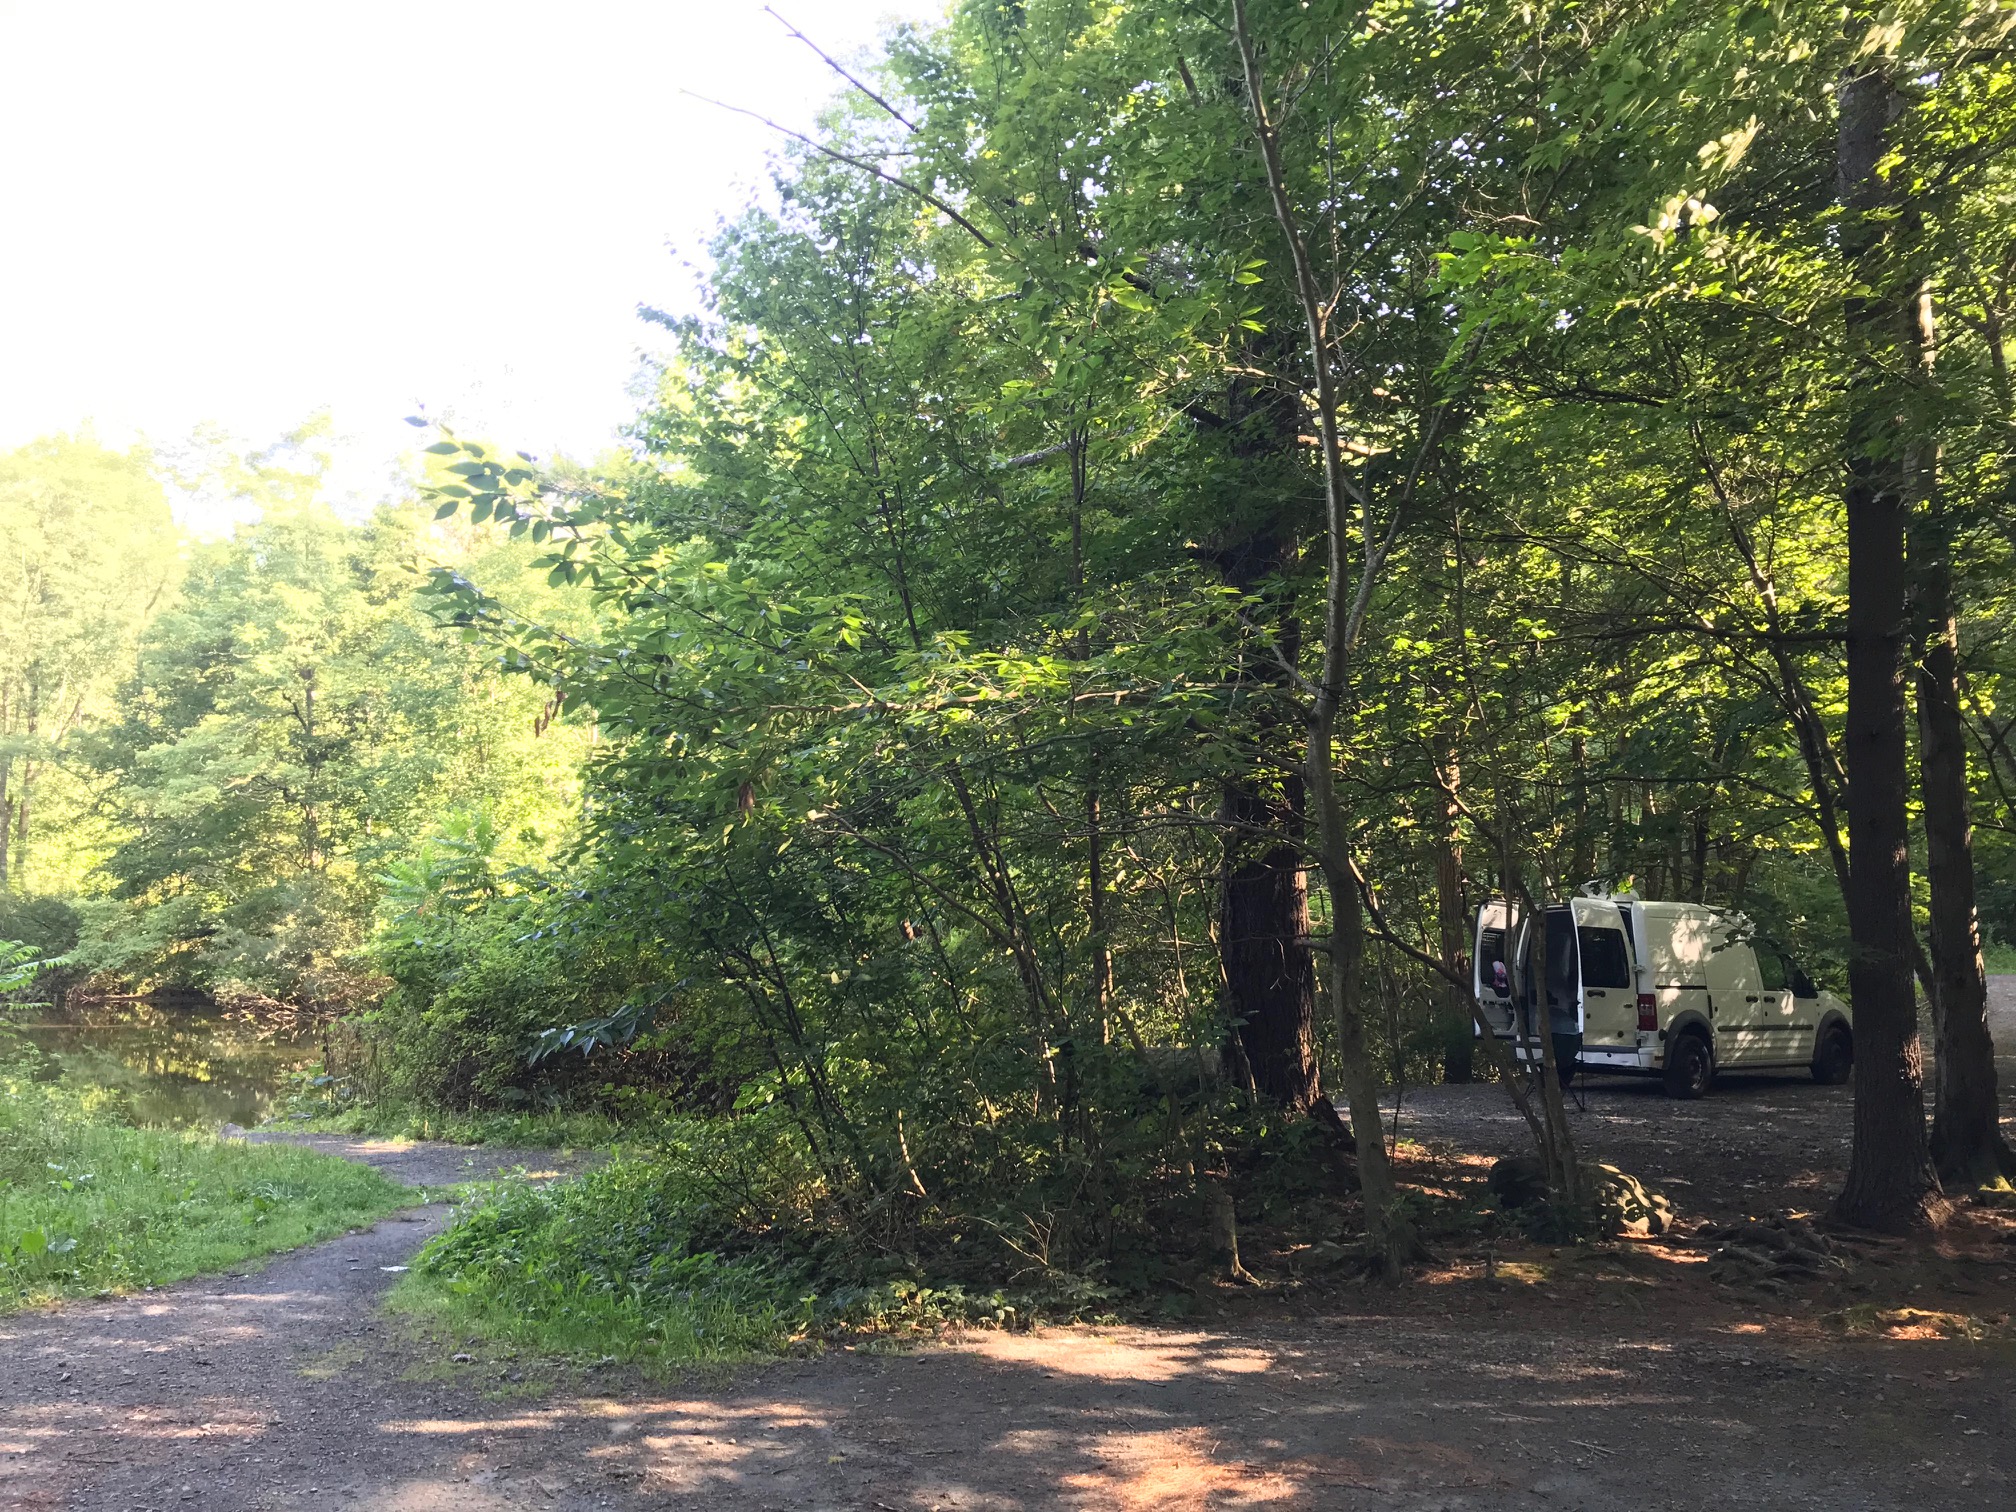
On my way home I spent a night camping in the Catskills near the town of Phoenicia, where I’d also visited years ago on another road trip with a friend. The cool air, many deer, and cicada sounds made for a pleasant stay. People were friendly and I chatted with several including a man who has been traveling cross country for several years and gave me some tips (main take aways from him- stay with friends til they kick you out, and family 2 days max, and listen to local stations even if all you can find is religious or country), and a group of local teachers either just retired or close to it who were very encouraging of my escape.
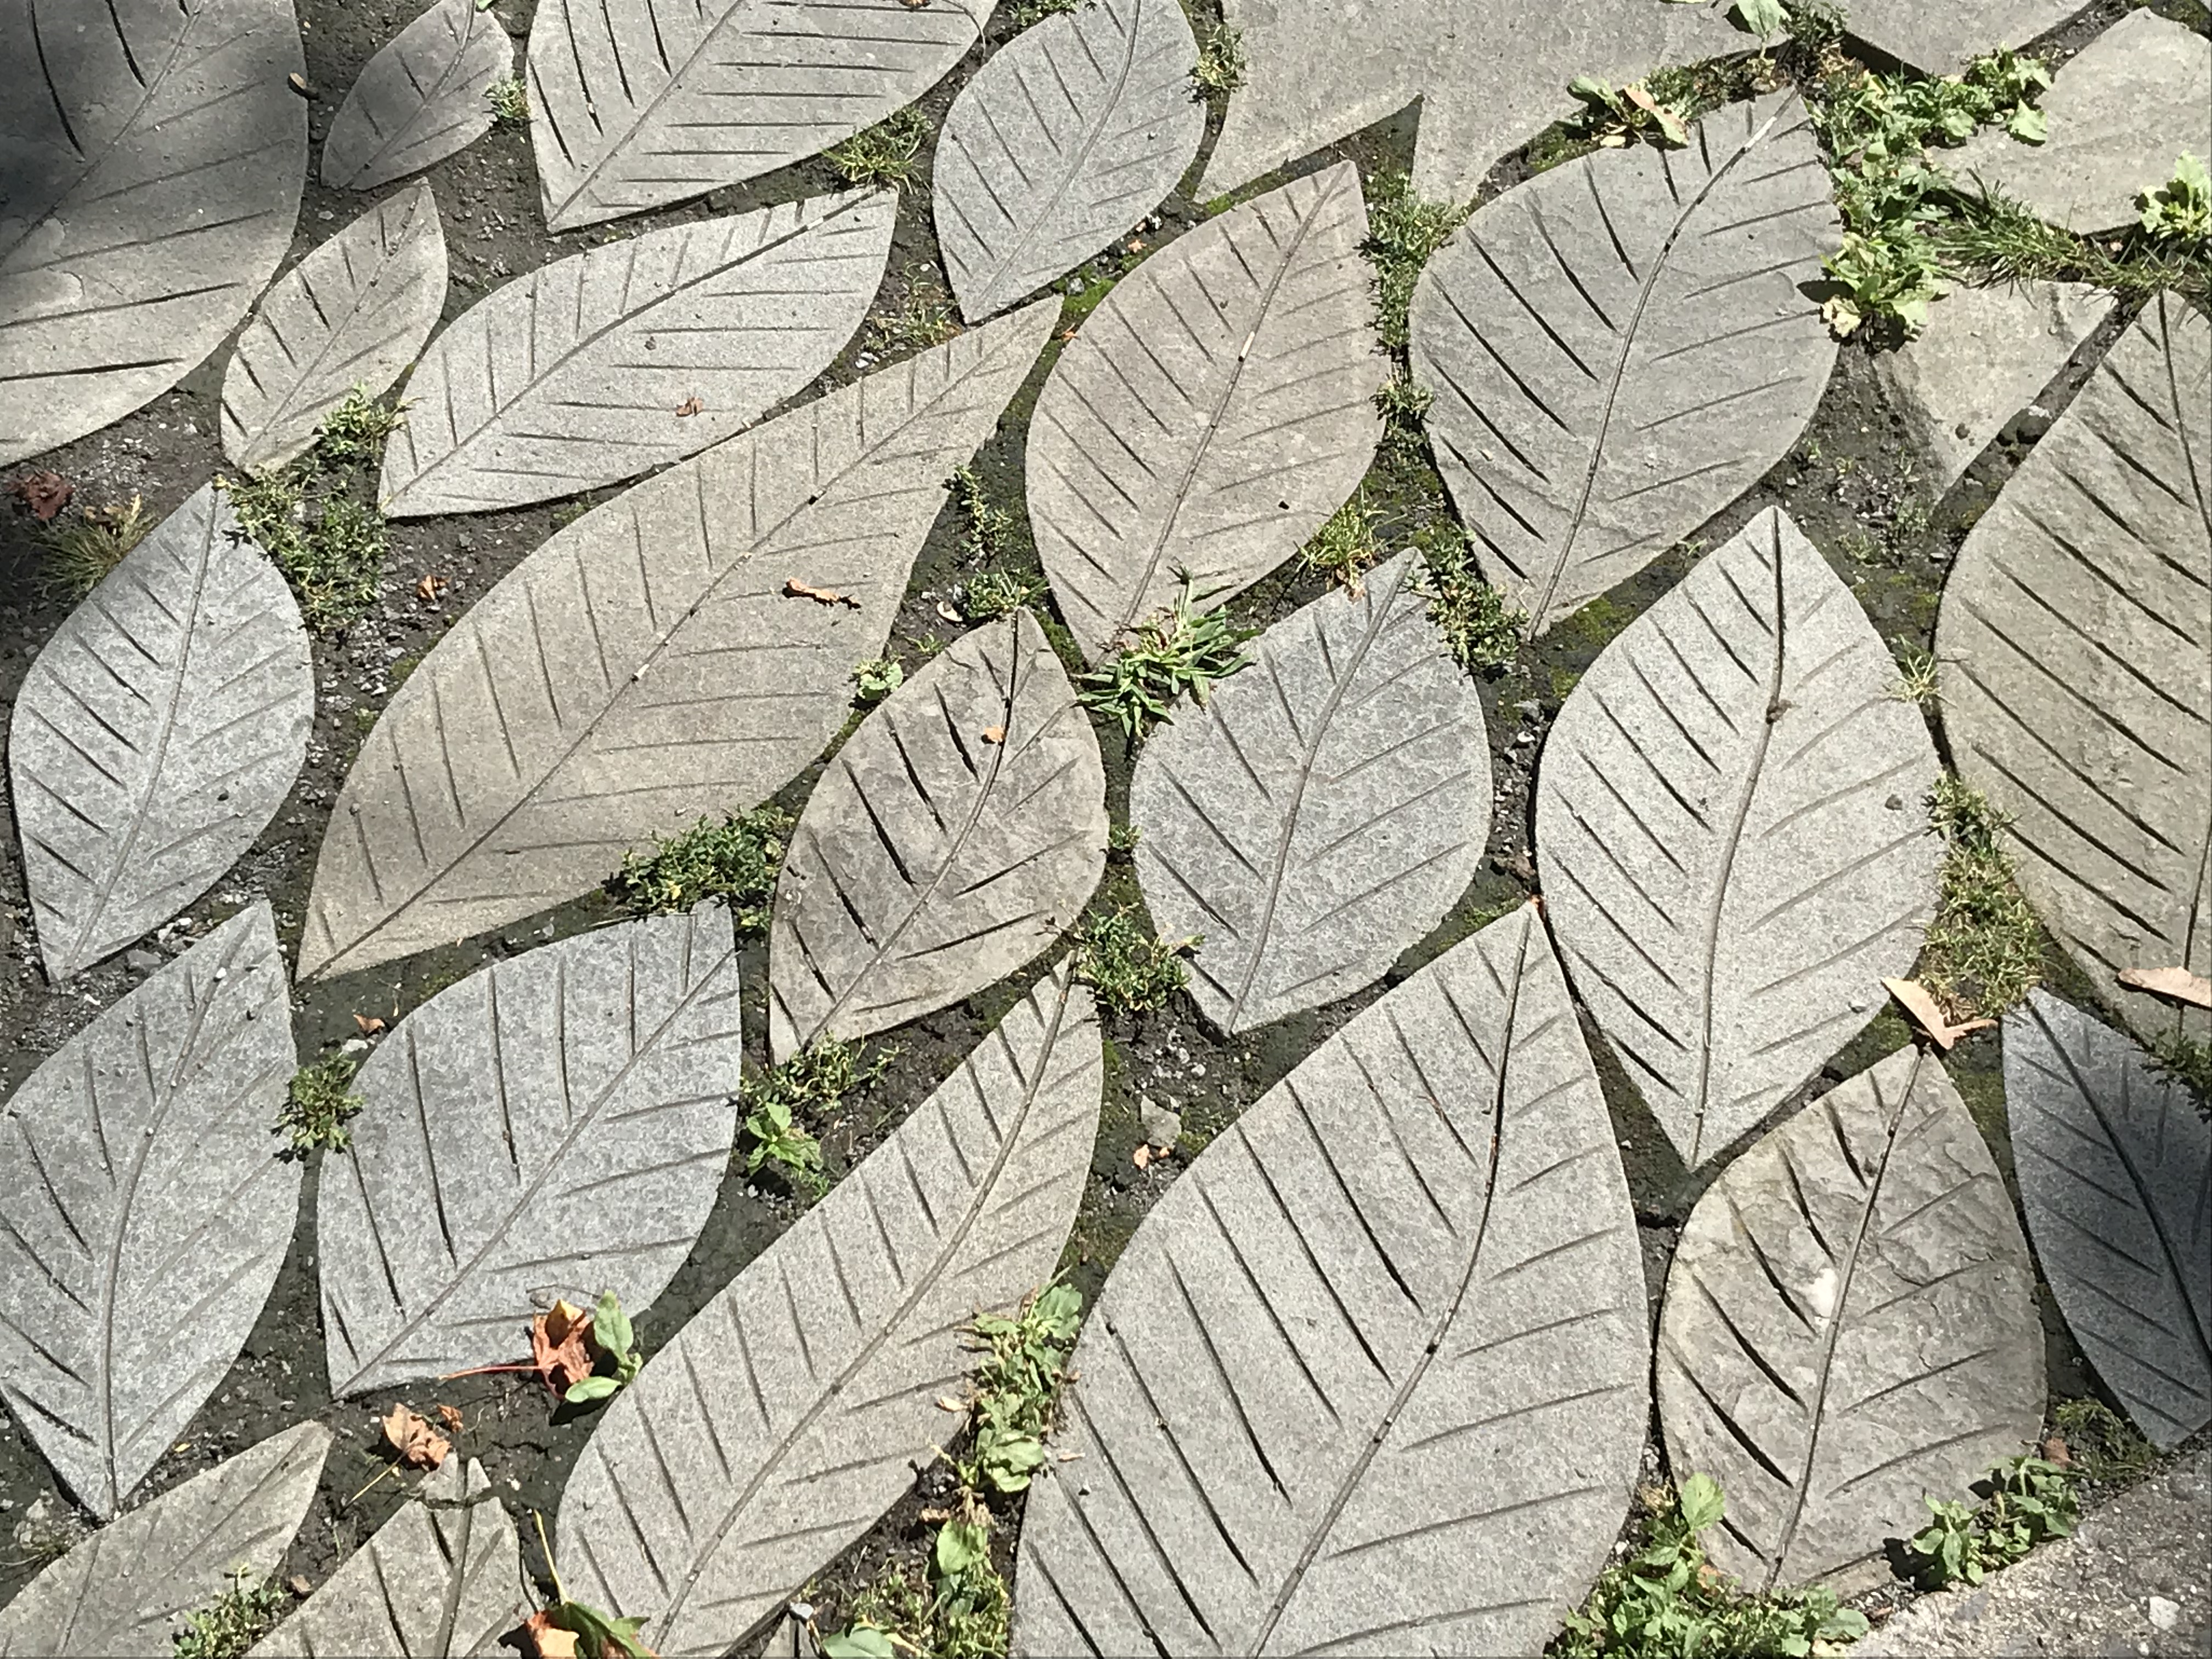
Passed an hour wandering through Woodstock, which is full of hippie folks and concert-related memorabilia despite not actually being where the show was. Had a great vibe, good coffee, and cool stones in the square.
I love these patio stones in Woodstock
Took 95 south for a few hours, and news flash: most aggressive and unsafe drivers were all around NYC/NJ. Stinkiest places on this trip were industrial areas of NJ on the highway, and farmland of southern PA (and myself at times since my current deodorant seems unusually ineffective after a few hours… sorry everyone around me).
Stopped off on the way home at a nice brewery in Bel Air, MD where there was an adorable puppy which overshadowed pretty much everything and everyone else in the place. All in all a good warm up trip full of places I want to check out more when I am actually free.
According to all I’ve heard, the enemy of vehicle dwelling is moisture. Sleeping = breath = condensation = dripping on your face from the ceiling as a wake up call, rust, mildew, mold, blegh. The general consensus from those in the know seems to be the only long-term remedy is a good fan for circulation and ventilation. Also very helpful for hot days, and bonus of being like white noise at night. Win!
The most effective fan mentioned everywhere online is the Maxxair Deluxe fan, which can switch between intake to circulate air from outside or act like a ceiling fan, and exhaust when cooking, stinky, etc. It has 10 speeds, cranks open manually because I don’t need the version with a remote, and has a thermostat so you can set it to maintain a temperature of 70-something (I think it’s preset and haven’t actually tried this feature- will update one day). Also has a rain cover so can be used in all weather. Sounds great!
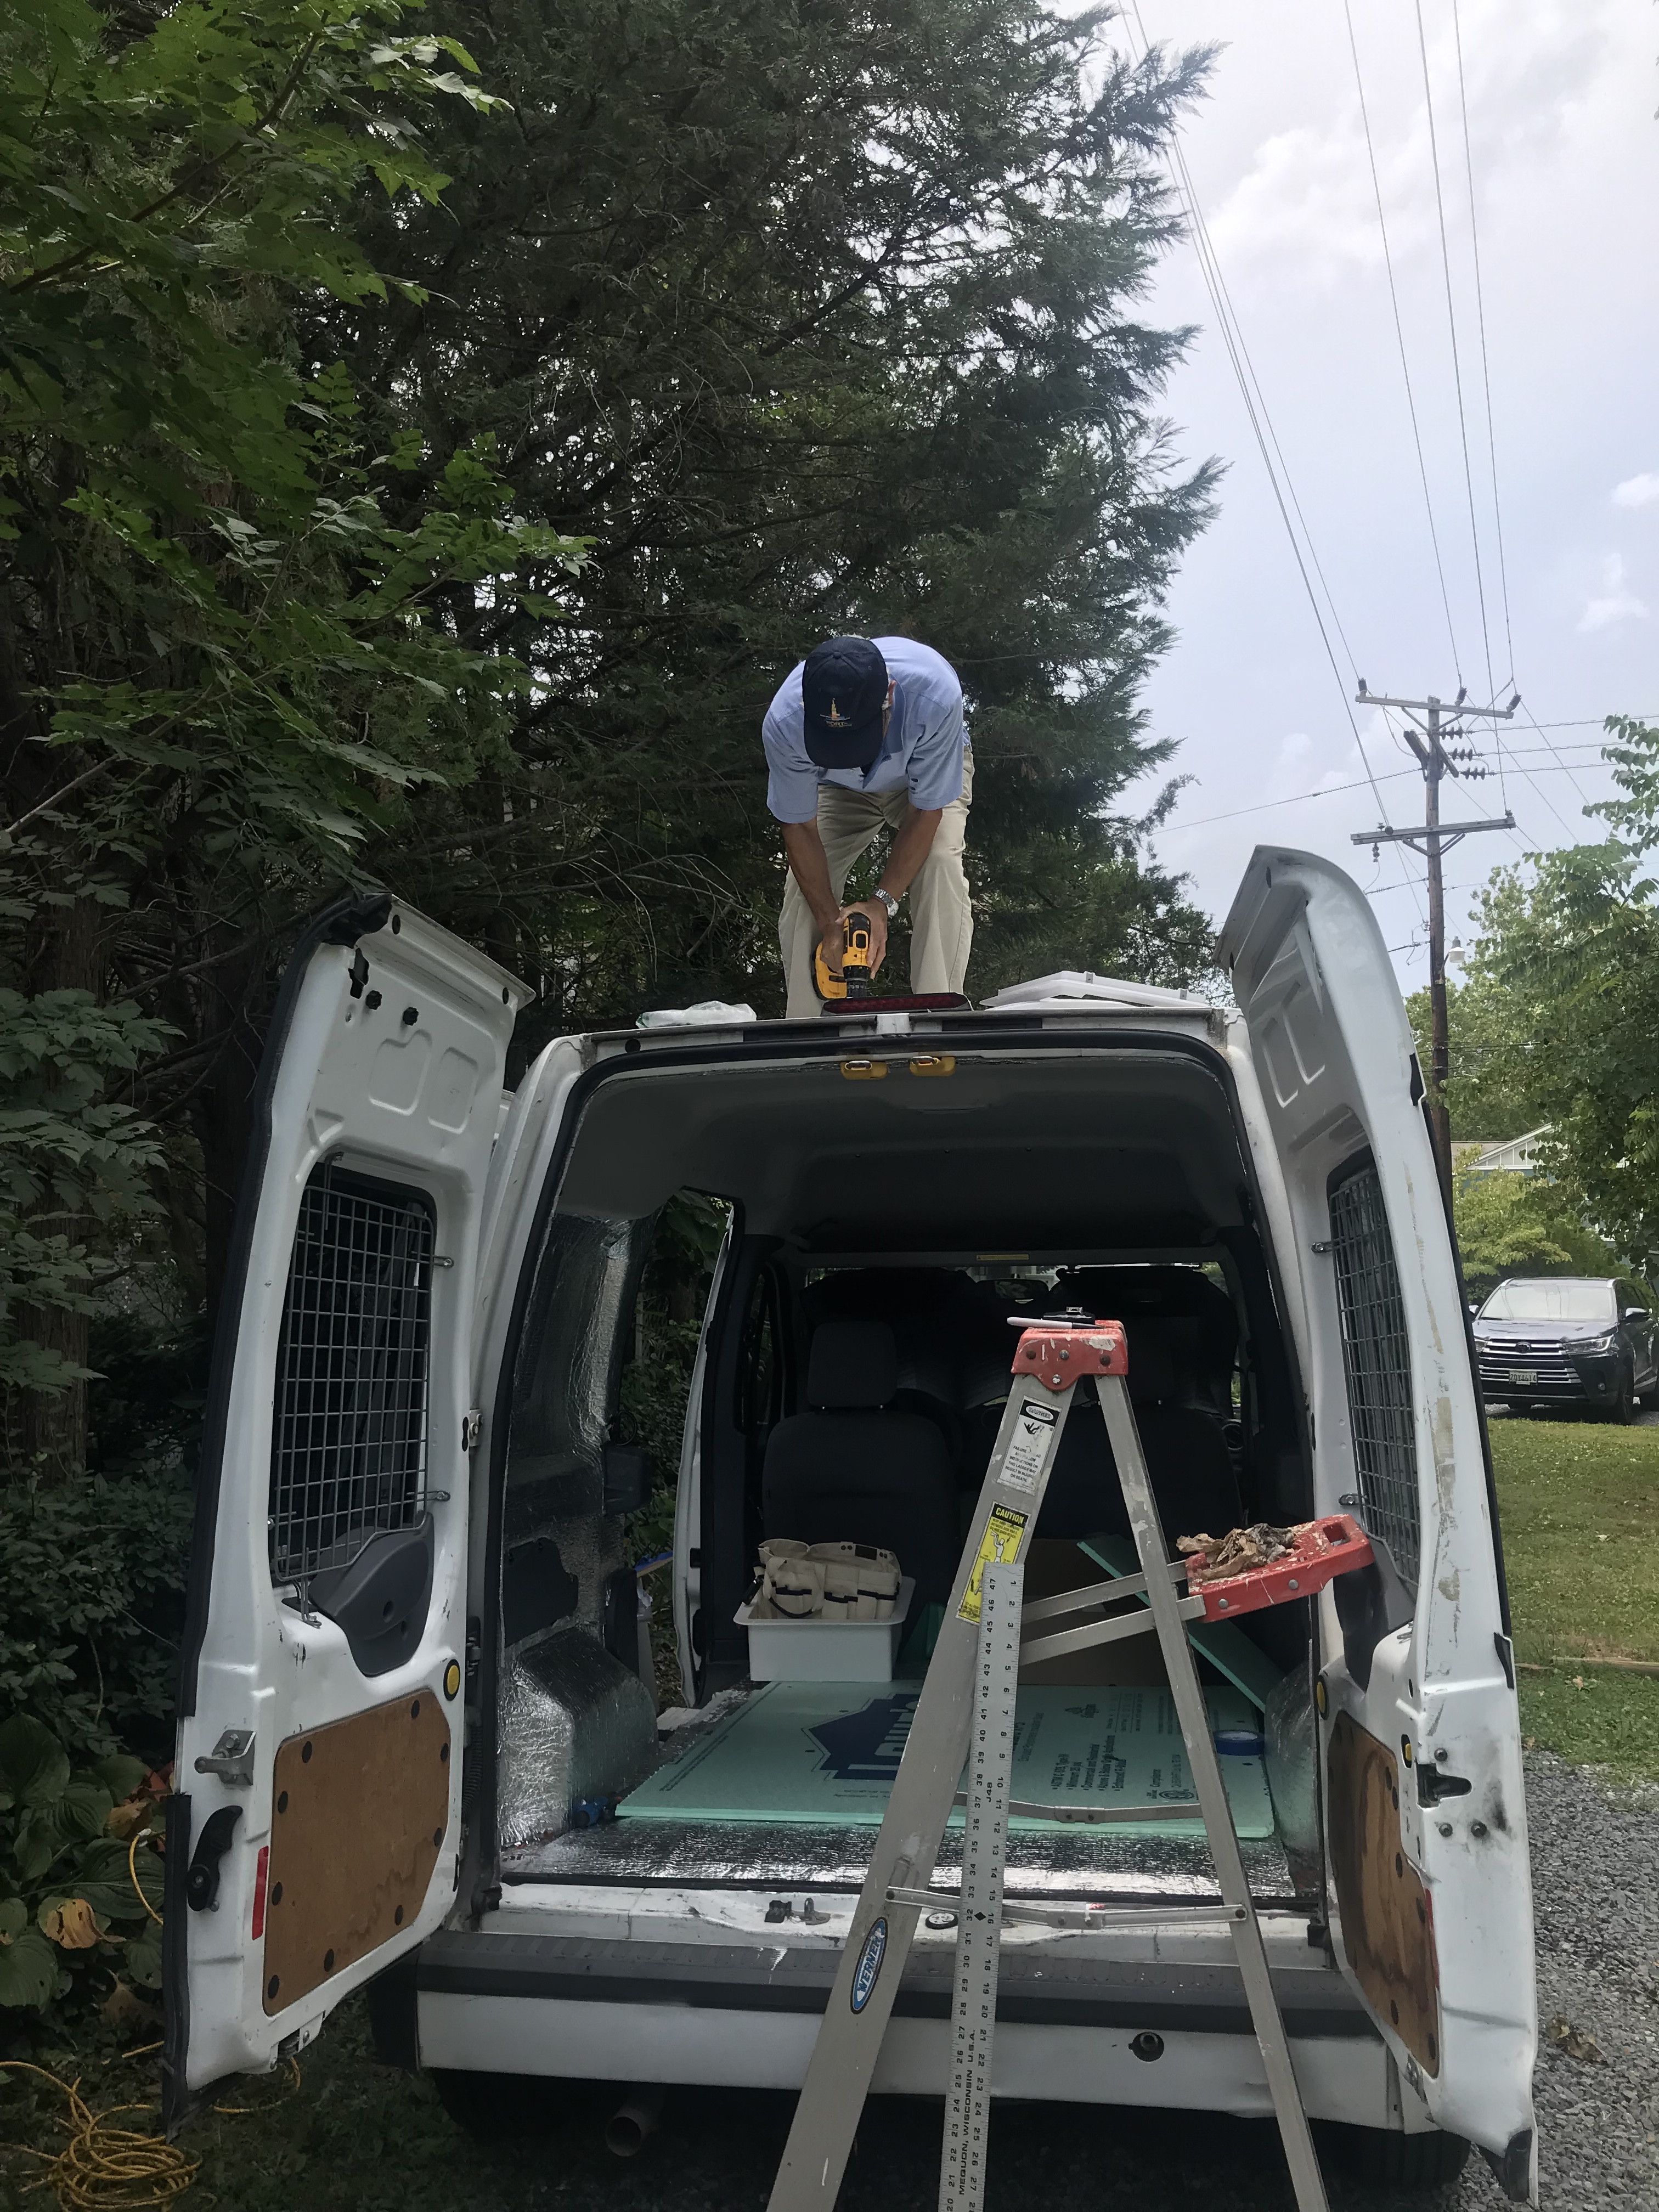
The first step to install the fan after ordering all the things needed is to take a giant plunge and chop a hole in the roof of the van. Yes, you read that right, cut a 14″ square in the roof of my future home. So there’s that. This requires a good saw that I don’t have but a few friends and connections do, so I was able to get a neighbor to help me out with this part.
Cutting the Roof Hole: The beginning of my comedy of errors
Now when cutting a big old hole in the roof of one’s vehicle, you might correctly assume the most important thing to do first would be to check the weather and wait for a day with 0% chance of rain. This is what smart people do. I, on the other hand, decided to take advantage of the offer for help from a family friend/neighbor who was going out of town in the next day or so, My window of opportunity was shrinking, the forecast that morning called for thunderstorms starting between 6-8pm. It was around noon. Plenty of time, I thought, I can either get the fan in and sealed or the van to a garage in plenty of time.
This, my friends, was a mistake. Classic beginner’s hubris. Trusting the weather report dumb. Assuming things would go smoothly stupid. Sigh.
I measured out the spot in the rear of the van where I wanted it to go. My little van has limited space I could choose from- basically it could go right behind the seats in the center of the van, or toward the back because of the lights installed in the interior ceiling are dead center. I really wanted to go with the rear placement so if I crack the front windows it would create a good air flow covering the whole space, versus leaving the back of the van pretty much untouched if I went with the front placement. Plus, with the exhaust feature I wanted it close-ish to where I’d be potentially cooking in crappy weather toward the back of the space. There’s a top rear brake light on my Transit Connect that is a little close for comfort, but I decided to risk it.
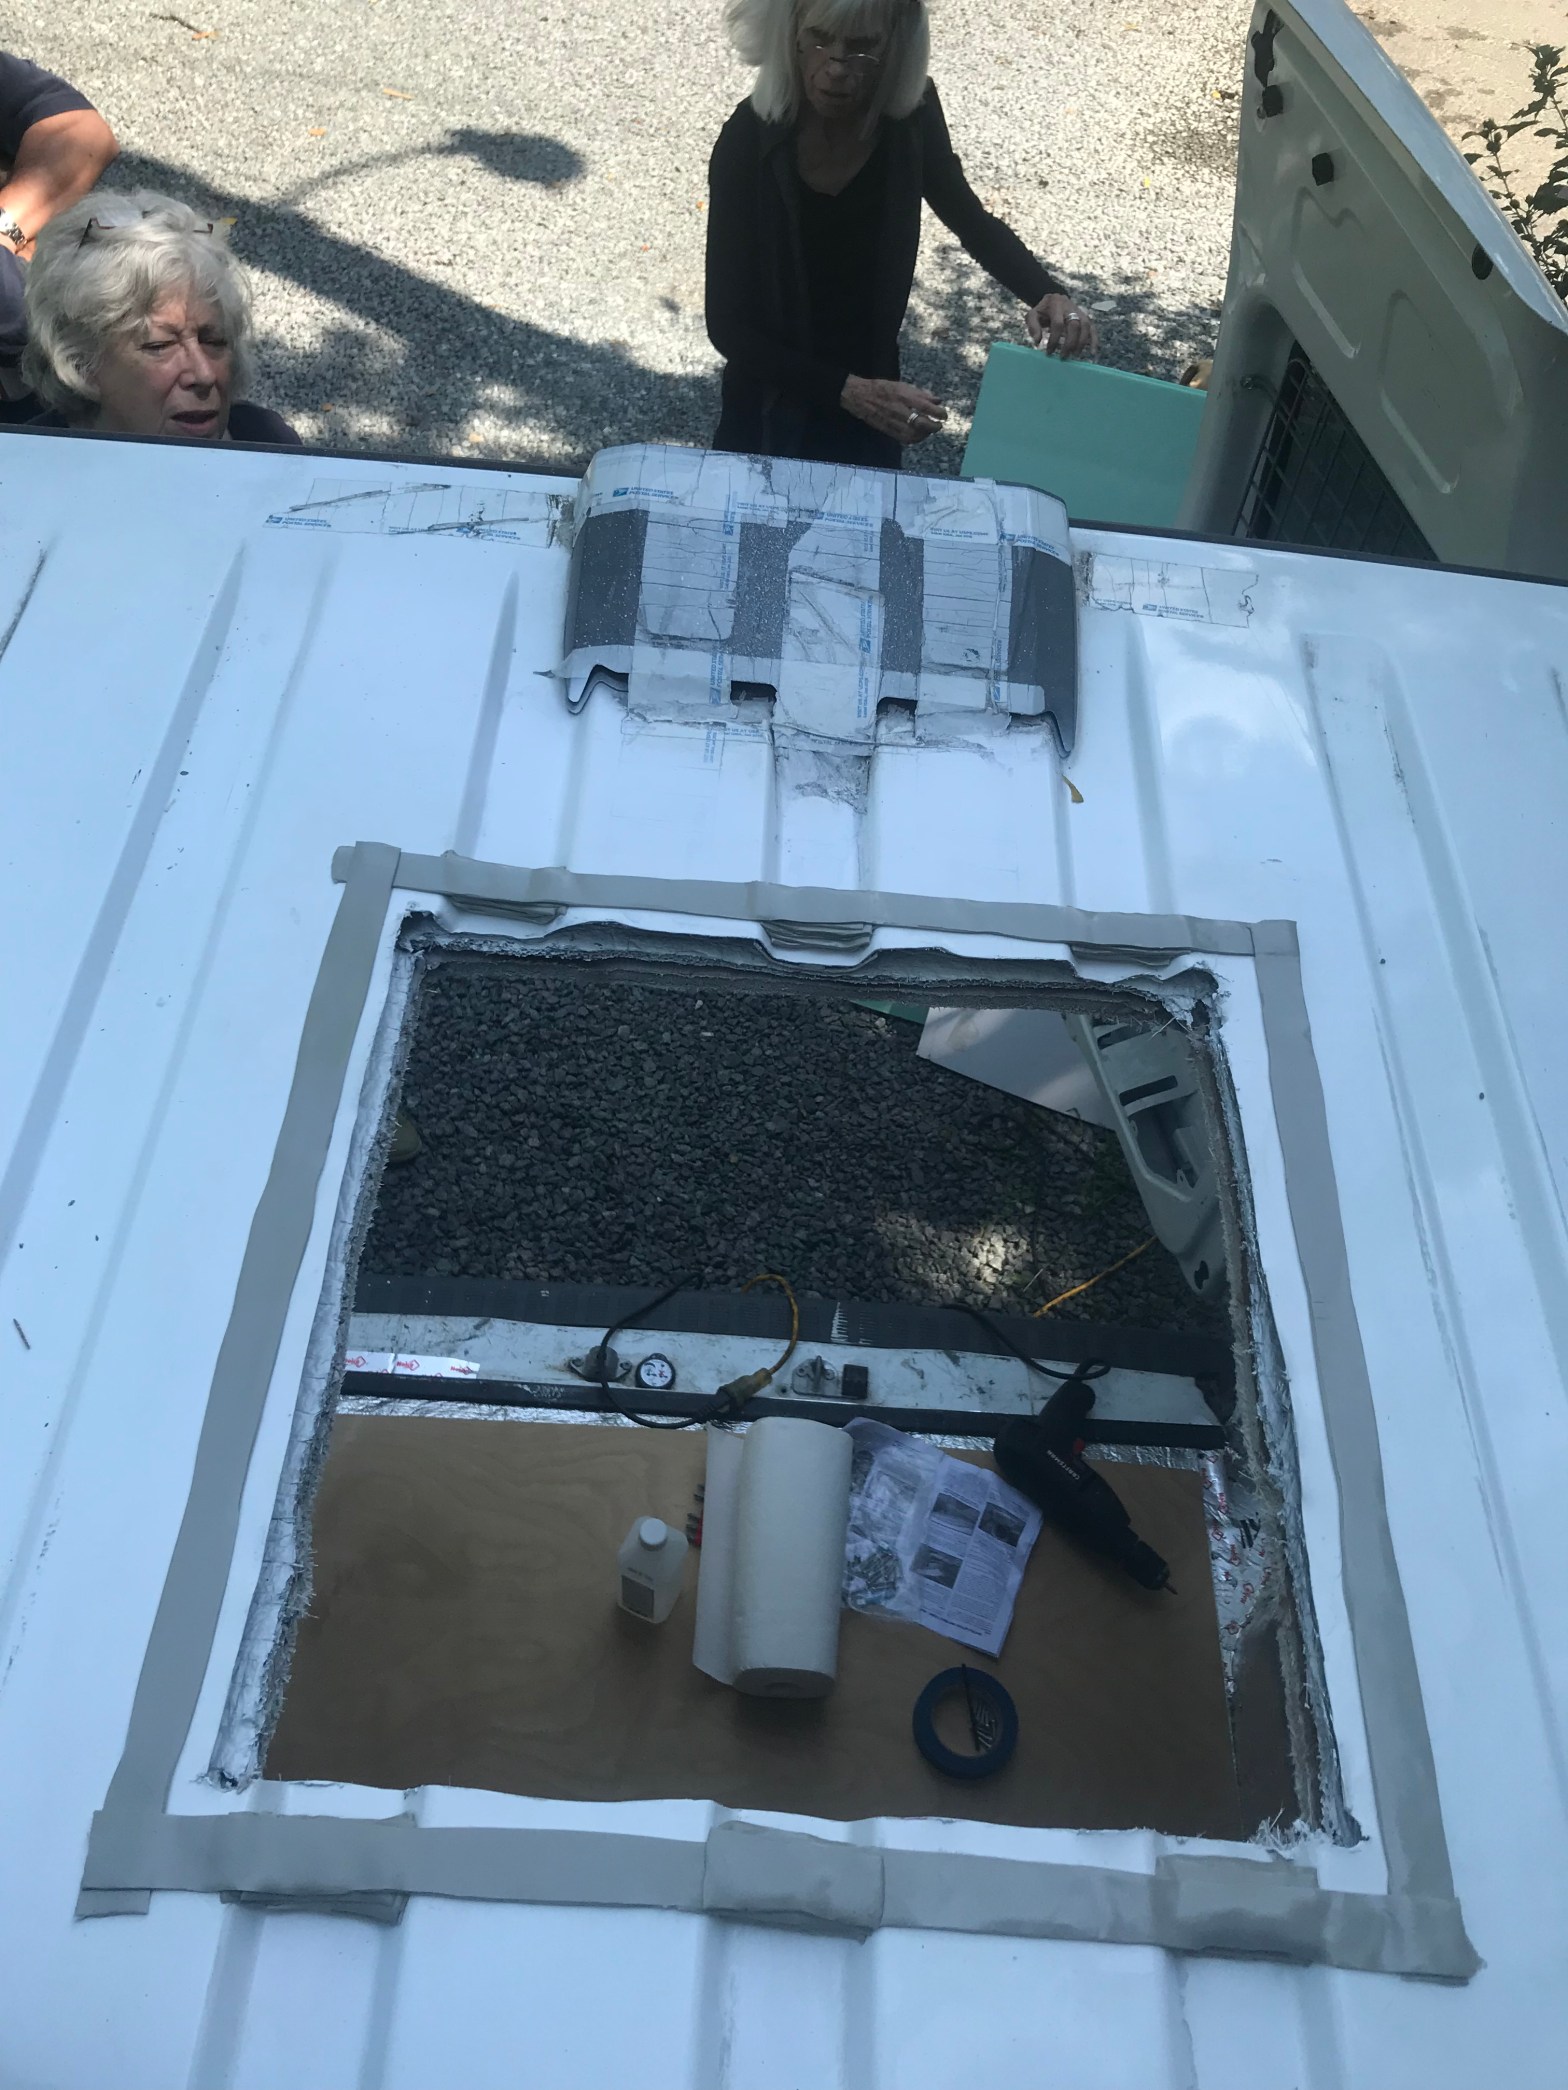
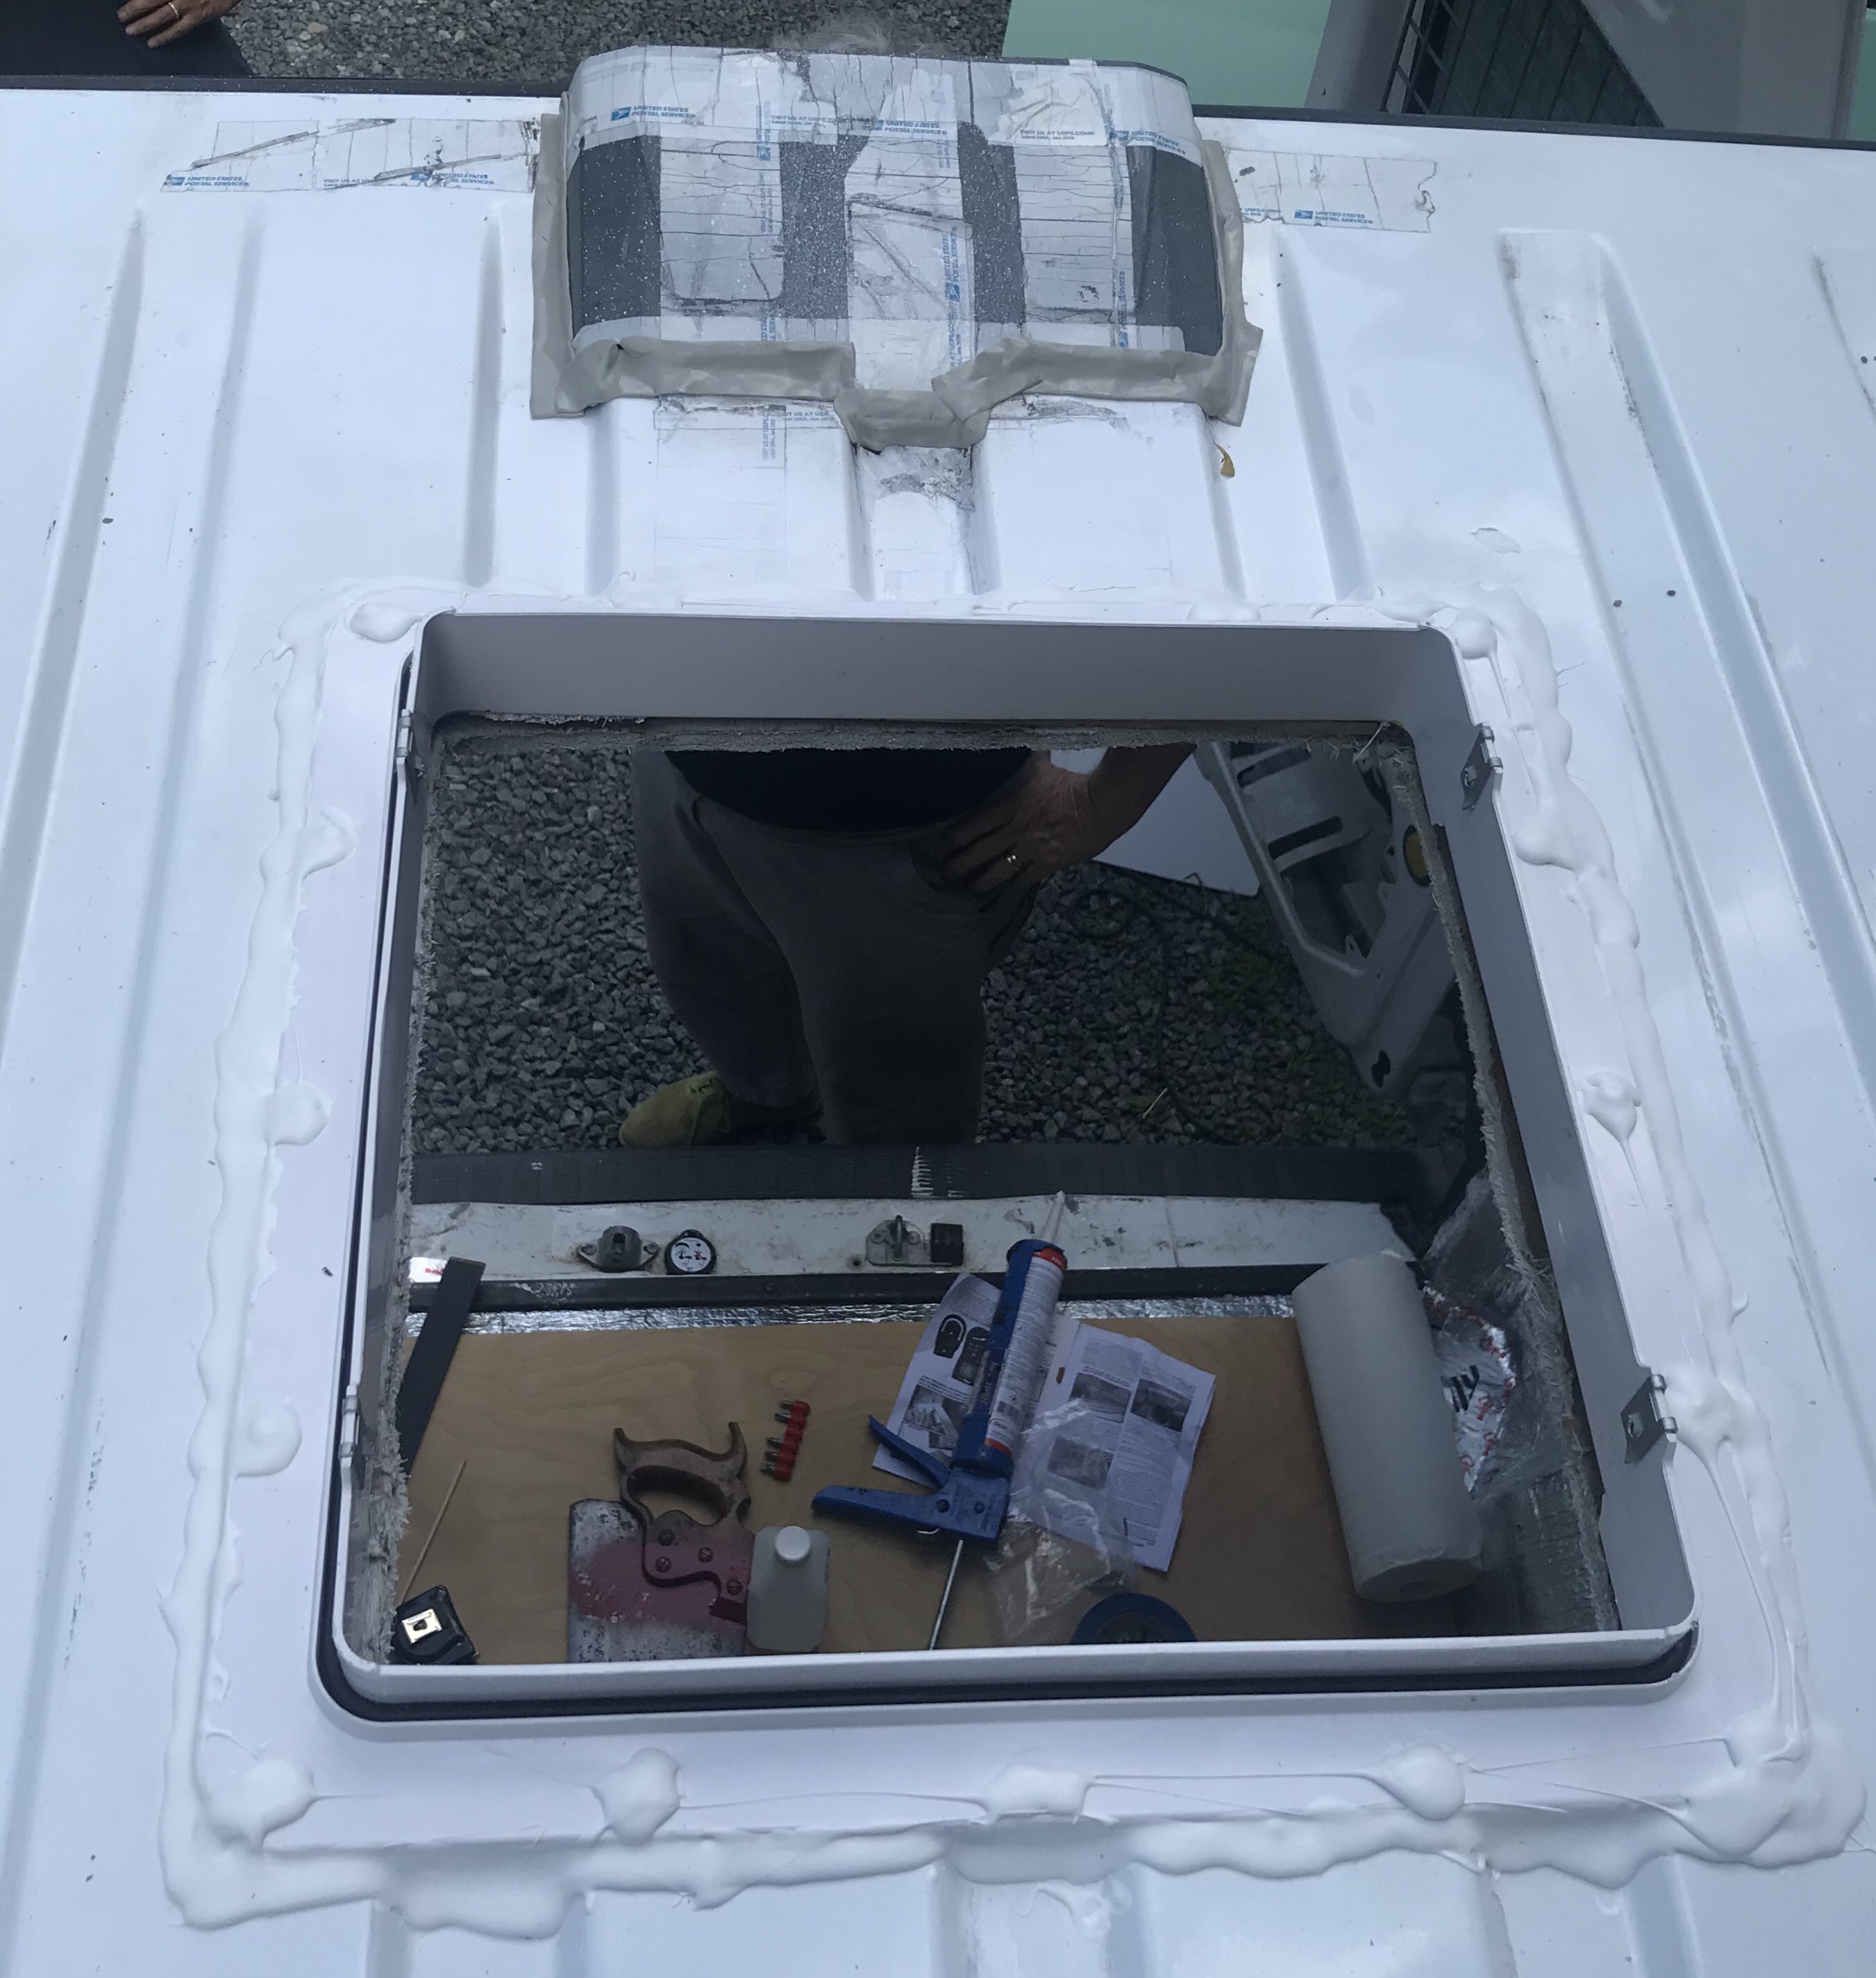
So, Osamu climbed up to the roof, we traced out the outline of the template, drilled corner holes to get the blade in, and he went to town with the Sawzall (or something in that family). I think it was harder than expected to stick to the lines exactly but overall it seemed to go pretty quickly after a flurry of me and my godmother fetching the tape measures, trash bags, ladders, extension cords, drills, etc. that we had’t had time to gather before he came over so promptly. Once this job was done Osamu promptly hopped off the roof to go home and watch tennis, glad to be done with us underprepared ladies and their crazy plans.
Kind neighbor cutting the specified block out of the roof
When the hole was cut, I climbed up and filed the jagged edges, sanded some, and tried to fit the base on. Nope. After much shoving, leaning, and wiggling I kind of got it in on 3 sides and was filing down the last one. By now it was probably around 1:30 or 2pm since all the gathering, measuring and drawing took (surprise) longer than expected. I was up there trying to fit the plastic frame into a somewhat too small square when Osamu returned to check on us- his tennis match was in a rain delay. One small stroke of luck! He hopped back up and used some metal shears to trim off a little more on the edges of several sides, and while he was up there drilled the screw holes (this I actually was going to do but hey, I take all the help I can get).
Now that the frame actually fit the hole, I went back to work sanding, filing, then sprayed the edges with Rustoleum to paint and prevent rust. It was now around 3pm.
Edges filed, frame fits, what could go wrong?
It was about this time that the first raindrops started to come down.
A look at the radar showed that the predicted rain and thunderstorms were approaching much faster than the news had predicted. Like, 2-3 hours early. Like, right now.
We grabbed some trash bags, painters tape (which didn’t work at all), duct tape (which was old and down to the end of the roll so it was sticky on both sides), and styrofoam. As the rain started to come down and the thunder rumbled, Jane rushed around gathering items as I was trapped on the roof of the van, unwilling to come down the ladder on unstable gravel without her there, plus I’d just have to get back up again. When she returned with the items, I attempted to tape down the trash bags over the styrofoam, which was intended to avoid the bags collecting water and collapsing into the hole. Once the roof got wet, however, it was very tough to get the tape to stick to the slick metal, and don’t get me started on the ridges on the roof. I finally got it stuck as I was going to get it, and climbed down to tackle the inside. We taped the styrofoam to the roof as much as possible to keep it from flying up, but with the sticky duct tape clinging more to my fingers than the roof, it was kind of a frustrating mess.
Grumpy self in the rain waiting for trash bags and tape delivery by my positive outlook coach Jane
I may have flipped out a little and hit my fist repeatedly on the door trying to get the stupid tape off my hand. I may have threatened to burn the whole thing to the ground because it was ruined. I may have been a little melodramatic. But rain was starting to seep in, darkening the ceiling as a stream of water growing steadier by the moment trickled in through one corner, then another. We fetched Jane’s soup pot to catch the waterfall, and some towels destined never to be the same color again. My pants had tiny shards of metal from the cutting, trimming and filing embedded all over. It was not my best day.
I jumped in the van and Jane in her new and non-leaking Bug and took off in the height of a thunderstorm downpour to the closest garage without need to feed a meter. We made it there, me glancing back at the dribble at water dinging in the pot and continually waiting for the moment the poorly secured tape would give out and the whole foam and plastic getup would fly off into traffic and cause a pile up. Luckily we made it with all secure, thought as I entered the garage I realized I didn’t actually know the clearance of my new to me van; later searching says it’s 6′ 6″ and the garage clearance is 6′ 8″ – Jane was driving behind me and says my antenna made it under the entrance arm just barely. We parked under cover, and my defeated, drenched self got into her car and left the disaster there overnight.
Of course, as we left the garage the rain let up and by the time we returned home 10 minutes later the sky was clear once again and it remained precipitation-free for the rest of the evening. Of course.
Day 2: Where I learn to stay positive
The next morning, we went back bright and early (the garage doesn’t charge between 10pm-7am and we escaped before the exit arm went back down, so at least it was free!) to retrieve the van and see what damage had been done.
I pulled off the trash bags, dumped the inch or so of water in the pot, wrung out the towels, and wiped down the damp floor and puddles in the floor cavities. We removed most of the fasteners holding the roof cover up, and stuck a few skewers in between the roof insulation and ceiling to air it out. Osamu dropped by, curious to see how we’d weathered the storm, and let a box fan to help dry out. It worked great after we’d covered the hold in the ceiling material with the styrofoam to direct the air around to circulate. I also sprayed down the whole ceiling material (update- I have since learned this is called the headliner. obviously i am now a car expert) with the mold-preventative spray I had left from the floor install, so it would dry at the same time. We left that to dry while working on some other things like the floor, and it was good to go later in the day, so we popped it back up and replaced the fasteners.
Our Macgyvered fan drying of ceiling propped up on left over insulation’s
Installing the Fan
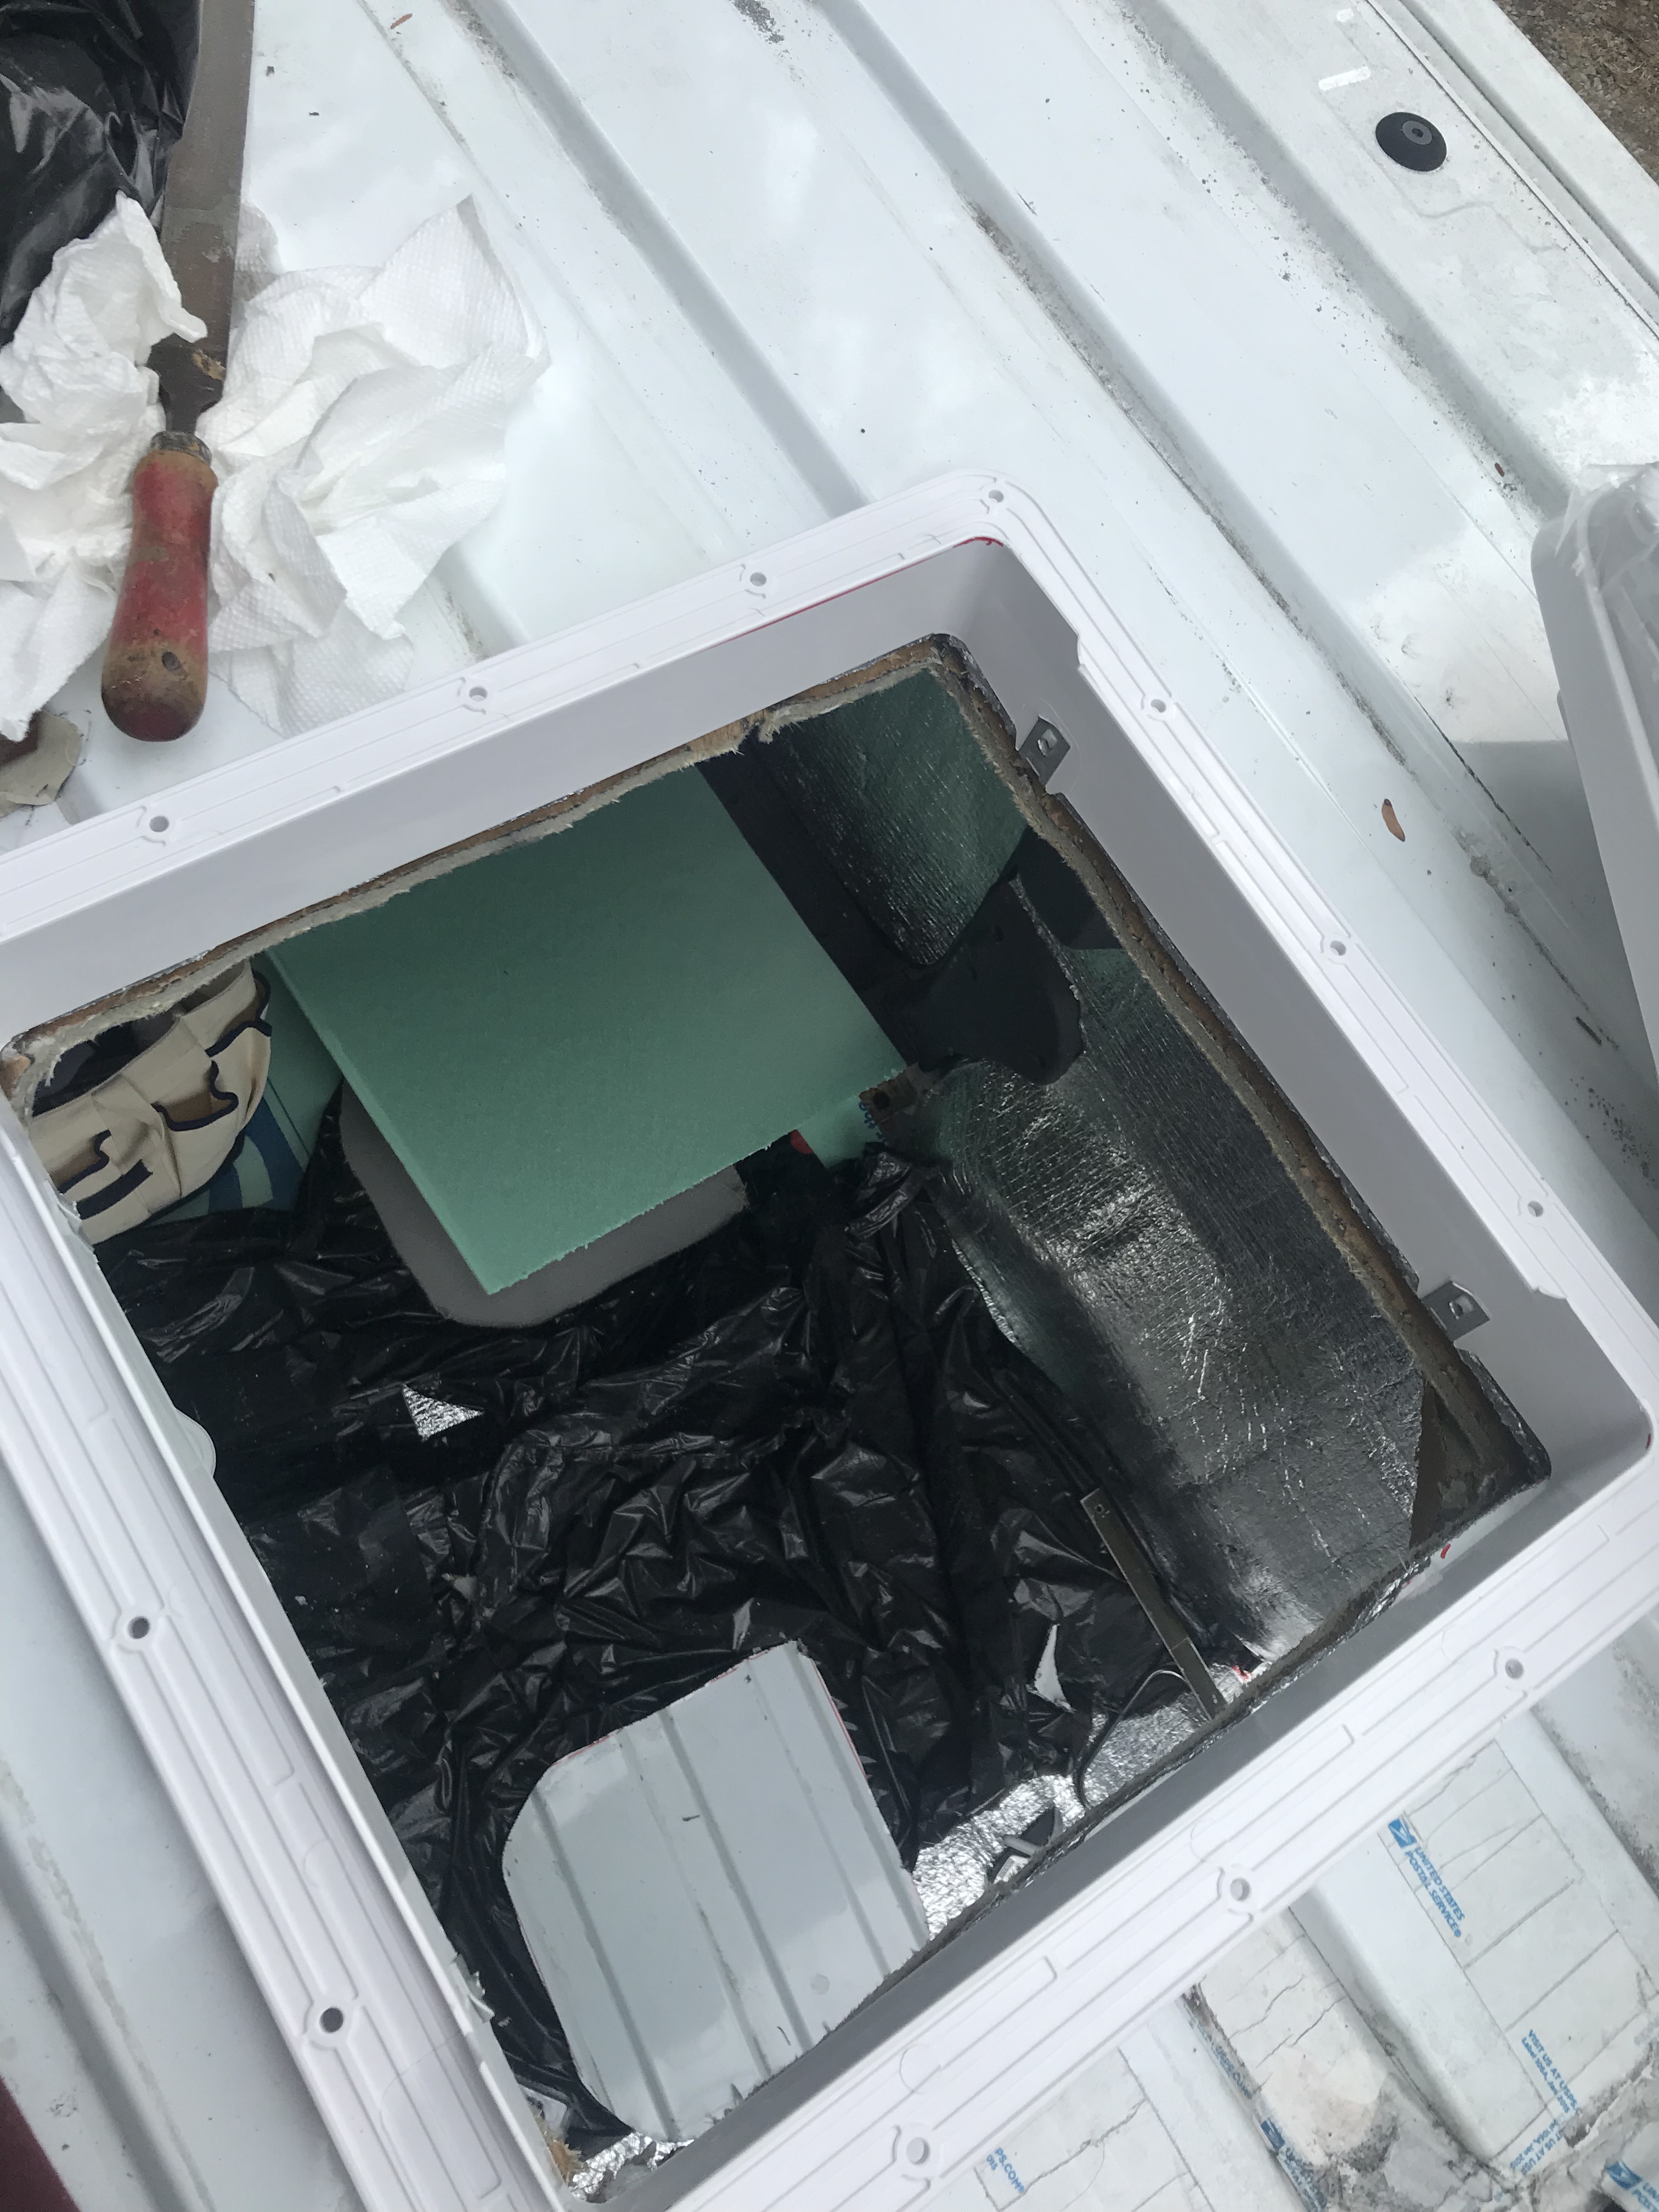
I got back up on the roof, cleaned the surface with rubbing alcohol, and started to prepare for the installation. As I mentioned, the van roof has ridges maybe half an inch deep along the length. In order to fit the flat frame on without allowing any water to come in, I had to fill the ridges with sealant before attaching the frame. I used many layers of butyl tape on top on one another to build a wall, then lay a layer all around where the frame would meet the roof around the hole to seal off any moisture.
My little ridge dams and final edging of butyl tape
Then cleaned the frame as directed with acetone (well, nail polish remover) and stuck the frame down firmly in the hole, and had my next troubleshooting moment. The screws didn’t seem to have anything to attach to inside the van roof, perhaps we drilled the holed too large. We improvised by sticking wood pieces, similar to paint stirrers, between the insulation and the roof metal creating a frame around the hole, which I was able to screw into.
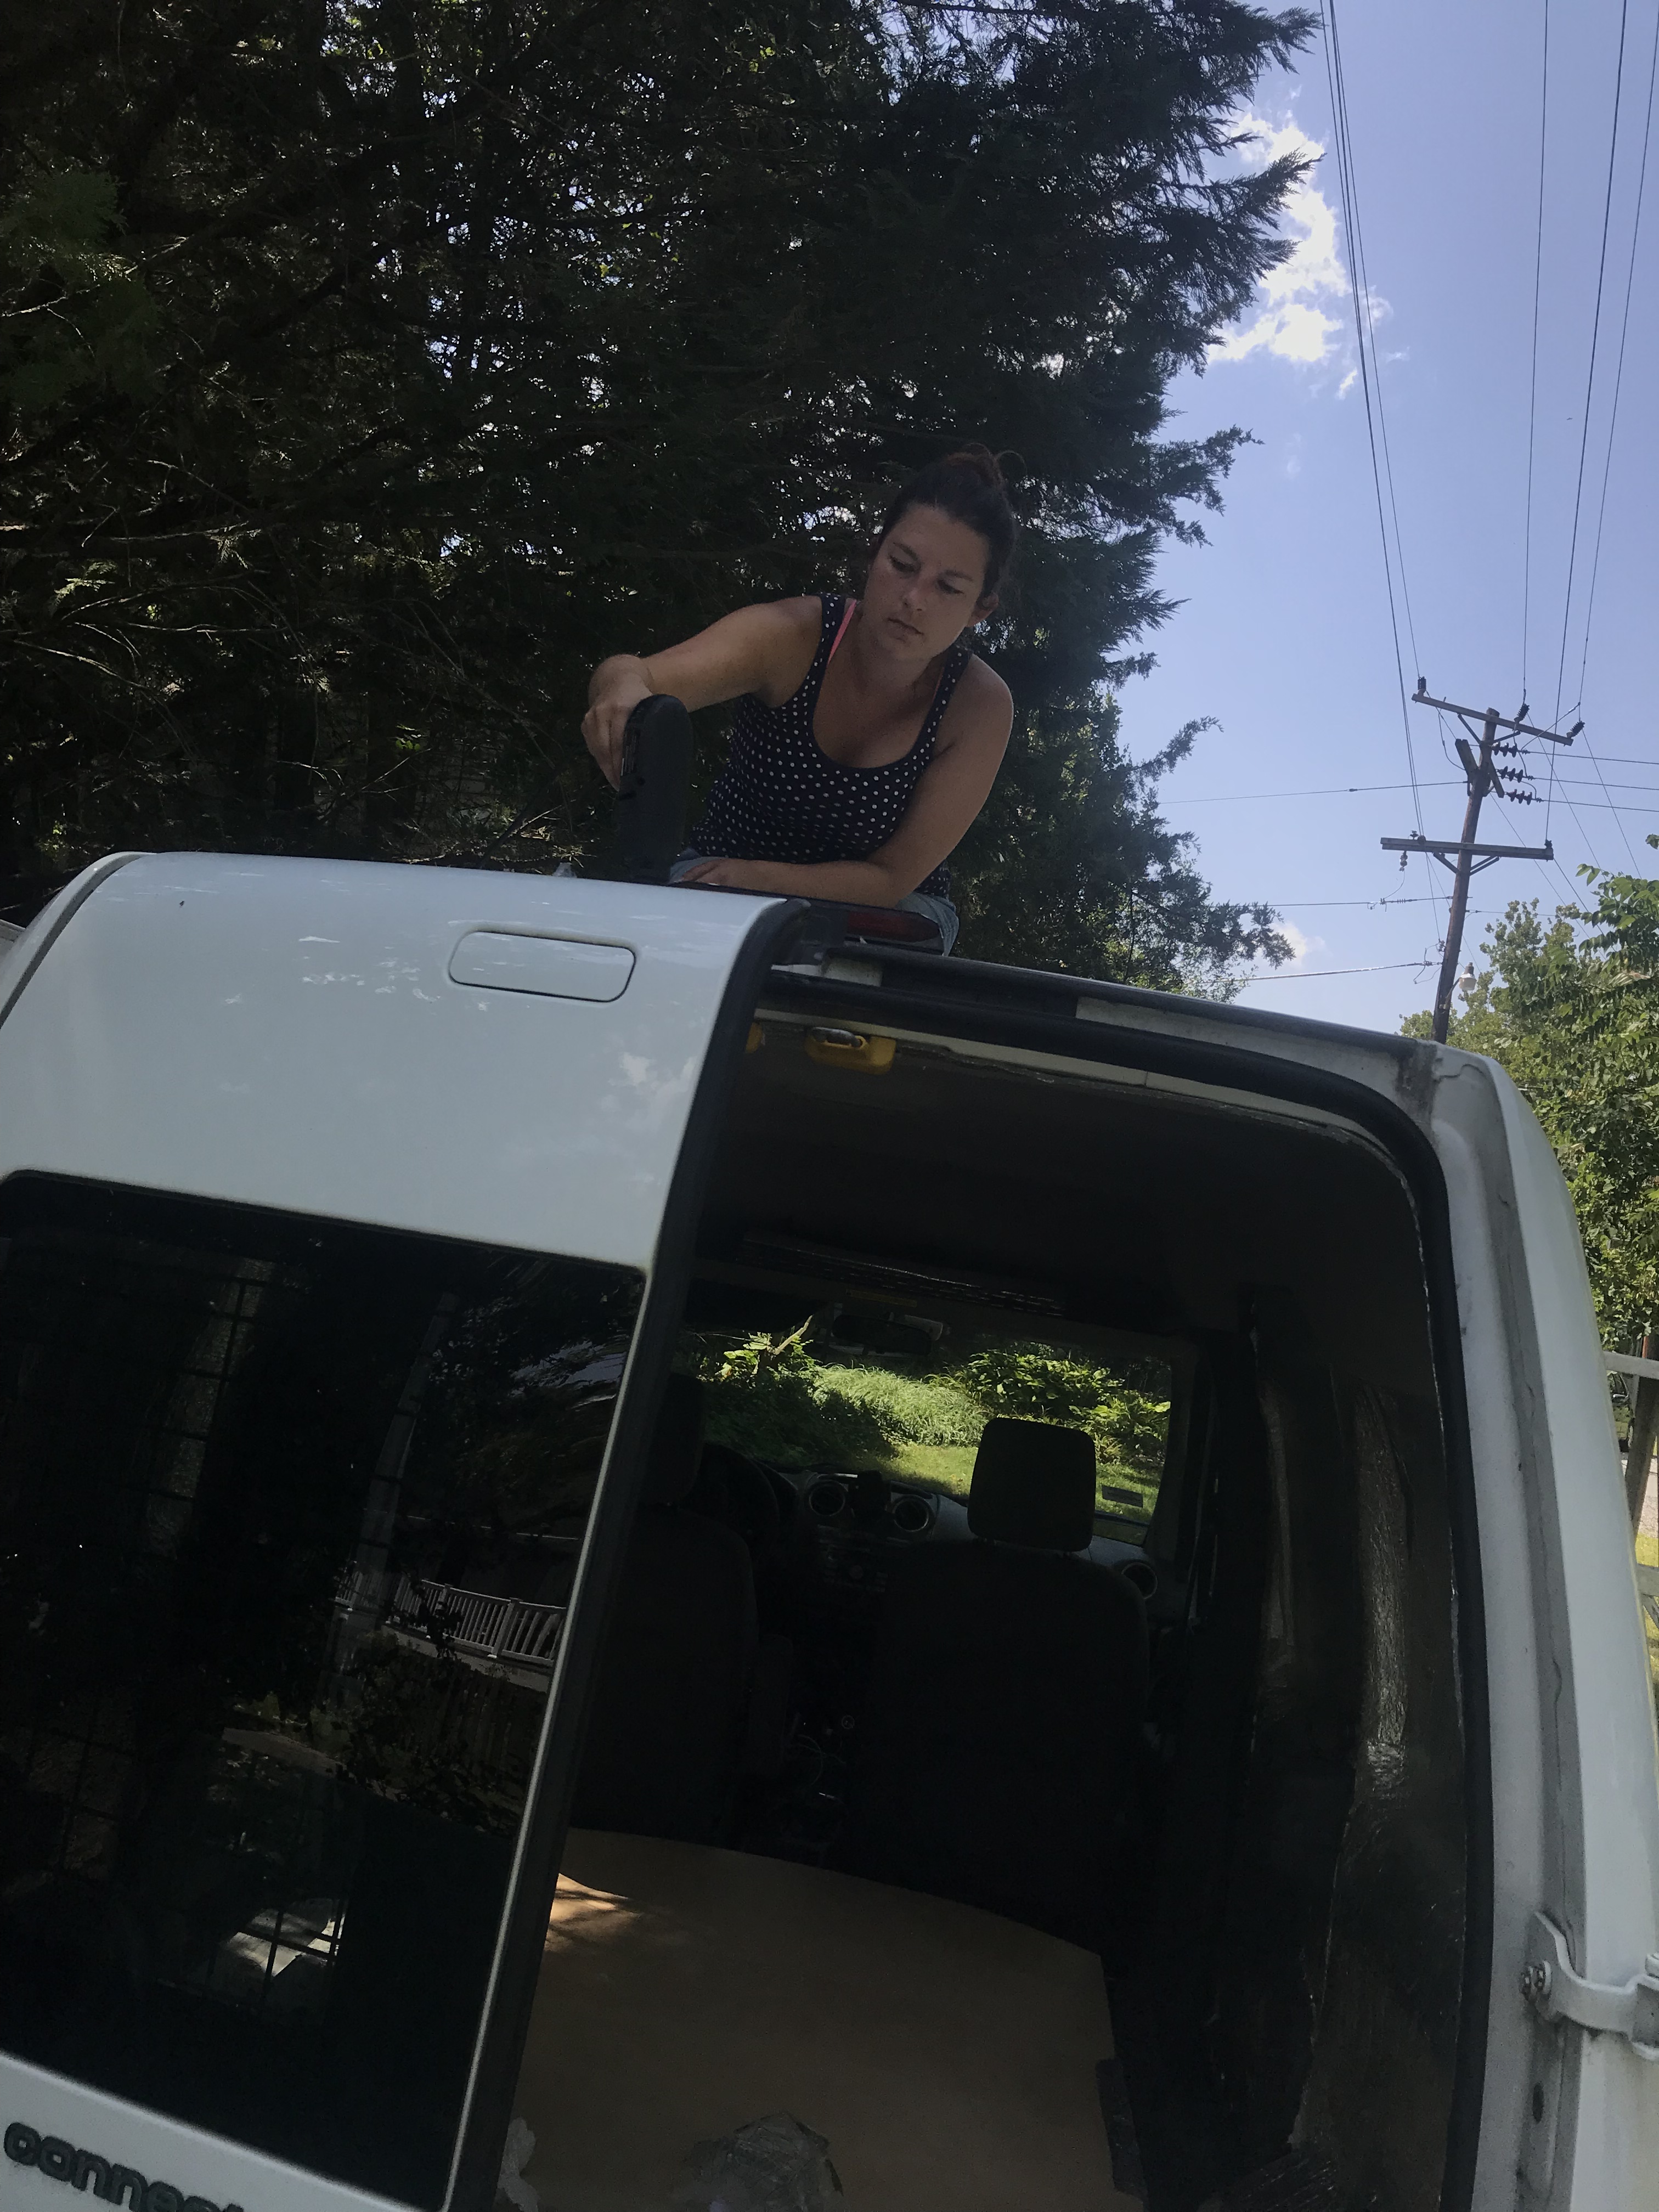
Just a little afternoon screwing
Next I applied a thick layer of sealant, like caulk, over the screws and all around the hole. We had borrowed a caulking gun from Osamu, but neither Jane nor I, nor my neighbor who had stopped by to chat, had ever actually used one before. It took us a while to figure out that you have to pierce the tube with this metal wire but then it was easy going. Another day after it had all dried I touched up and added more in a few places, but so far (knock on wood) no leaks!
Another day we measured how tall the interior frame should be, Jane sawed it off at the right height, and we screwed that into the wood frame, as well. Fan in!
Jane cutting down the interior lip
Wiring the Fan
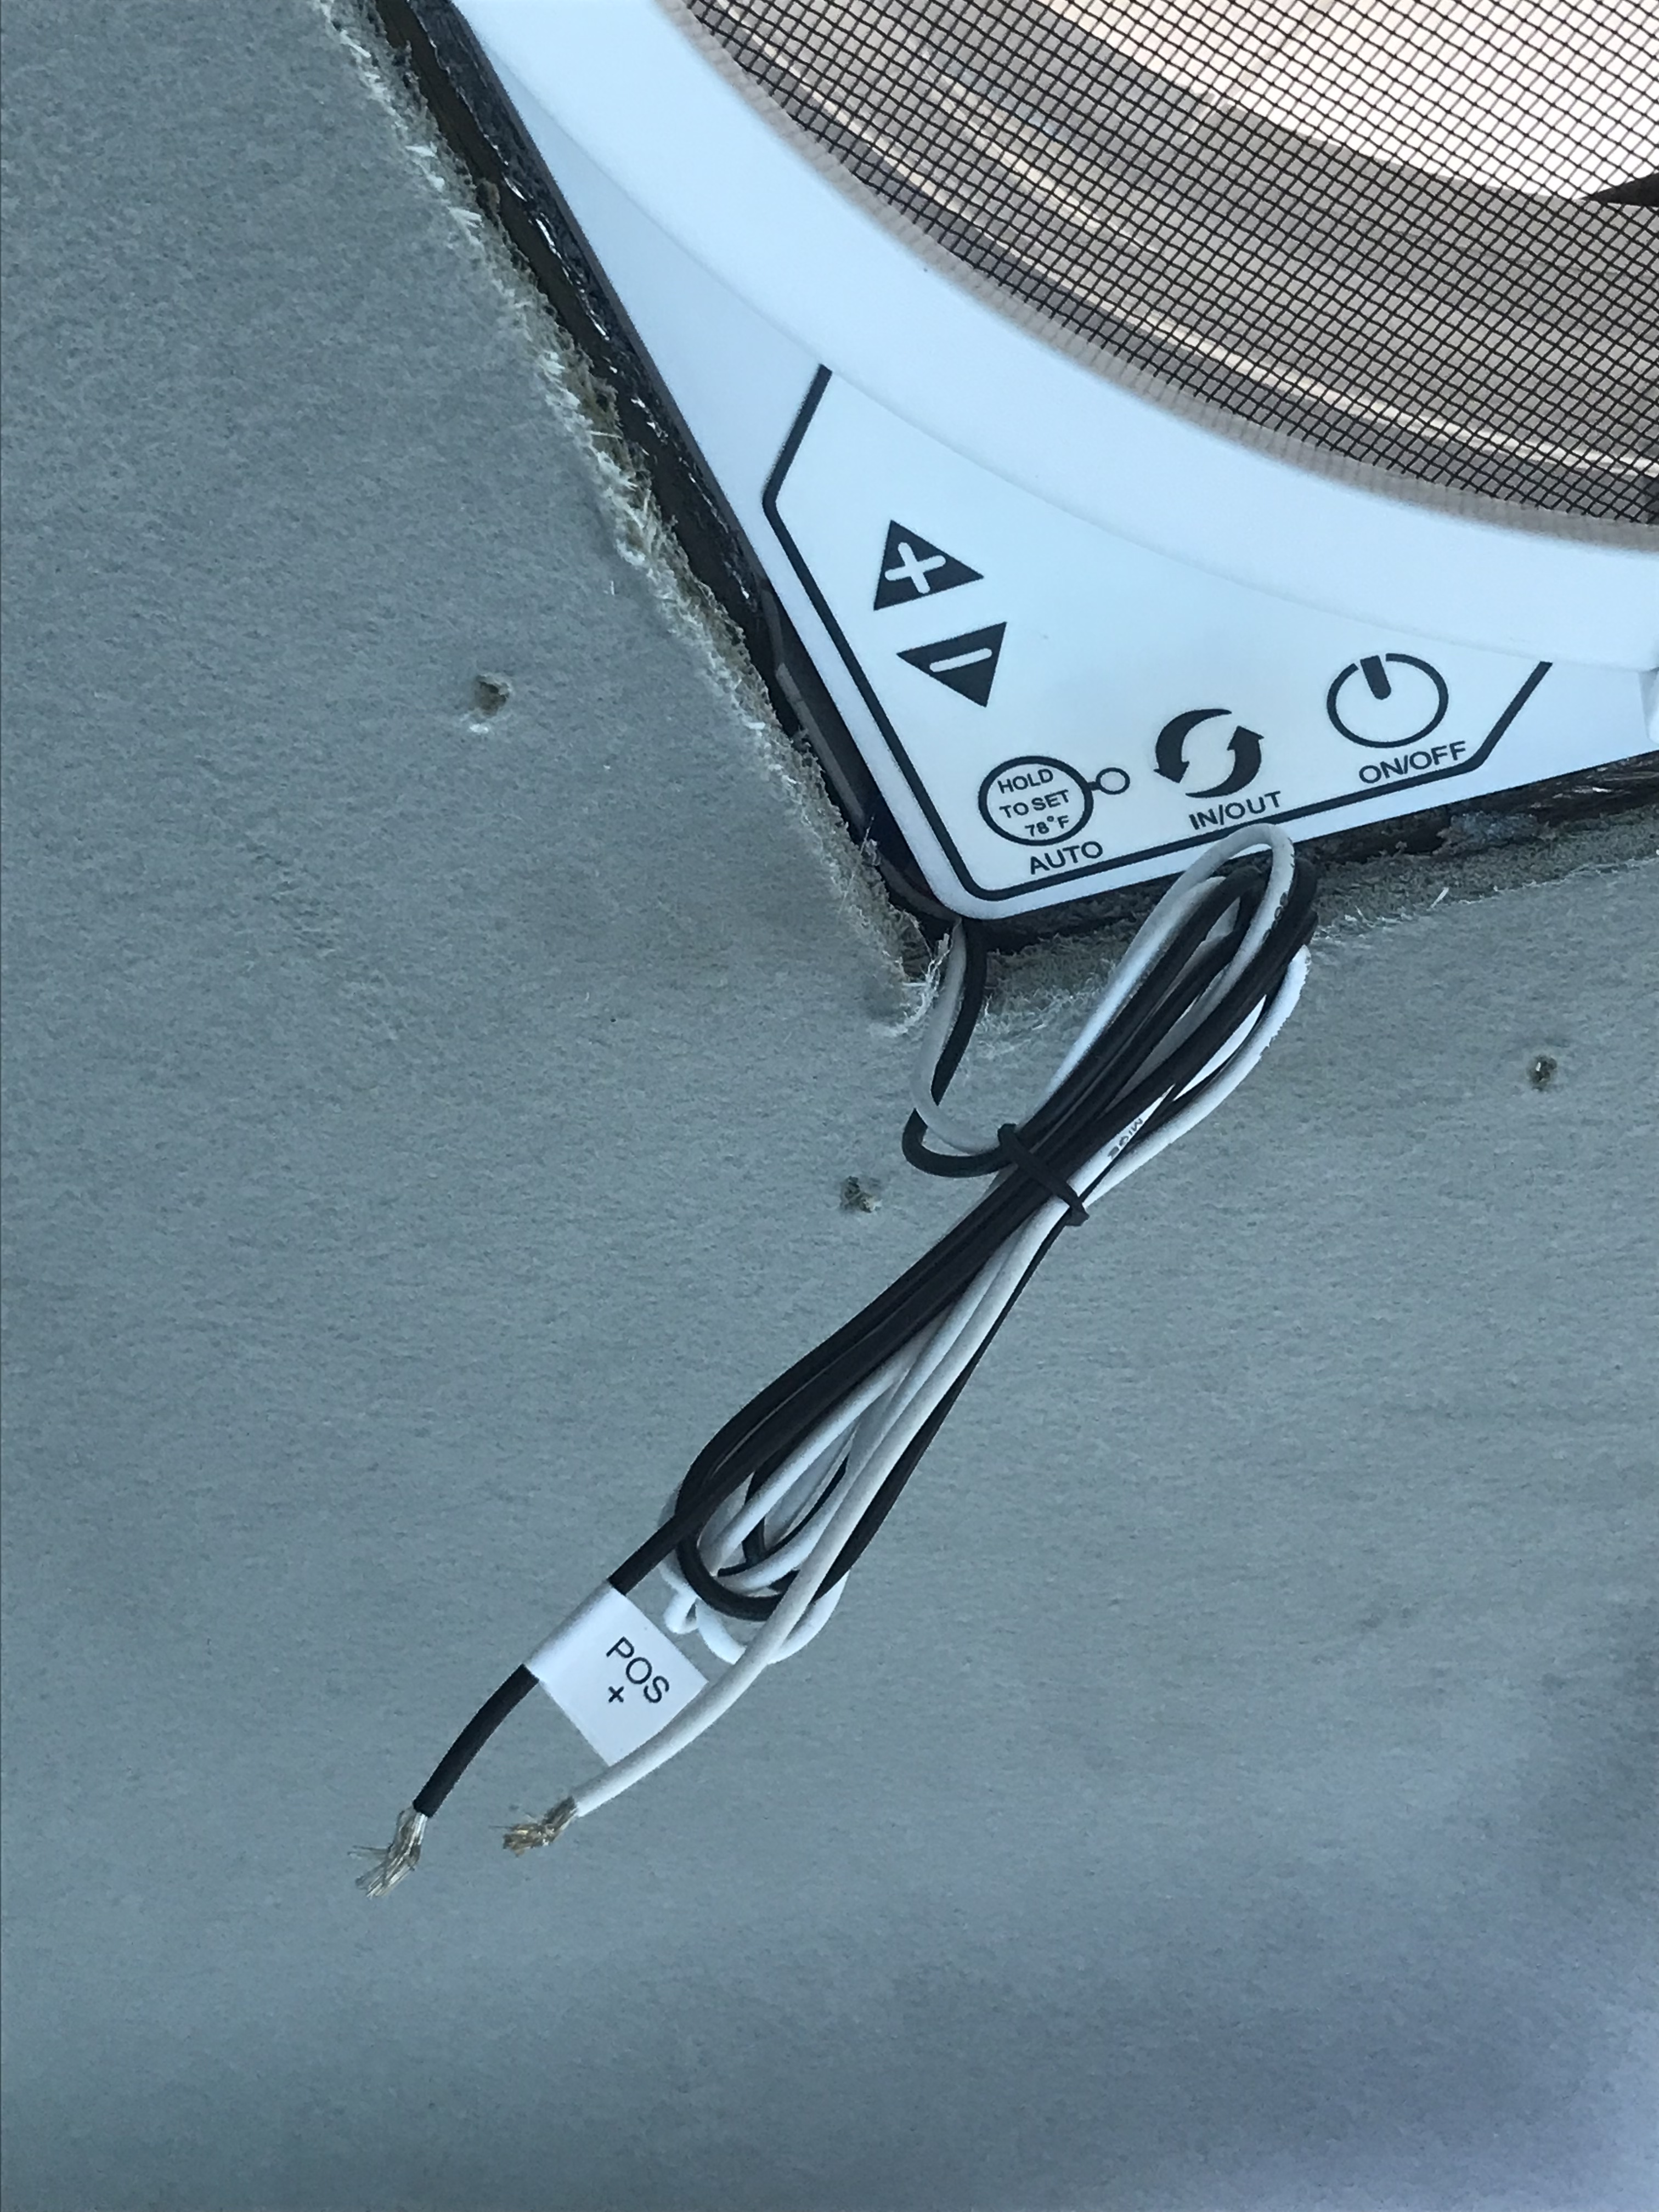
All that was really left to do was test out the fan, but I was waiting on a part ordered from Amazon to wire it up. Most people, I imagine, wire the fan to the existing car lighting wires or engine (obviously I know little and can barely imagine what this would look like), but I wanted to wire mine separately in order to plug it into my battery pack and not drain the car battery if I use the fan overnight. So I got this 12v lighter attachment to connect to the fan wires, which I could then plug in as needed. It arrived to my parents’ house where I was visiting several days later, and my dad helped me strip off the wires and connect them to the fan wiring.
The magical tag that put us right
We went to test it out and…. nothing. We hooked black to black and red to white, we re-attached the connections, still nothing. My parents’ friend and neighbor, Nick, tried it, too, and still nothing, until he noticed that the black wire was labeled positive (the plug end was just straight unlabeled and with no directions, which is what I get for choosing a cheap online item) so we swapped wires and ta-da! Power. Why the two would use black for opposite wires I don’t know but glad he spotted it. It worked fine and all was well for now!
Time will tell how it really went. My choice to cut corners and place the fan really too close to the rear light may come back to bite me if I have any really cold weather and don’t get a good closure seal and heat escapes. Updates to come 🤗
After completing the floor insulation and soundproofing application, it was time to actually get a floor in this thing.
While I love the look of the gorgeous wood, bamboo, or cork floors in the magically clean, sleek vans of Instagram, my small space, limited budget, and knowing it was a fun trip rather than a full-time home for the foreseeable future led me to explore easy end of the options.
Originally I was leaning toward a roll of laminate, I saw a girl’s facebook group post of her van which seemed down to earth, simple yet functional, and used a bunch of stuff I actually owned and decided to send her a message asking how some things were functioning for her. She mentioned that her floor was one of those semi-squishy gym mat floors which is like a bunch of puzzle pieces, easy to wipe clean, and easy to replace as needed. I decided to give it a try since it was cheap enough that if I hated it I could revert to the original plan with no harm done.
The Subfloor
Since both these options are pretty lightweight, I opted for only 1/4″ of OSB (no idea what exact type but similar to this) as a subfloor. I was (and still am) a little nervous that it’s too thin and going to crack with the furniture weight and my own walking over it, but so far so good and on top of the insulation and below the cushioned floor I hope it holds.
I pulled out the van floor mat and used this as a template for the subfloor from which I traced the outline of the floor. Pretty simple.
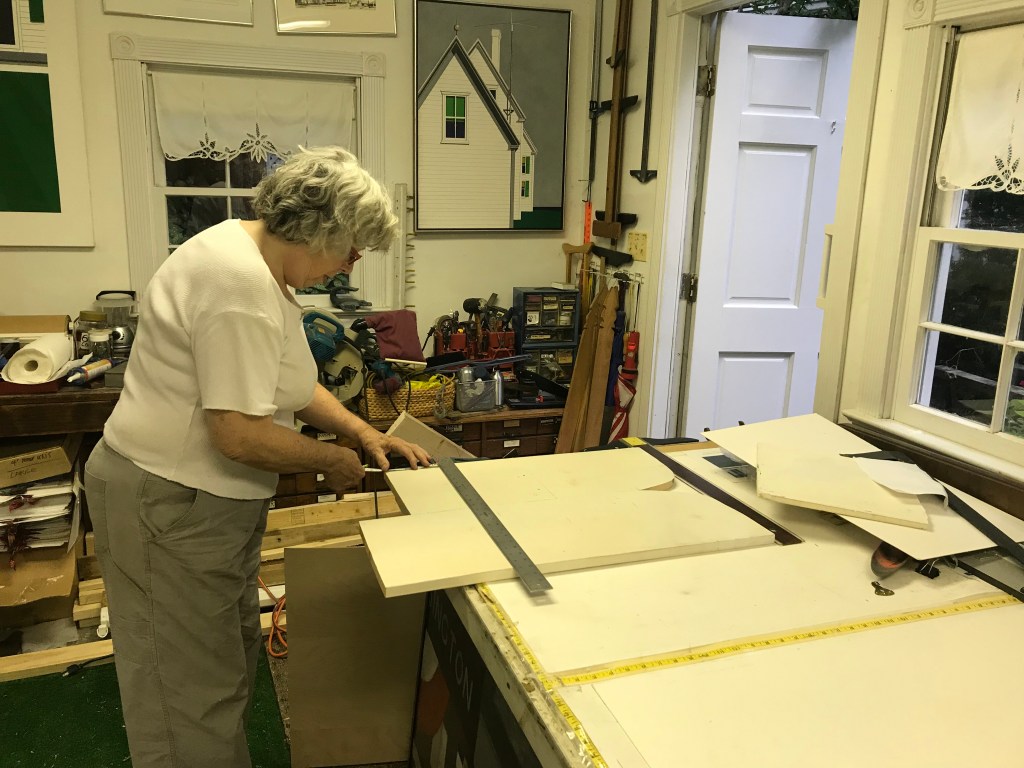
My ever resourceful helper/godmother Jane helped me cut the outline with a coping saw and cut off the excess length with a circular saw.
Tracing using the floor mat as a template for the OSB subfloor
Then I sprayed down the wood with a mildew/mold preventative so any condensation wouldn’t cause issues. Yuck. Downside of this turned out to be that the wetness made the boards bow a little but once the floor was down it wasn’t a problem.
Cut subfloor in the van
I unscrewed the metal bar that runs across the back of the van floor by the back doors, and was able to screw it back down over the insulation and subfloor to hold it in place and prevent slipping forward while driving. This was… a process which showed my less than stellar ability to work well with others to my godmother and neighbor who was trying to be helpful. Too many people blocking the view, too many hands and bodies in one small space, and grumpy Mary scared everyone away. My very kind Jane returned though with longer screws and helped as I stood on the whole thing to get it down and screwed back in. One time those extra wine and cheese pounds come in handy!
The Floor
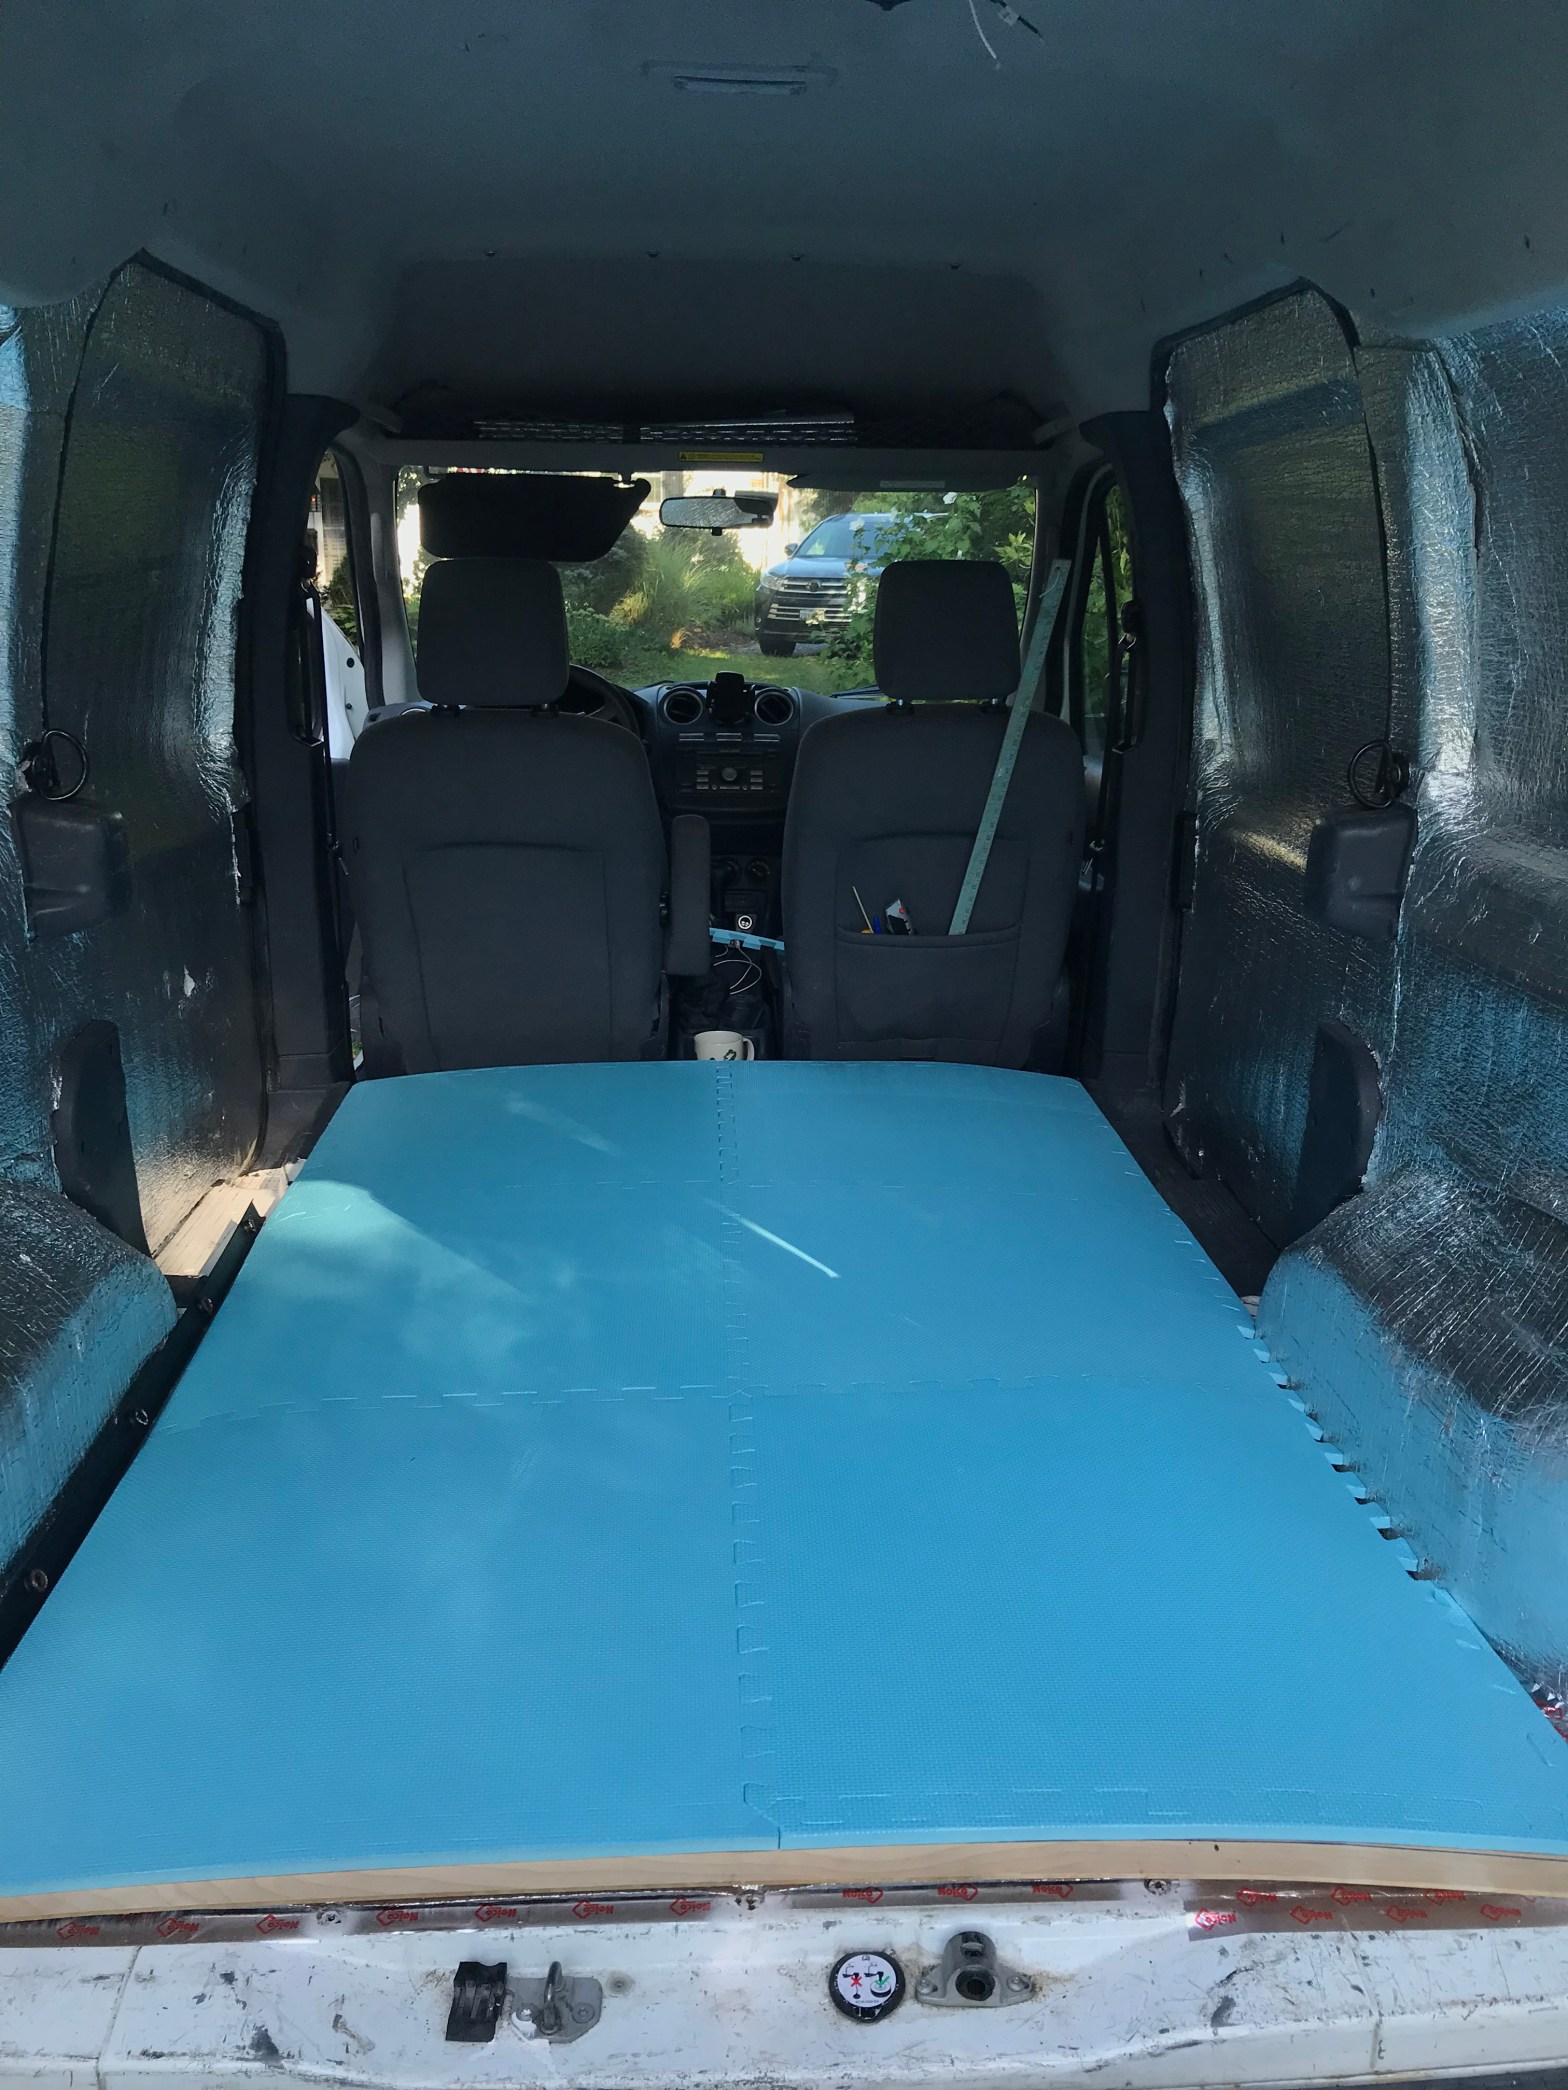
I ordered the flooring from Amazon which I expected to have to cut to fit, but actually worked perfectly for the most part. Since the edges will just be hidden I didn’t bother filling in the edges around the curves, and ta-da! 5 min later I have a floor. I chose this sky blue color to make it a little brighter and cheerier, but also know this will show more wear and dirt than a more neutral dark color. Oh well. It’s already a little dented here and there but it does feel very cushy and has made the world of difference kneeling while working inside the van compared to the subfloor and awful feeling ridges.
Blue floor mat before attaching rear metal bar and evening out everything